

Introduction: How to Make a Christmas Star


More by the author:


About: I like to make things more simple with easily available resources. My favorite quote: A human being should be able to change a diaper, plan an invasion, butcher a hog, conn a ship, design a building, write a…
Make your own Christmas stars with paper and use it as decoration during festivals or any other occasion. You need 5 pieces of paper of any size or any color which you can fold and glue together to form the star
Please go through the step-by-step instructions below on how to make the Christmas Star you see in the pictures
Step 1: Trim Paper to Square


- Take 5 pieces of paper. here I have used Sea Blue colored A4 size papers
- Fold diagonally so that it forms a triangle
- trim extra rectangle piece and you will have a square
Step 2: Intial Folding


- The square paper is already folded diagonally while trimming
- Open up the paper and bring other two sides to center fold to form an arrow head
- Then fold the bottom portion the same way. This time the size of the fold will be smaller than the first one and this will make a diamond shape
- Once again fold it in half to triangle and make a crease at the center
Step 3: Final Fold


- Open up the creased triangle to again to the diamond shape
- In the second fold we made at the bottom to make the diamond, fold the crease line as shown in the first picture to form a small triangle at center
- Fold along these crease lines and it will form a winged pattern as shown in the third picture
- This will make one segment of the star. make five of these with remaining papers
Step 4: How to Make Star Shape


- Open up the fold inside the wings on one side on all papers
- Glue will be applied to the open side of the fold and inserted into an adjacent piece to make one segment of completed star.
- Please refer the pictures above for guidance
Step 5: Apply Glue and Stick Segments


- Apply glue on opened surface of segments and attach with another piece
- Continue adding and gluing pieces together to form the complete star
- Do not apply glue to the last segment and keep it open. We will add lighting through this opening and then close it
Step 6: Insert Lighting


The star is completed. Now I will place the LED serial lighting you see in the first picture inside the star and then close it
- Insert the LED Light inside star so that the LEDs are placed in all segments
- Leave the plug and additional cables out side the star
- Once you place the LED inside, apply glue on the open end and close
Step 7: Close the Center Opening


- On joining all segments together, there is a hole visible at the joints in the center
- Apply glue on a suitable jewelry making piece and attach at the center. This will cover the joint at center and will also give a beautiful look to the star
- For hanging the star, attach a thread line and glue it along the backside edge of star
- After drying, you can suspend the star with a thread
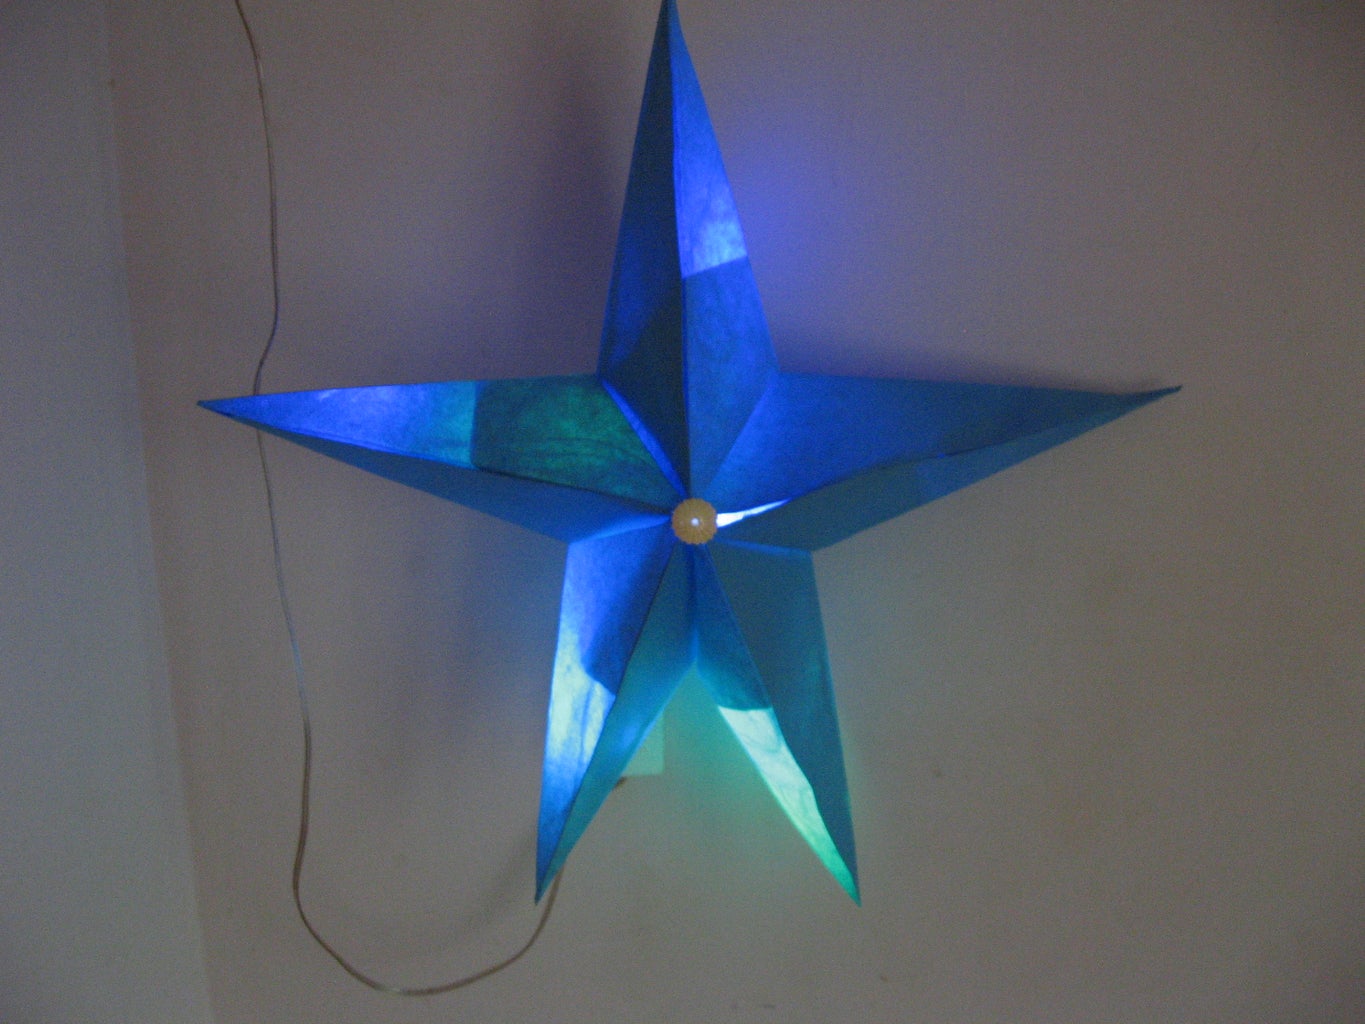
Step 8: Display Your Star
- Now suspend the star from the ceiling or any other place you like using the glued thread
- The bottom two segments will sag and seem to be closer than other segments due to weight of LED lighting inside
Plug in the LED lighting and you will have beautiful shining star

Participated in the
Makerspace Contest 2017


