

Introduction: How to Make a Message Board Website Using PHP and MYSQL

This instructable will show you how to create a message board website using php, mysql, html, and css. If you are new to web development, do not worry, there will be detailed explanations and analogies so you may better understand the concepts.
Materials Needed:
- Text editor (i.e Sublime Text, Atom, etc). I will be using sublime text.
- WAMP stands for Windows Apache MySQL and PHP
- MAMP stands for Mac Apache MySQL and PHP
MAMP for Mac users: https://www.mamp.info/en/ (includes MySQL and PHP)
WAMP for Windows users: http://www.wampserver.com/en/ (includes MySQL and PHP)
Sublime Text: https://www.sublimetext.com/
Step 1: Project Overview
The way to keep track of messages is to store them in a database. In this tutorial, we will be using MySQL. (I am using WAMP since I have a windows based operating system)
- Configure PHP and MySQL by making sure they are downloaded and you can navigate to their file location on your computer.
- Open command prompt and navigate to your mysql directory and type "mysqladmin -u root -p password." This command will ask for your password and for you to enter it again.
- Now start your WAMP or MAMP server. There will appear a green icon once the server finished loading. Click the icon -> MySQL -> MySQL console to make sure you can login in with your newly created password.
- Now the task is to create the database where the information about the messages will be stored. Let's think about what is usually needed from a message. Common items included: Name, the time the message was posted,time the message was posted, and the message itself.
- Create database named "message".
- Create table named "comments" and add the rows: id (Integer type that auto increments), name (Varchar type), comment(Varchar type), time (Varchar type), date(Varchar type),
- Connect to the "message" database in a php file name "db.php".
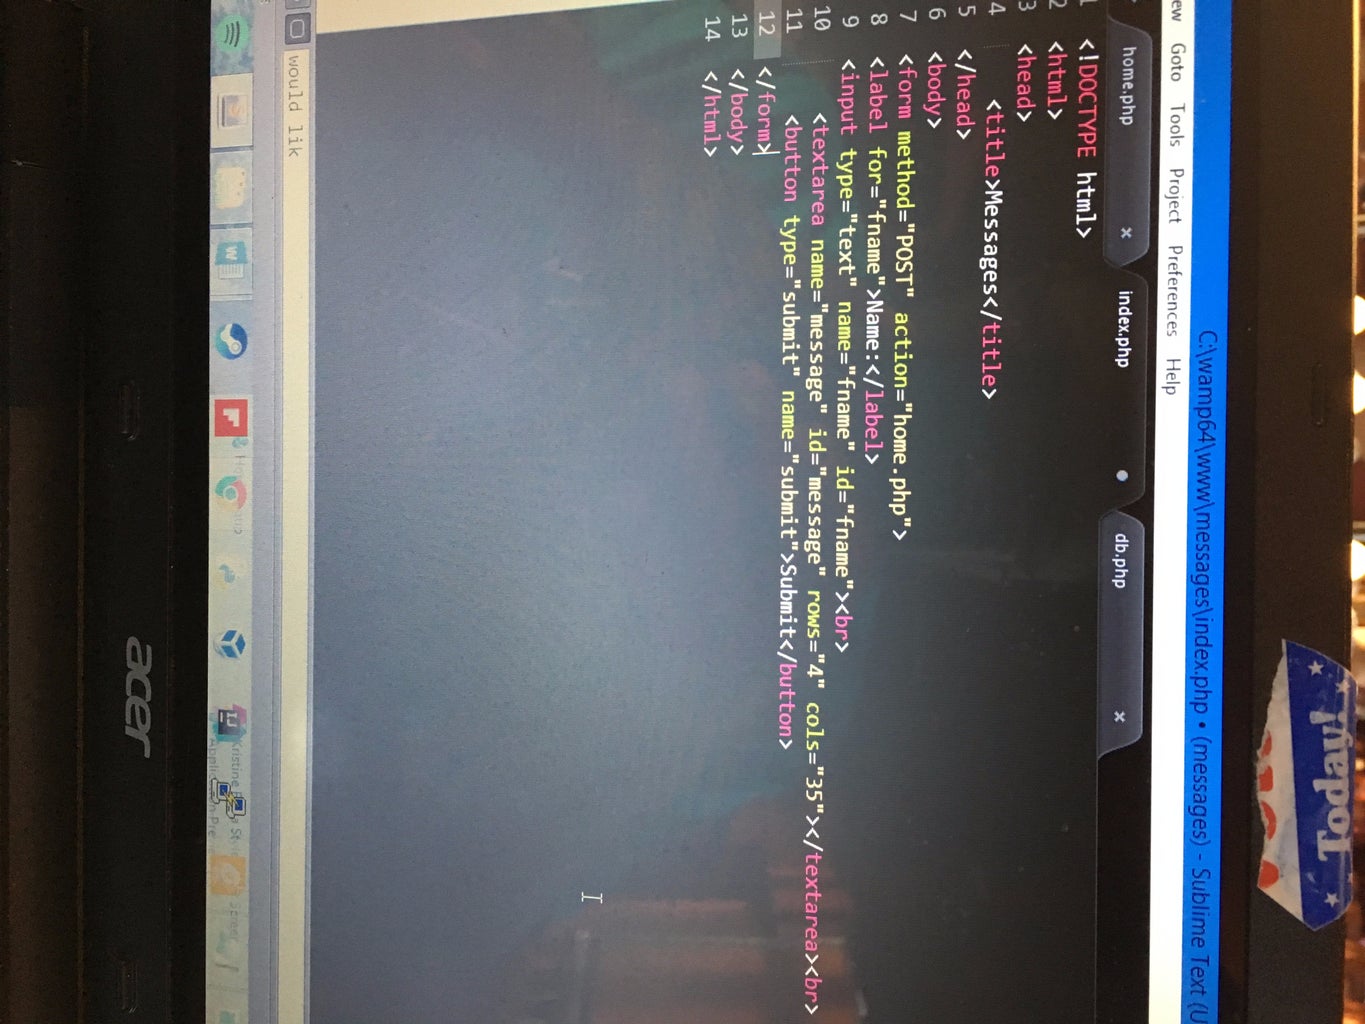
- Create the input field for the author's name and text area for the message.
- Validate the data before inserting it into the database. If everything is fine, insert the message, name of author, date and time the post was posted.
- Display the messages by retrieving all databases records into a html div and style the page using CSS.
- Horray, you have successfully learned to create a messaging system.
Step 2: Step 2 - Set Up Database


Picture 1 - Once the database is created, you may enter the command 'show databases' to make sure the database was created successfully.
SHOW DATABASES;
Picture 2 - In order to store information in the database a table needs to be created. Creating the table with the essential rows is key to making sure the website has all necessary information.The table comments will have all the necessary information
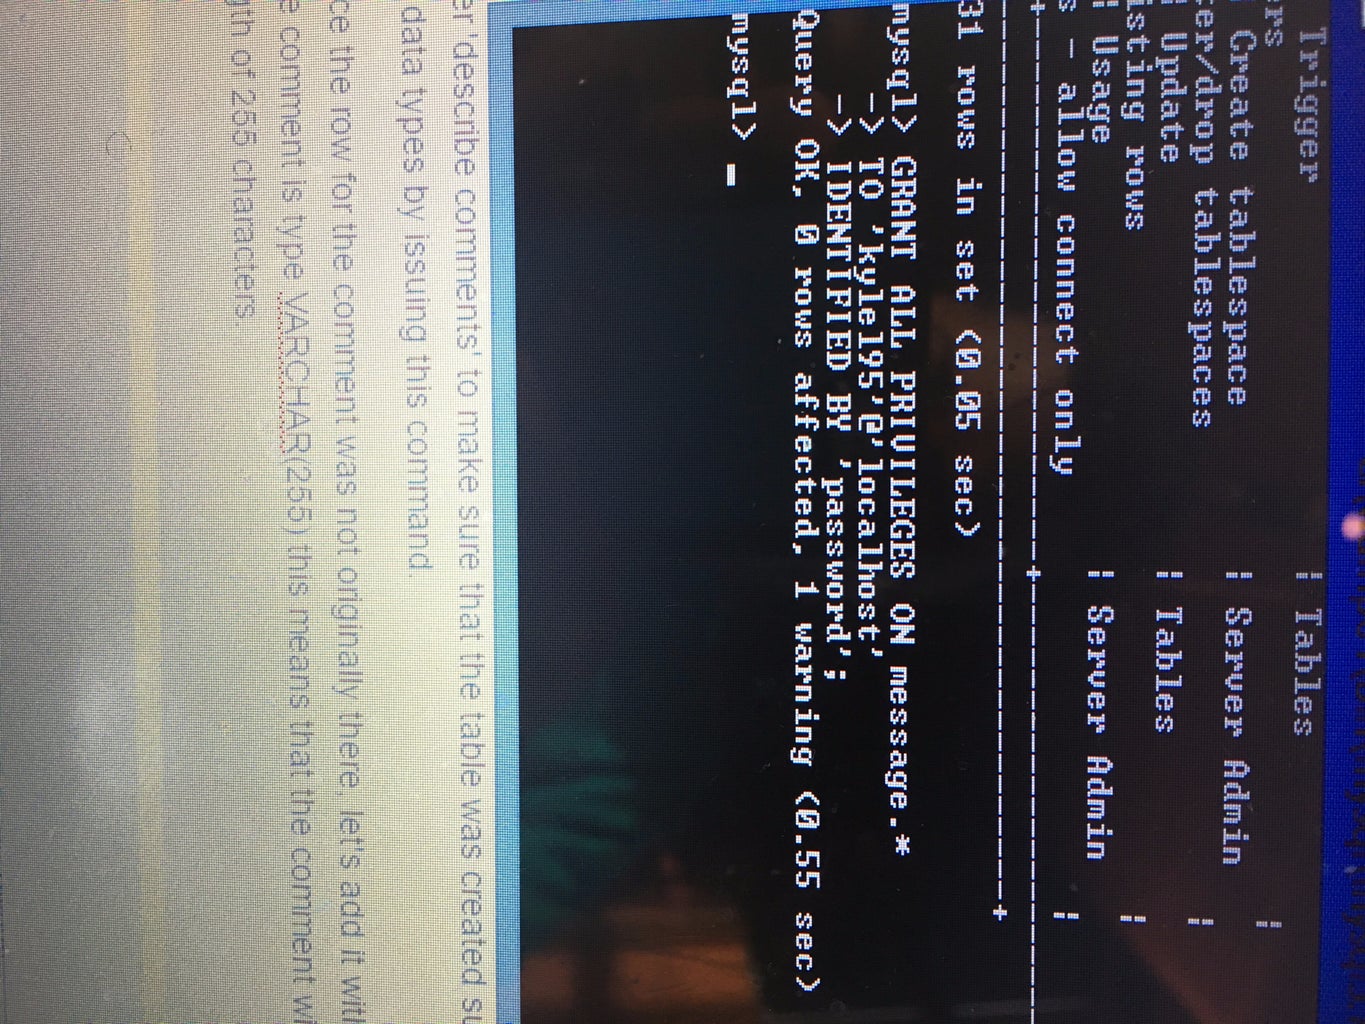
In order to be able to connect to the message database, issue the "GRANT ALL PRIVILEGES ON message.*" command. You may use your own username and password, just please do not forget it.
CREATE DATABASE message;
GRANT ALL PRIVILEGES ON message.*
TO 'username'@'localhost'
IDENTIFIED BY 'password';
Picture 3 - Enter 'describe comments' to make sure that the table was created successfully. You can see the rows and their data types by issuing this command.
DESCRIBE COMMENTS;
Picture 4 - Since the row for the comment was not originally there, let's add it with the ALTER TABLE command. The comment is type VARCHAR(255) this means that the comment will be text that cannot exceed a length of 255 characters.
ALTER TABLE message ADD COLUMN comments VARCHAR(255) NOT NULL;
The 255 represents the max length for comment. Not null means that when a message is inserted into the database, the comment field in the database can not be empty (null; non-existent).
Step 3: Create Php Files
The following steps will take place in your text editor of choice. I will be using sublime text.
1. We will need to create two files. One will be called db.php which will connect or website to the MYSQL (my standard query language) database and index.php, the page where the messages will take place.
2. First, let's create db.php. When the database was set up the connection credentials to connect to the database. This file will connect index.php to the database so that we may populate it with the information needed to create the chatroom.
Code for db.php
define("DB_SERVER", "localhost");
define("DB_USER", "kylel95");
define("DB_PASSWORD", "password");
define("DB_NAME", "message");
$connect = mysqli_connect(DB_SERVER, DB_USER, DB_PASSWORD, DB_NAME);
if(mysqli_connect_errno())
{
die("Database connection failed: " .
mysqli_connect_error() .
" (" . mysqli_connect_errno(). ")"
);
}?>
3. Next, let's create index.php. This file is where we create the chatroom. We will use html's input field for the name, textarea for the message, and a div element to contain the messages. We will use CSS (Cascase Style Sheet) to position the page elements and decorate the page's content.
code for index.php
require_once('db.php'); if(isset($_POST['submit'])) { $time = date("g:i:s A"); $date = date("n/j/Y"); $msg = $_POST['message']; $name = $_POST['fname']; $result = ""; if(!empty($msg) && !empty($name)) { //name time date message $query = "INSERT INTO comments ("; $query .= " name, time, date, comment"; $query .= ") VALUES ("; $query .= " '{$name}', '{$time}', '{$date}', '{$msg}' "; $query .= ")"; $result = mysqli_query($connect, $query); } } ?>
textarea { border-radius: 2%; } #thread { border: 1px #d3d3d3 solid; height: 350px; width: 350px; overflow: scroll; }
4. We will use php's built in function date() to get the date and time the message was posted and empty() to make sure that users do not enter an empty message or name.
5. Once the form data is submitted, we will insert the name, message, time and date into the database.
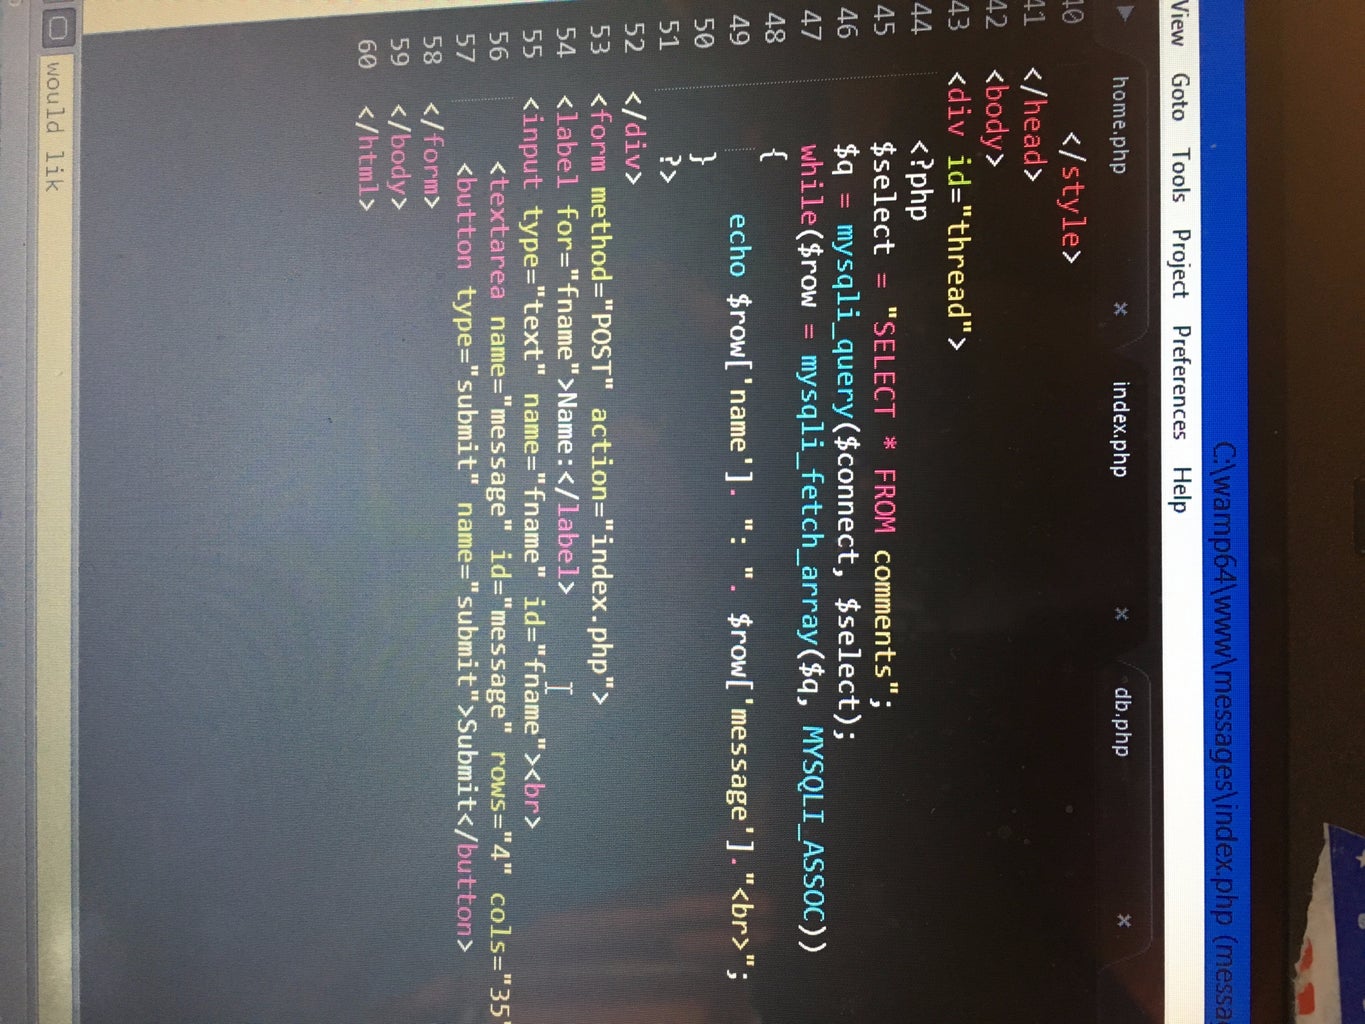
6. We will now query from the database and get all comments. The comments will be stored in a div.
?>Step 4: Populate the Db.php and Index.php Files


1. The db.php (db short for database) uses the username and password I used once the database was created when I issued the "GRANT ALL PRIVILEGES" command.
The define function at the top of the file indicates that the variables DB_SERVER, DB_USER, DB_PASSWORD, DB_NAME are constants (they don't change in value). The if statements checks if the connection to the database failed or not.
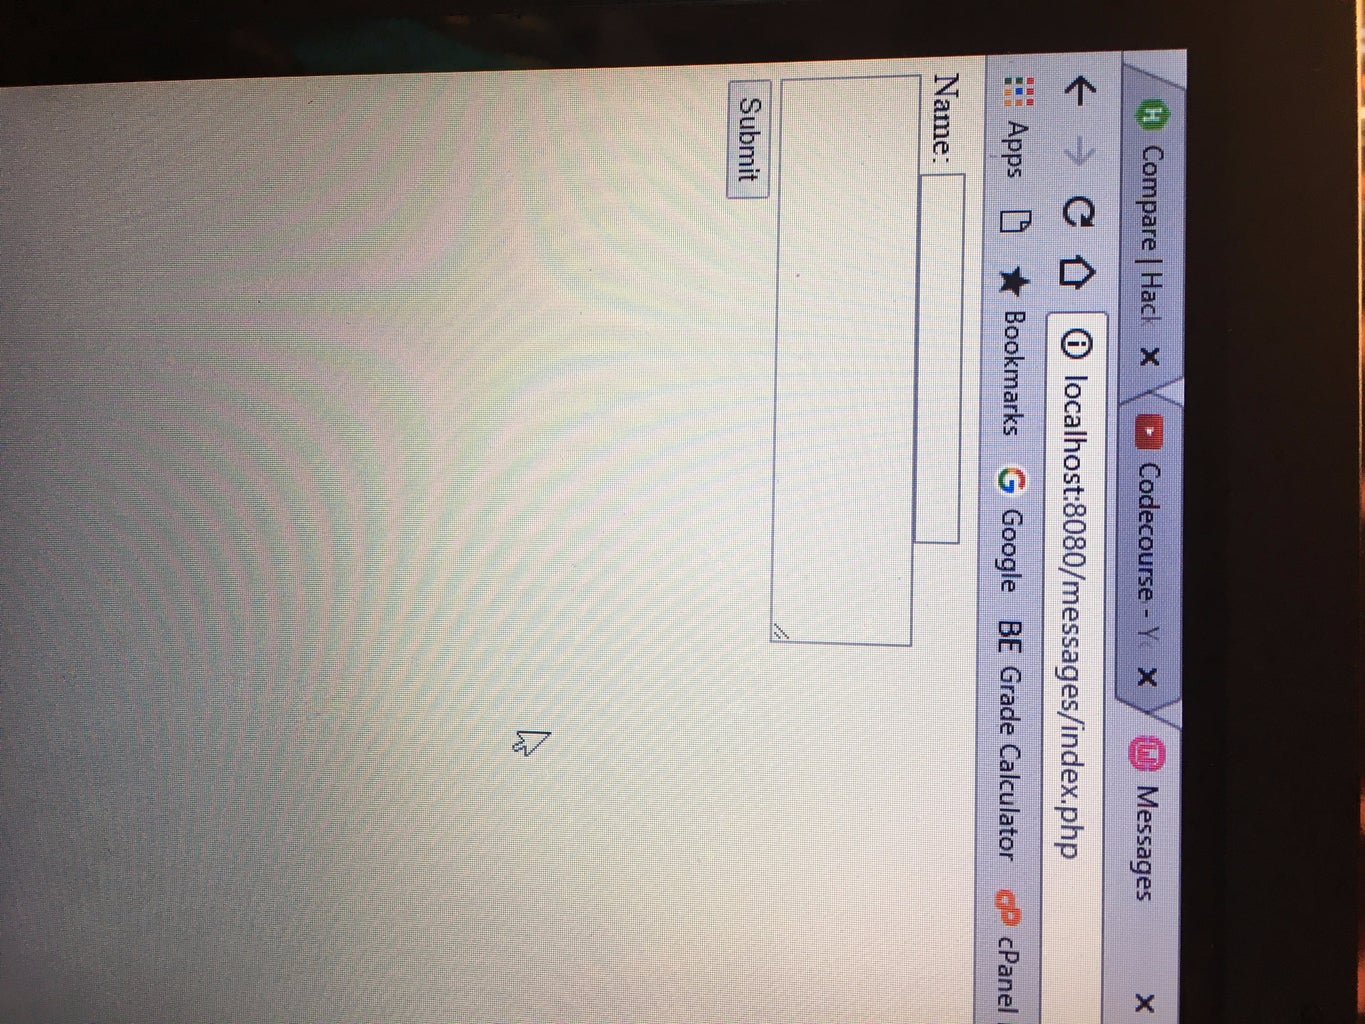
2. In the index.php file, we will use php's require function to connect the page to the database. Next, create a input field for the name. Then make the textarea for the message. Once these are created visit http://localhost:8080/messages/index.php (you may not have a port number i.e 8080) to make sure you see the input box and textarea.
3. Next, let's gather the form data and then insert into the database.
4. Now, let's add query the database and output all messages into a div.
5. To style things a bit better, let's add some CSS to make it a little prettier.
PS: I had a typo. Please change 'message' to comment near the INSERT command for the $query variable.
Step 5: Step 5: Example and Next Steps


Hopefully you see something similar to what is above after adding the css and testing it out.
Next steps: Add more css to make the site more appealing.


