

Introduction: How to Make an Atari Game


It's the console that stood the test of time longer than any other... the Atari 2600 VCS! From Warlords, Pole Position, Donkey Kong, Space Invaders, and even the infamous Pac-Man, the classics from the 70's, 80's, and on into the 90's are still as playable today as when they were released. The characters created still permeate pop-culture and are among the most unique of all video games.
Now, several decades later, the resources are available for the common person to create their own game. Modern video games require teams of programmers who remain virtually nameless, yet the people who choose to program for these early retro systems (Coleco, Atari, NES) can control ALL aspects of their game including plot, characters, graphics and all of the other things that go into a game. You can create an entire game by yourself. This instructable won't show you everything you need to know, but rather give you a set of resources you can use to make your own game.
A word of warning: I spent two years of my life trying to teach myself to program well enough in Assembly to make this work. Yes, the majority of games are programmed in Assembly, however there is the possibility of also programming in Basic (if you are interested, google search for batariBasic). I had no real programming experience, and while I could hack code and pretty well understand other people's code, I never was able to write my own code from scratch. You need to evaluate whether you're serious enough to see this through before you begin.
Step 1: Really, Really Assess If You Are Capable of Pulling This Off


So, I know I warned you in the introduction, but it needs to be said again. If you don't have any programming knowledge, Assembly is not the language to start with. If you have programming experience, Assembly is not an easy program to work in. If you learn Assembly, the Atari is particularly difficult to program for.
The most common mistake for newbie Atari programmers is announcing exactly what their game will be, when it will be released, and then not understanding why the retro-gaming community mocks them. It's really a miscommunication on both ends. The community has heard it before, they've seen games announced, some even have demos, and yet they never see the light of day and the author disappears. They've become a little jaded to new game announcements from new programmers, and rightly so. Most new programmers are ignorant of this and are so excited and motivated by their new-found hobby that they become a little over-zealous in their announcements. They are then frustrated and annoyed by the response they get.
I'm not trying to scare you off. I just feel it's important that you understand what you're up against before you begin. If you think you're up to the task (or just interested in the process) then please read on. I ran across this page, which does an excellent job of breaking down the tasks you face: http://www.kuro5hin.org/story/2001/9/15/211737/858
Step 2: Find a Retro-Gaming Community to Help You


There are a few retro-gaming communities around the ole webosphere that you'll run across. The first one that I ran into, and the one that I consider the best is AtariAge http://www.atariage.com. You'll find all kinds of goodness there including game reviews, ROMs, high score clubs, a marketplace, and more including what we're looking for: information on programming for the VCS (and other retro game system coding).
The second community to mention is Digital Press http://www.digitpress.com. You will find a lot of information on old games here, but they don't just specialize in old games. You'll also run across information about all the newest consoles. I also joined this website in the midst of my Atari wanna-be programmer phase, but don't think it's quite as useful as the first.
The last community is a little unique in a few ways. The way I understand it, they don't have an "official" website, but have been hosted in several places. The Stella Mailing List http://www.biglist.com/lists/stella/ has searchable archives and I believe it dates back to the mid-90s. I don't think they still update the information, but in the past it would contain answers to fairly detailed questions from the community itself. You can still search through the archives and find a lot of the answers you need to difficult questions.
For the purposes of this instructable, I will pretty much reference the community from AtariAge. They also cross over to the other two sites, and vice versa, but AtariAge seems to be the most personable and the most helpful of the three for beginners (imho).
Step 3: Gather the Needed Tools


There are really 5 "tools" you will need to have on hand in order to put a game together. The first four are from Andrew Davie's 2600 tutorials available at AtariAge.
First and foremost, you will need a text editor. For PC users, you likely already have this, I always just used Notepad when I was working on code. Two excellent text editors for the Mac include TextWrangler http://www.barebones.com/products/TextWrangler/ which is free, and TextMatehttp://www.macromates.com. TextEdit will work, but if you're going to do serious programming, TextWrangler and TextMate are much better.
Second, you'll need an assembler to convert the source code into a usable ROM. For Atari programming, there is only one real option, and that is a program called DASM. It has passed from caretaker to caretaker over the years and isn't always the easiest thing to track down. As of writing this instructable I tracked down what seems to be the current home of DASM here http://dasm-dillon.sourceforge.net/.
Next, is the emulator. Emulation of NES, SNES, Playstation and other systems has become a pretty big deal over the years, although the craze seems to have died down to some extent. Atari is no exception, and there are two emulators which seem to be worthy of the Atari programming community. The first is Z26 http://www.whimsey.com/z26/and Andrew suggests this is possibly the best solution for Windows users, yet he suggests using Stella http://sourceforge.net/projects/stella/ for users of other operating systems. I found z26 was able to perform all the tasks I asked of it, and can't recommend it enough.
The Stella Programmer's Guide is essential and will answer many of your questions. The 57 page .pdf file can be downloaded here: http://www.atarihq.com/danb/files/stella.pdf
Finally, my own suggestion is to start looking for hardware capable of downloading your ROM and plugging into your tv. There are a few options available including the Supercharger, Cuttle Cart, and the hardware I was able to get ahold of, the Krokodile Cartridge. While functional, the Supercharger is slightly less flexible than the other two options. None of these are currently being produced, and you may have to spend 150-300 bucks to get ahold of one of them. If you start looking now, you may be able to find a better deal before you actually need to use it.
While you technically don't have to ever play it on your tv (you can test in emulators) it's a lot more fun than playing your game on a keyboard and computer monitor. An alternative to the mentioned hardware is to get a socketed development board and then use an EPROM programmer and eraser to program an actual board for your 2600. You can either hack existing boards or just buy new ones. More information on these can be found at AtariAge.
Step 4: Go Through 6507 Tutorials

With all of the resources available for beginners it can be a little overwhelming to know where to begin. Andrew Davie, an AtariAge member has written a number of "instructables" of sorts on beginner programming for the 2600. Another member with the handle of Kisrael put these tutorials together in a nice little sticky note linking to each of the lessons. Here is the Table of Contents: http://www.atariage.com/forums/index.php?showtopic=33233
Programming for Atari is actually done for the 6507 microprocessor, however as I think you learn from the linked tutorials, this is really just a stripped down version of the 6502. So, if you've taken the time to learn Assembly, chances are you are probably ready to convert that knowledge to Atari coding. There are only a few minor differences, and the different tutorials will point these out to you. From my understanding, a couple of these unsupported commands even appear to be functional. Of course, that doesn't mean you would want to program them in, but the point is the differences are minimal.
Step 5: Hacking Games


Now that you've gone through some tutorials, my opinion is the best way to learn is to start hacking games. There are some of the original games that have been reverse-engineered so you can see what a complete game looks like. In addition, several other homebrew authors have published the code from their completed games. This is generally for learning purposes- you can play around with hacking homebrew games, but it bad form to post your hacks since the author was nice enough to share it with you in the first place.
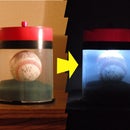
You don't even need a ton of programming experience to hack games. While the old fashioned way of disassembling and changing values certainly works, there are a few programs around that let you scroll through the bits. If you look carefully you can often find the sprites in the bits, and alter those values so you are actually changing how the games looks. Two such programs I am aware of are HackoMatic (version 2 & 3) and Bithacker. Unfortunetely, both original hosting sites seem to be down, but you can still find downloads available lurking in different atari forums. In general these tools don't allow color changes unless you knew the bits you're looking for or really have a lot of free time to try and find random bits. For example, bithacker will show you the PacMan sprites (remember there are more than one) and you could alter them into an animated robot. Besides sprite shape, playfield and background colors are often easy changes to make without a ton of programming knowledge. More on that in the next step, but the more you play, the more you learn!
Here is a quick look at bithacker in action. If you look at the first image, you can see the Activision logo upside down and split up into groups of eight pixels. Simply by re-arranging the bits that are on/off if these section I can make the game read "RoboTHacK" as you will see in the second image. Unfortunetely in the emulator I use, screen shots don't work so I can only show you a mockup of what the hack would look like.
Step 6: Design Your Game


Now we're getting to the fun part- game design. Granted, the elements you are going to be given are very limited, but that's where creativity comes into the picture. There are six built-in elements that will be used to create everything on your screen:
1.) Playfield
2.) Sprite 0
3.) Sprite 1
4.) Missile 0
5.) Missile 1
6.) Ball
Advanced programming will allow you to exploit the characteristics of each of these elements. For example, the flashing ghosts on PacMan allow the same sprites to be repeated and show up in multiple places on the screen, creating more characters. This will be explained in far better detail in the tutorials, but here are the basics.
Playfield- stored in 3 registers, with 4,8, and 8 pixels available in each. This will draw half the screen from left to right, then the screen can be repeated or mirrored. You can also re-write to the registers after drawing the first half to create a screen that is different all the way across. Basically you have 40 pixels across the screen. These could be changed on each scanline, but are normally coded in blocks of about 8 scanlines to save memory. The playfield in my exampled is mirrored, meaning the right half of the screens reflects, not repeats, the left half.
Sprites- For ease of explanation sprites are limited to 8 pixels wide. There are techniques of combining two sprites to act like one and even repeat them horizontally to get up to 48 (I believe) pixels across. For a beginner, just getting a simple sprite on the screen will be quite a task. The hard limit to sprite height is the entire screen, up to 192 pixels in NTSC systems. However, you have to keep in mind a character that takes up the entire screen is hard to design a game around. This is where design and creativity in keeping sprites smaller while still conveying the idea comes across. For reference the Robot design is 8x22 pixels shown here, while PacMan is 8x8. Sometimes you have to decide between size and more detail.
Missiles- There are also two built in missiles. These are normally used as straight lines or dots. This is what is shot in the game combat. These (I believe offhand) are what would be used as lasers in games like Space Invaders or Vanguard. They can also serve as design elements (the rails in Pole Position). You are only limited by your imagination, and of course the severe limitations of the 2600. The missile colors are often matched to the sprite of the same number.
Ball- Really, the ball is just like the missiles are far as I can tell. The only real difference I can tell is that the ball matches the color of the playfield. Designers of the game Adventure exploited this to actually make the ball the main character, which is why it shows up as a block instead of with more detail.
Step 7: Write Your Code

Now to the fun, and the work. There is no simple way to do this, but if you want to create your own game, you have to code the kernel. Creating the logic is by far the most fun and most frustrating part of creating your game. Think of it like learning to play golf. If you have ever tried to learn, you've probably felt the same frustration at times that you will trying to code your game.
There is another option besides assembly editing that I only mentioned in passing up to this point. It is batariBasic, which takes pre-existing kernels and allows you to modify them with code written in Basic instead of assembly. It then takes this new code, and transforms it into a playable binary file. But, since this is the stage where I am the least amount of help, wander over to cNet and watch this five minute video I ran across that's about halfway down the page and talks about how some of the games have been made.
http://reviews.cnet.com/Games_and_gear/9602-12576_7-0.html?messageID=2506030
Below is a small sample of some code I have in my collection. Offhand, I think it was something I was working on given the filename, but can't say with certainty I wrote or if I even modified this code in any way from something I found online. As you can see, Notepad is my text editor of choice for code.
Step 8: Publishing With a Green Twist


If you've actually made it this far, it's all downhill from here. You can get new boards available from http://www.pixelspast.com/. Once you have your board complete, you then need a casing to put the game in. We all know the old adage for being green- reduce, re-use, recycle. So, if you're just making a couple of copies for yourself, then I suggest "reusing" by simply taking a cartridge you have multiple copies of, removing the labels, taking it apart, and placing the new board in the old casing. Since there are no other real raw materials the only other way to introduce a green element would be with the computer itself. Despite my distate for all things Apple/Mac (comments welcome, but no flame wars please) part of their new campaign is the green-ness of their new line of notebooks, so I suppose you could go that route as well.
Anyway, back on topic- you can do this yourself, but there are several people online who offer to do these services as well, for all types of old game consoles. It's my belief that most if not all of these people are pretty dedicated to the retro-gaming experience and do a top-notch service for you. AtariAge in particular not only puts the game in a new case for you, they also create labels for the games (unless you want to make your own label), as well as instruction manuals and even a box in one case. They are also where I got the idea of re-using old cartridges instead of throwing away old duplicates or selling them on ebay for less than the postage of mailing them out. For more information on their publishing services, take a look at their homebrewing services page. http://www.atariage.com/store/index.php?main_page=homebrews.
Step 9: Wrapping Up the Details

Once you create and publish a game, you will have reached a certain cult status among the retro-gaming community. There are a few places around the interwebs where you can sell your games and such. If you've taken the time to learn Assembly and code one game, you've done the hard part, so have fun with it! It's time to get started on your second project, since you've no doubt had a ton of ideas since you started coding.
Also, one other thing I would like to encourage you to do is to share your code with the community. While this does mean that people can use it to make a ROM for themselves of your game, the community still does a pretty good job of supporting homebrew authors through game sales too. Some people won't buy the game without playing the ROM anyway. Of course this is your personal decision, some people feel that creating a game for the community is enough reward for them. This has been instructable numero six, please vote for me if you enjoyed it!
Participated in the
Epilog Challenge


