

Introduction: How to Use Arduino I2C Serial LCD 16x2 (Yellow Backlight)


Description
Now, with only 3 pins from microcontroller, you can display message on this LCD. Compared to parallel LCD which required at least 6 pins of I/O, this LCD offer more cost effective solution. The LCD display is two lines by 16 characters and provides basic text wrapping so that your text looks right on the display.
Feature:
1. 5V powered 2 x 16 character
2. SPI communication
3. Minimum 3 Pins interface to microcontroller
4.Compatible with all types of microcontrollers
5.Suitable for hobbyists and experts
6.Back light and contrast control is available
Step 1: MATERIAL PREPARATION

In this tutorial,the things you are needed as below:
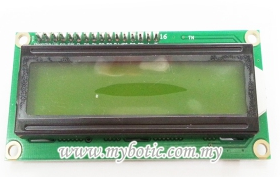
1. I2C Serial LCD 16x2 (Yellow backlight)
2. Arduino Uno Board and USB
3.4 Male-to-Female Jumper Wire
Step 2: PIN DETAILS

You could see the pinout labeled at the back of the module. It has 4 pins that is VCC, GND,SDA and SCL.
Step 3: PIN CONNECTION
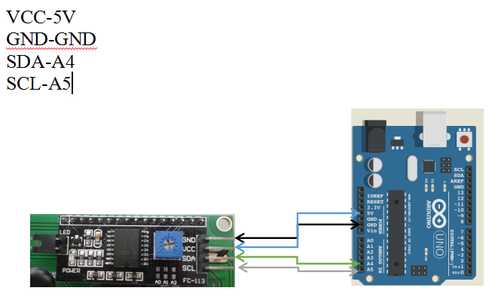
Connect I2C Serial LCD Module to Arduino UNO as following :
- VCC to 5V
- GND to GND
- SDA to A4
- SCL to A5
Then, Connect your Arduino UNO Board to your computer via USB Cable.
Step 4: Library

For this tutorial,it is necessary to download and install the "LiquidCrystal_I2C" library.LiquidCrystal_I2C is a library of Arduino which enables serial LCD 16x2 connect with Arduino.To be able to interface the serial LCD with arduino, you will have to download this library and save it into your Arduino's libraries. Download the LiquidCrystal_I2C file below >Go to document >Save the file into your Arduino Uno Library folder. Refer the image above for your references.
Attachments

Step 5: SAMPLE SOURCE CODE


To get the result, please download the sample source code which is attached below and upload it into your Arduino. In this tutorial, the Arduino UNO is being used.
Attachments
Step 6: RESULT

The LCD will display the text.


