

Introduction: How to Use the L293D Motor Driver (With Arduino).


What is a Motor Driver?
A motor driver is a small Current Amplifier whose function is to take a low-current control signal and then turn it into a higher-current signal that can drive a motor. The L293D is a typical Motor Driver which can drive 2 DC motors simultaneously.
Why Motor Drivers?
Motor Driver ICs are primarily used in autonomous robotics only. Also most microprocessors operate at low voltages and require a small amount of current to operate while the motors require a relatively higher voltages and current . Thus current cannot be supplied to the motors from the microprocessor. This is the primary need for the motor driver IC.
So if you want to build a rover or a robot using DC motors, then look no further than L293D Dual H-Bridge Motor Driver. In this Instructable, I'll show you how to get started with the L293D.
Step 1: How It Works


The L293D IC receives signals from the microprocessor and transmits the relative signal to the motors. It has two voltage pins, one of which is used to draw current for the working of the L293D and the other is used to apply voltage to the motors. The L293D switches it output signal according to the input received from the microprocessor.
The L293D is a 16 pin IC, with eight pins, on each side, dedicated to the controlling of a motor. There are 2 INPUT pins, 2 OUTPUT pins and 1 ENABLE pin for each motor. L293D consist of two H-bridge. H-bridge is the simplest circuit for controlling a low current rated motor.
Step 2: What Is a H-Bridge Circuit

H-bridge is a circuit which allows the voltage to be flown in either direction.
In the given diagram, the arrow on the left points to the higher potential side of the input voltage of the circuit. Now if the switches S1 & S4 are kept in a closed position while the switches S2 & S3 are kept in a open position meaning that the circuit gets shorted across the switches S1 & S4. This creates a path for the current to flow, starting from the V input to switch S1 to the motor, then to switch S4 and then the exiting from the circuit. This flow of the current would make the motor turn in one direction. You can get it to turn the motor in the opposite direction by simply changing the terminals.
Step 3: Components Required


- L293D Motor Driver.
- Arduino UNO.
- DC motors.
- Bread Board.
- 9V Battery.
- Jumper Wires.
- Wheels
Step 4: The Connections


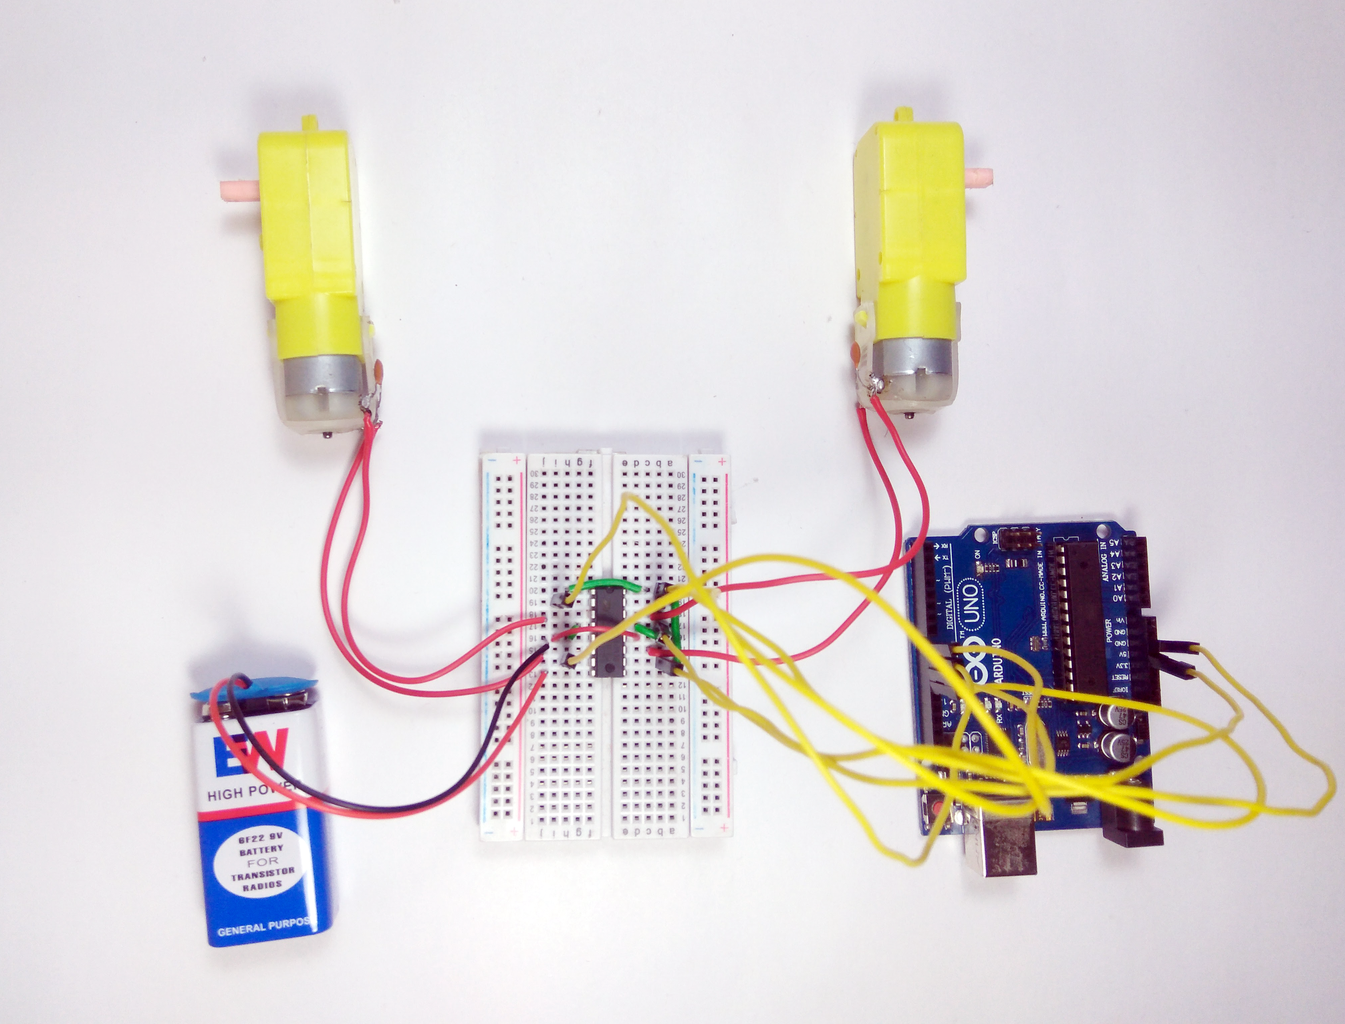

Follow the schematic and build the circuit. You'll need an Arduino UNO to control the motor driver.
- All the Enable pins are connected to the 5V pin on the Arduino.
- Ground Pins should be shorted and connected to the Gnd pin on the Arduino.
- +ve side of the battery should be connected to pin 8 of the IC and the -ve to the Gnd of Arduino.
Note: If you want to turn on and off the motors manually then you have to connect the Enable Pins on both sides to Digital Pins on the Arduino.
Step 5: The Code
//Declaring the pins for controlling the motors.
//I have not declared enable pins because I want the motor to run when I turn it on. If you want to turn on the motor manually then you can connect the enable pin.
const int leftForward = 8;
const int leftBackward = 9;
const int rightForward = 10;
const int rightBackward = 11;
void setup()
{
  pinMode(leftForward , OUTPUT);
  pinMode(leftBackward , OUTPUT);
  pinMode(rightForward , OUTPUT);
  pinMode(rightBackward , OUTPUT);
}
void loop()
{
  //One pin should be HIGH and the other should be LOW for the motor to turn in one direction. By reversing, you can change the direction of the motors.
  digitalWrite(leftForward , HIGH);
  digitalWrite(leftBackward , LOW);
  digitalWrite(rightForward , HIGH);
  digitalWrite(rightBackward , LOW);

}
Step 6: The Output

Once you have uploaded the code to the Arduino, the motors will start running in one direction. If you need to change the direction, simply interchange HIGH and LOW values in the code.

Participated in the
Makerspace Contest 2017


