

Introduction: How to Build a Custom PC (UPDATED!!)


Alright, so it's MrNintendo again. I've dropped pretty much all of my modding (except for case mods and stuff) and switched to computer design/upgrade/repair. I've seen a few Instructables on how to build a computer, but they don't really explain everything well. This is more of my area of expertise, so if there are any questions among those of you who are reading this Instructable, please leave them in the comments and I'll get to them as soon as I can. Also, I do not know everything there is to know about computers, so if those of you reading this feel that I may have left something out, send me a message or add it to the comments and I'll edit it in as soon as possible.
UPDATE: Alright guys, this is what you will be seeing when I have posted an update in the steps. No update on the intro though...
Step 1: Tools and Materials
Tools needed:
1) anti-static wrist strap - found on many electronics websites and in most Radioshacks
2) screwdrivers - phillips and flat head (different sizes will help)
3) Arctic Silver 5 (or any other thermal grease) - only needed for those of you who are using a custom cooling system (air or water) or using a non-retail processor
4) rubbing alcohol, lint-free cloth, paper towel/napkin/whatever works - to clean the processor and heatsink contact plates (optional)
5) a pair of tweezers - just in case a small part or piece happens to drop into a small or tight space
6) power supply tester - don't want your new computer to short circuit b/c of a faulty power supply
7) extra fan screws - just in case ;) (no pun intended)
8) and most importantly... a little common sense... okay maybe more than a little
Optional
Anything that you will need to modify a component or part of a component to make it work/fit correctly
Step 2: Finding and Buying Parts


Okay, now guess what we need first? That's right, we need the parts. You'll need a case for the parts to fit in, a power supply (PSU) to power the system, a Hard Drive for storage, a Processor (CPU), RAM Memory, a cooling system (whether air or water cooling (I will cover water cooling in another Instructable if any of you would like), a motherboard, Disc Drive (CD/DVD), and a graphics card (optional, unless your motherboard does not have a integrated graphics chip). Now before you go off just buying parts willy nilly, you need to understand the system of buying parts. That's right, buying computer parts has a system to follow. Follow the diagram I have made below to see how the system works, if you have any questions, please leave them in the comments section.
The best place I know to find parts is Newegg.com - I use this website for all of the parts that I buy and their RMA procedure is great.
UPDATE: Okay, I found a few other websites, most of you probably already know them: Tiger-Direct, Directron, ZipZoomFly, eBay, and lots of others, you just have to do a little research. Also, the parts do not have to be new, they can be used from a current system or you can salvage parts from an old computer to try. Also, the diagram is a little confusing, so if it's too confusing just remember this: If the part fits, it should work...
UPDATE: Okay, you don't really need a case, a good motherboard tray will work well enough... check the last step to see my current setup, I like the computer a lot better out of the case.
The parts I have used in this Instructable are as follows:
Case: NZXT Whisper
Motherboard: Gigabyte GA-MA790X-UD4P
Processor: AMD Phenom II X2 550 Black Edition Callisto
RAM: 2 X 2GB Patriot Viper DDR2 SDRAM
Power Supply: Corsair CMPSU-750TX - probably the best brand for PSU's
Hard Disk Drive: Western Digital Caviar Black WD1001FALS
Graphics Card: Asus EAH3450/HTP/256M
Step 3: Starting the Build
Okay, what do you think that we need to do first? Well, let's go ahead and unpack the case and the manuals that came with everything and set them directly in front of you, this way you will be more... well... encouraged to read your manuals (not trying to offend everybody, it's that there are some that will throw the manual aside, try to figure it out on their own, and when whatever they were trying to figure out catches on fire, they finally start to read the manual... GREAT IDEA... only what happened to the 200 some dollar component you were working on? Oh, wait... it caught on fire)! Anyways, it's important to read the manuals just in case anything is different in your designs and whatnot.
After you get a general idea of your components' designs and functions, then it's time to start assembling your PC. First, get acquainted with your case, figure out how to remove the Disc Drive and such. Next you need to refer to your manual or wherever it is that tells you where to place the motherboard standoffs (motherboard extenders that came with your case) for whichever type of motherboard you are going to be installing. Then screw them in and continue on to the next step. This will not always be the same with every case, most Mini ITX cases have the standoffs pre-mounted in the case.
Step 4: Setting Up the Main System


Okay, now that we have gotten our case sorted out, the next step is to install the motherboard... hold that thought for a second though. You still need to install the processor and RAM don't you? Well, would it be easier to do it while the motherboard is inside the case; or outside the case, where you have more room? Your choice, but installation is the same in all motherboards. If you have an Intel-based motherboard, then you will have a different way to set up your processor than an AMD-based motherboard.
First unpack your motherboard, but hold off on taking it out of the wrapper! Separate everything into piles, the objects you need, need later, and don't really need. Everything you don't need can go back into their wrappers. Now unpack your processor, but again, leave it in the protective seal (usually a solid plastic covering). Okay, now that you have prepared the processor and motherboard, it's time to install the processor. First unwrap the bag from the motherboard but keep the motherboard inside the bag, this way you can attach the anti-static wrist strap to the motherboard and your wrist while keeping the motherboard static free (A viewer of this Instructable has told me that it is better to connect the anti-static strap to a grounded metal source instead of the motherboard. This makes more sense than connecting it to the motherboard, so connect it to a grounded source instead). Once the motherboard is attached, bring the motherboard out slowly and place it on top of the anti-static bag it came in (just as an extra precaution). When the motherboard has settled on top of the bag, take the processor out of the packaging to clean it. If the processor was bought in an unopened retail package, then you can skip this step, if not you'll need to clean it up a bit just to be sure. Place your processor down on a nice clean surface with the pins facing down. Then take rubbing alcohol and apply it to a paper towel/napkin/non-lotioned tissue and rub the top of the processor GENTLY to prevent the pins from bending. You may pick up the processor and hold it one hand to clean it if it is easier than on a flat surface. After you have rubbed it for a while (or you notice that any foreign contaminants are gone) take a lint-free cloth, such as a paper coffee filter (I know it says "paper", but it works great as a lint-free "cloth") and dry the processor off and to remove any lint that resides on the processor from rubbing it. Now you are finished and can proceed with the next step below.
With an AMD-based motherboard, like mine, it is the same difficulty as it is with an Intel-based. All you have to do is lift up on the metal lever and position it so it stays practically straight up (this is the "unlocked" position). Then installing the processor is a breeze; simply drop (not literally) the processor into the slot, making very sure that the arrows on the corners of the processor and processor slot match up. DO NOT FORCE THE PROCESSOR INTO THE SLOT!!! If it does not drop into the slot, remove it away from the motherboard, then carefully look at the pins on the processor and make sure that all of the pins are not bent. If one or a few of them are bent, then carefully bend (ones that are bent... obviously) them back into position. If they are not bent much, then you can take a credit or debit card and slide it through the gaps created by the pins to straighten them. If they are bent too much for this trick, then resort to using tweezers to bend them back into place. Once they are bent back, try dropping the processor in again; if it does not drop in, then take it back out and try straightening them again.
With an Intel Motherboard, simply remove the protective cover on your processor's slot, then pull the metal lever into an upright position then lift the "holder" back so you can insert the processor. Intel is the same way, just drop the processor in the slot then secure the "holder" over the processor. To me, the AMD configuration is simpler, but you will get different opinions from Intel and AMD users alike.
Once the Processor is properly inserted in the slot, push the lever back into the "locking" position (down against the processor slot). Once that is done, simply place the included heatsink (only if you bought a retail processor and are planning on using the heatsink that came with it) on the processor how it states in your processor manual. If you are going with an aftermarket/custom heatsink or cooling system, then you will have to read the instructions on how to install it yourself, because I have no idea what cooling system you installed, even if I did, I probably wouldn't know how to install it unless I got my hands on it personally. After the heatsink is in place and locked, unlock it and remove it, then look at the bottom of the heatsink and the top of the processor to make sure they made good contact (you should be able to see at least a very thin layer of thermal grease on the processor as well as the heatsink). If they did not make good contact, seek out the problem; if they did, place the heatsink back on it and lock it. If they did not, you may have to figure out if you are securing the heatsink in the wrong direction, such as you may need to turn it 90 degrees to allow it to make contact with a side of the processor. Also, more thermal grease may be required. Once that is done, plug in your processor's heatsink fan (if you have one) to the correct fan plug-in (if you do not plug it into the correct plug-in, your processor can overheat because your motherboard is turning up the fan speed on the wrong fan)
To apply thermal grease (for those wanting to upgrade to Arctic Silver 5 or some other compound), the process is very simple. If necessary, but recommended, take rubbing alcohol and a lint-free cloth (coffee filters are great lint-free cloths (even though they say paper) and rub the alcohol around on the top of the processor (only on the heatsink contact (usually the tallest part on a processor, unless it has a metal heat spreader on it; if so, then apply to the entire top area)). Then wipe dry with a dry area of the cloth if it does not evaporate fast enough for you. Now take the recommended amount of thermal grease (usually, the correct amount can be found on manufacturer's website, or Arctic Silver's anyways) and apply to the top of the processor. Once that is finished, take a CLEAN straight-edge razor blade and smooth the grease out onto the surface of the processor, making an even layer of grease. Then follow instructions for testing the heatsink contact as described above.
Now to refer back to your case. Install the rear I/O plate (the metal, back plate that comes with your motherboard, if you don't have one, don't worry about it) by inserting it into the I/O hole in your case, making sure that the plate is in the correct position (basically make sure that the ports will match up with the motherboard when it's installed in the case). When that is installed, grab your motherboard and attach your wrist strap to your case (attach your wrist strap onto whatever you are working on (if you are working IN your case, you must attach the strap to the case)). When installing the motherboard, make sure to touch the case with your skin first to make sure that static will not jump to the motherboard when it touches the inside of the case. To properly install the motherboard, start by placing it inside, rear ports first, and make sure that the tabs on the I/O lay on top of the ports instead of going inside them. Once you get the motherboard settled into the case, start screwing down the motherboard to complete the installation. When the motherboard is screwed in, unpack your RAM.
I know that I installed the RAM when it was in the case, but it really is easier to do it outside the case... trust me on this. For AMD-based motherboards, the performance is usually better if the RAM is installed closer to the processor, the opposite goes for Intel-based motherboards (notice that I found this out after I had taken pictures). To install the RAM, it's pretty straight forward: push the small tabs away from the RAM slots that you wish to install the RAM into, then simply line up the slot in the RAM with the notch in the actual RAM slot on the motherboard, and insert (you pretty much have to force the RAM in a little). After that, you're pretty much done with the motherboard except for plugging up the fans and checking the motherboard over again to make sure everything is positioned and connected properly.
Step 5: Adding the Other Hardware


Now that we have the motherboard and the case sorted out, it's time to install the hard drive and the disc drive. Refer to your case's manual on how to install the hard drive and the disc drive. Once both are installed, it's time to install the power supply, then we'll hook up the cables. First and foremost, test your power supply if you haven't already, grab your power supply tester and hook it up following the instructions you got with the tester, if everything checks out, we're ready to power up.
For the power supply, insert it into the case and into the proper power supply bay/slot/whatever you want to call it. Match up the screw holes on the power supply to the ones in the case and screw in the power supply. Make sure the screws are tight, but not overtightened. When the power supply has been properly installed, we can proceed to hook up the cables. Start by hooking up the disc drive and hard drive to the motherboard using the appropriate cables. After that, hook up the power cables to the motherboard first, then to the hard and disc drives and the graphics card if yours has an external power connector other than to the motherboard. This can also be done as power first then the other cables, but it doesn't matter which order you hook them up as. Congratulations, you now have a working computer system... not really, we still need to install the Operating System, of which is entirely up to you. And since there are many operating systems, I cannot guide you through all of them. I can tell you that I have installed Microsoft Windows Vista Ultimate and can get it up and running well within 15-20 seconds of boot time. So for a dual-core processor, this PC has a lot of "kick".
UPDATE: I have upgraded to Windows 7, it now boots up in about 8-12 seconds. Also, I'm holding a steady overclock of 3.6GHz. Some have gotten it to 4GHz, but that's with extreme cooling...
UPDATE: Well, I have finally replaced the stock heatsink with an all-in-one liquid cooling system, the Corsair Hydro Series H50 to be exact... Yes I went with a pre-made cooling system, but it works out a lot better than some high-performance air coolers, now holding a steady overclock at 3.85GHz... 3.9 is too unstable without going over the maximum recommended voltage level... and I'm not going to risk the processor for another 0.15GHz...
Step 6: Congrats!

Now you are completely done with your Custom Computer! Give it a few test runs and try to push it to its limits. If it's a gaming pc, try running crysis; if its an entertainment or media center pc, try running a ton of youtube videos at the same time or a high-def video or two; if its a business pc.... sorry, can't think of any tests for it.
Step 7: Extras


The following are extra steps to make sure your computer is also neat as well as functional and a few odds and ends too:
Cable Management
Cable management is practically common sense. Although this cannot be done in all computer cases (some are too small or don't have enough holes cut in the sides), it is used in most of the ones found today. Cable management is defined as a neat and simple way to dramatically improve airflow and case neatness (especially if you have a case window and want to show off your impressive setup). Basically it is taking the power cables, SATA cables, and any other cables that reside in your case, and routing them through different holes in your case. You can also route cables through different gaps and behind components, such as the motherboard, to improve neatness and such. Look at the first 5 pictures below for an example.
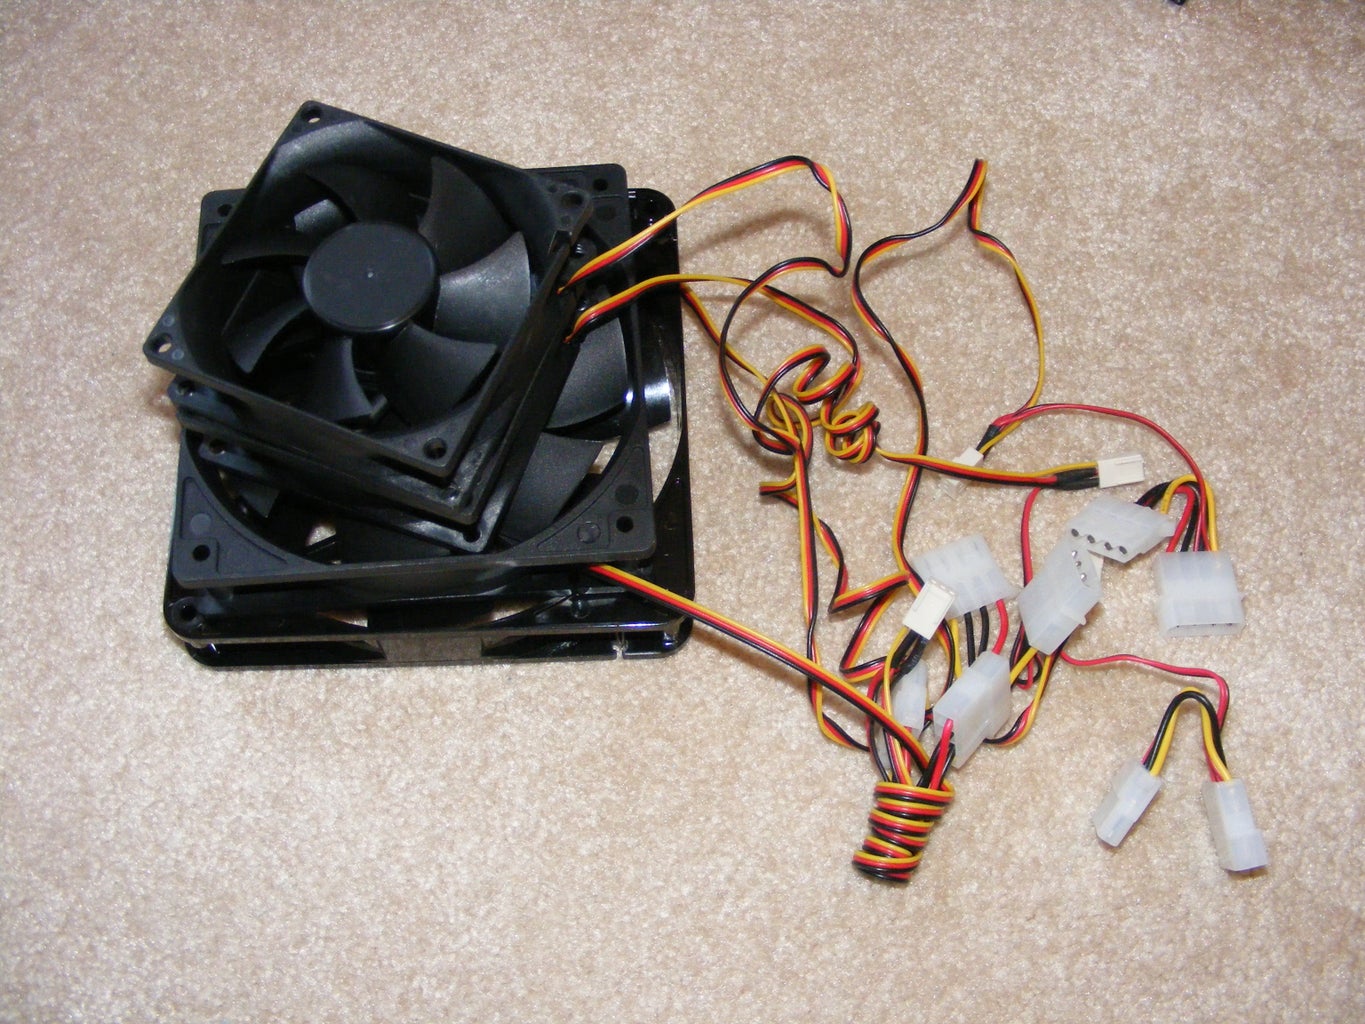
Replacing the Case Fans
Replacing the case fans is a great way to improve airflow and air cooling. It's simple, so there isn't any reason why I need to explain how to do it. See pictures 6 - 8 below for an example.
PC Case Replacement
A PC doesn't need to be contained in a case, some people prefer them mounted on what's called a torture rack, if you haven't seen one, basically it's a small shelving unit consisting of 2 shelves, mounting the motherboard and everything directly attached to it, on the top, and mounting the rest on the bottom shelf. Well, you can also use a standard motherboard tray... much cheaper than buying a torture rack, but it lacks the ability to mount hard drives and the other components onto it, but with some tweaking and modding it could become one heck of a setup. Plus this is cheaper than buying a case anyways. For a site to buy a motherboard tray, check out: Performance-PCs.com.
UPDATE: Check out my current setup below, pictures 9 and 10.
Simple and Easy Fan Filters
Nasty and awful, dust is one of a computer geek's worst nightmares... (Me? I don't care, there's nothing a little compressed air, a swiffer, and a vacuum can't fix). For a simple solution (and probably better than buying a retail one), just use a dry swiffer duster pad (the ones for the dry floor dusting). Simply cut out the correct shape and apply to the fan with some tape. It may not be the most awesome or glamorous thing you have seen, but in my case it works very well. Another plus is that it barely restricts the airflow, unlike other filters. See the last 2 pictures below.
I'll add more extras as i complete them. If you have questions, concerns, etc., just leave them in the comments and I will get to them as soon as I can.


