

Introduction: How to Create a Gif Out of a Video in Photoshop


What you will need:
- A portion of a video you want to turn into a gif
- Photoshop
before you start make sure your video clip is cut so that you're only importing what you want to be a gif, this makes things a lot easier and understandable
Step 1: Import Your Clip


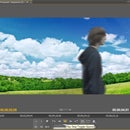
Go to File and then import. Click on Video Frames to Layers. Select your video and click on Load. Make sure that it is a video that can play in Photoshop. The formats supported are .MOV, .AVI, .MPG, .MPEG, and .MP4. Make sure you hit From beginning to end if you want the full clip into a gif. If not then shorten it before doing this.
Step 2: Starting the Animation
Go up to the window drop down menu and click Animation. This is also the time to add any new frames. Remember that if the amount of frames is low, the size will be smaller and it will take less time to load when you post it on a website. Go the bottom left on the animation frames and check Forever. This will make sure that the animation will loop forever.
Step 3: Saving
Go to File and click on Save for Web & Devices. This will optimize your image. Look to see if the animation appears correct in your browser by clicking "Preview" at the left bottom. If you want to change anything, you can always click " Cancel" and go back to Photoshop. A lower file size will load faster in a browser but may look bad. If everything looks fine, click on "Save." Fill in the file name and save it.


