

Introduction: How to Make a Sims Plumbob Hat


So there I was looking along my games shelf thinking of a simple costume design to do and I got the idea to make one of these hats which makes you into a sim along with whatever clothing you're wearing! This is a semi-easy build and you may well have most of what you need lying around, but it may or may not take longer than you'd expect it to and it is quite meticulous to do so read all these instructions carefully.
In this design the plumbob is detachable so if you like you can attach other colored plumbobs onto the hat and you can use the hat without the plumbob on top, so it's still perfect for those business meetings! This is only the first complete iteration (aside from the last step and a couple of other tidbits) of this so if anyone has any suggestions as to doing things differently in a better way then feel free to post in the comments.
You will need:
- 1x 4 or 5cm long by 0.8 or 0.9cm wide metal coil/spring (although more of a coil than a spring since you do need a fairly high amount of rigidity in it)
- 1x 1cm wide set of gripper snaps and an extra 2 male ones (so three male and one female)
- A small 3 or 4cm length of clear plastic tubing which just about fits into the metal coil/spring (heat shrink tubing may also work since this tube is just there to add rigidity to one end of the coil)
- A typical baseball cap, which includes those 6 small holes going around the hat (which you don't mind drilling a small hole on top of and gluing some pieces to)
- Some Araldite glue (I've found this dries really nicely in that it's not brittle when it dries, plus it's strong)
- The means to print off the two parts (one matte coated A4 page each) of the papercraft plumbob
- Scissors, 2x pliers, some regular glue and a marker pen
- A drill with a drillbit that's just larger than the hole on the female gripper snaps (this is so that the male gripper snap connects properly into the female one when the female one is stuck onto the top of the baseball cap
- Something you can carry around which will fit in between the male/female gripper snaps when you want to remove the plumbobfrom your hat (I used a strange blank, very thin key I found, as seen in the photo, nobody I asked knew what it was though)
- A strip off of a polypropylene sheet (basically a bendy plastic, often used to make binder folders), about 4cm wide and 19cm long
- Two small rivet pieces (with holes about 4mm wide) that fit somewhat into the holes that go around your baseball cap
Now onto the making part itself...
Step 1: Making the Papercraft Plumbob

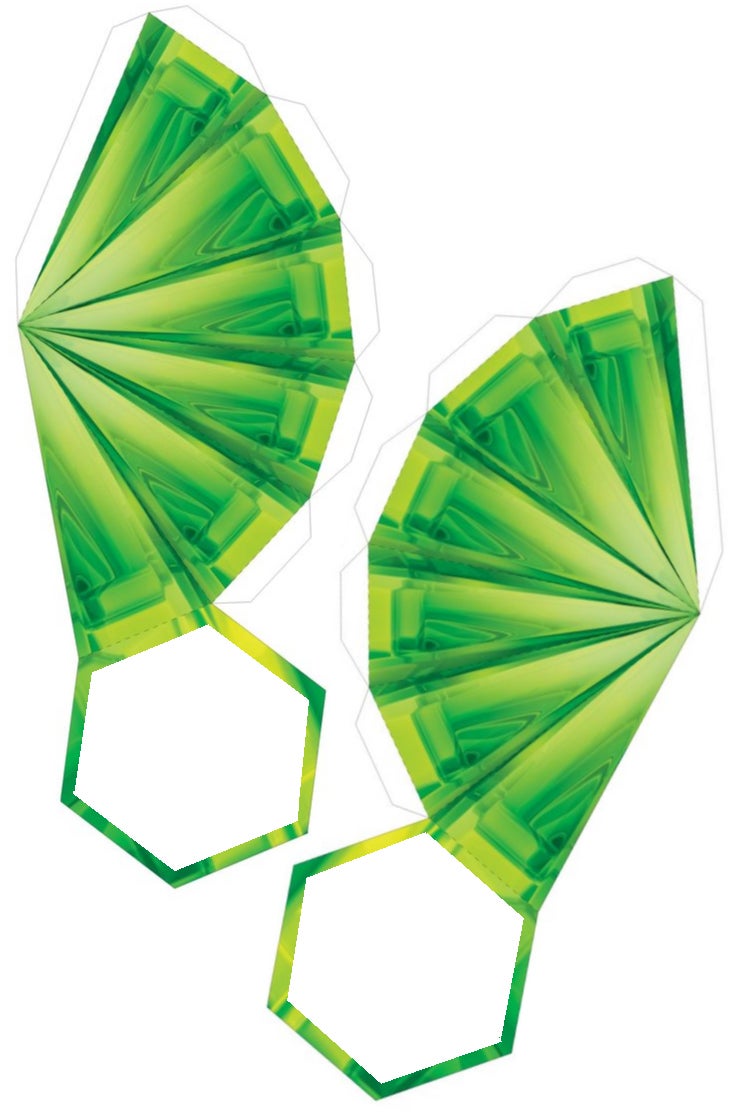
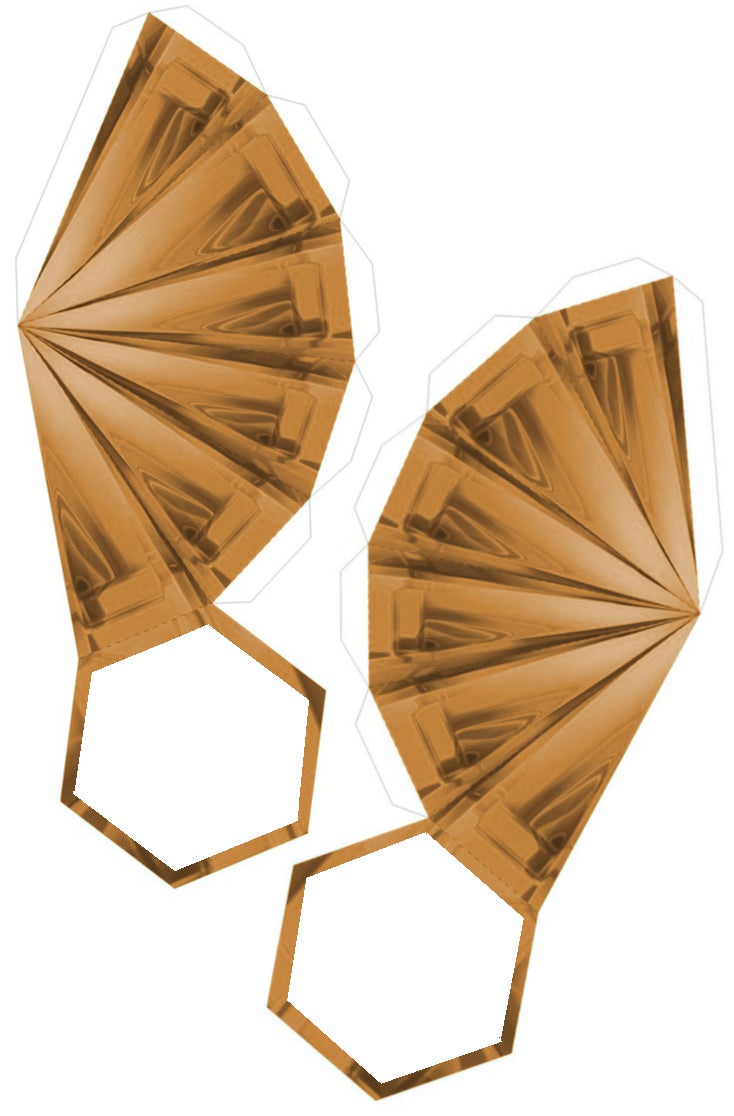
So first off you'll want to print the two halves of your plumbob in either green, amber or red, depending on your mood!
EDIT: As pointed out the links expired but now I've uploaded new images right here for you to print out ;)
I'd like to thank 'killero94' (original: http://bit.ly/29n8ct3) for the original plumbob papercraft printout design, I just modified it a bit and scaled it up for our purposes.
You'll want to print off the two halves (one page = one halve, just makin it clear!) on matte (note, matte paper does have a smoother side you need to print onto, it's hard to feel but it's there) or glossy A4 paper, your printer likely has its own appropriate settings for each type.
When those are printed cut along the outside edges of it, but also cut out the white hexagon shape, and fold those into the half diamond/plumbob shapes, make sure to fold those tabs too. Then put glue on all these tabs and stick the thing together to make a half. Don't glue the two halves together yet though!
Step 2: Creating the Springy Attachment


Now for this you'll want to get your very rigid coil/spring (I'll just call em coils), which remember should be about the right width so that they are just a tiny bit less wide than the male gripper snaps (I'm talking like 1-2mm less wide).
Now evenly (along its length) pull your coil apart until it's twice its original length.
Next grab one of these male gripper snaps and your coil, if they're both of the right width you'll notice that you can twist the coil into the gripper snap (into the underside ridge of it where the metal folds over). This will secure the coil somewhat into the male gripper snap, but for extra measure mix together a bit of your araldite glue and add a dab of it around this connection (but make sure not to get it on the other side of it, it'll have to connect into one of those female gripper snaps later!).
Next up after that has dried (or right away, if you don't mind having glue hands) take your small piece of tubing and insert it in the coil, if you got a thin enough piece it'll fit into your coil (albeit a bit trickily) and move that to the gripper snap, then glue it to the gripper snap as you did with the coil (see picture for reference). Alternatively you could probably use some heatshrink tubing at the base of (or all along for extra rigidity) the coil instead, although I've not tried this myself.
Once that's all dried...
Step 3: Attaching the Spring and Completing the Plumbob


Now you want to create a tiny hole at the point of one of your plumbob halves. Just cut the point off of one of these halves so you end up with a tiny 2-4mm hole.
Then take the other, bare end of your coil from the last step and using a couple pairs of pliers bend that up, into a sort of oval shape as seen in the picture.
Insert this into the hole you just made and pour a little araldite into the hexagonal hole of your halve, hopefully with the viscosity of the araldite it won't leak through the tiny gap in your hole (but do check it's not leaking as it dries). If you're wondering where to put this as it's drying, you can use a drawer as I did. Once this has dried that coil will be very securely attached to the plumbob.
Then you can glue the two halves of your papercraft plumbob together :)
Now for the hat modifications...
Step 4: Attaching the Female Gripper Snap to the Hat
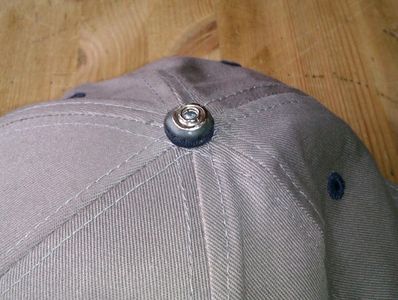
First things first, you need to drill a hole on the top of that sucka! This is just so that the male gripper snap can fit into the female one properly. You'll want to be careful about doing this since it's basically a hard piece of fabric. The hole needs to be about 3mm deep and just a slight bit wider than the hole in the female gripper snap (but careful not to make it too wide), you can test if it's wide enough by holding the gripper snap onto the hole and inserting a male gripper snap into it.
Next up very carefully glue (with that good ol araldite stuff again) this female gripper snap around the edge, over this hole, making sure that you don't get glue in the hole or on the hat anywhere else than that top bit (I've ruined a hat by getting araldite on it, although I was experimenting before I came up with the next step). Hopefully it'll be as you see it in the picture once dry. That glue will hole the gripper snap onto the hat very nicely, although you will want to have one of those keys for prying apart the plumbob attachment from the hat so that you don't put so much strain on it (as opposed to pulling the two apart, potentially wrecking the coil too!).
Now to add some extra rigidity to the top of your hat...
Step 5: Adding Rigidity to Your Hat


This is the step I didn't have time for when I attended the expo I made it for, I often had to make sure the hat was pointing fairly straight up, although it didn't help that I had overstretched the coils in my initial making of it, I ended up using duct tape for some extra rigidity. But no more! I had the idea to use a polypropylene strip since it would be rigid enough and I discovered that I can use a couple of the holes going around the hat to attach it to the inside of it.
First things first, take the two rivet pieces and put them into the holes at the sides of your hat, mine were a tiny bit too big so they needed a bit of encouragement.
Next up grab a marker pen and whilst holding your acrylic strip to the inside of the hat (so it curves around the inside) at two of its holes, mark where you need to make the two holes in your strip of plastic. Then drill these holes in your piece of polypropylene just big enough to fit the two male gripper snaps into.
Insert the gripper snaps into your polypropylene strip and then attach this to the inside of your hat (as seen in the picture), the two gripper snaps should fit nicely into the two rivet pieces, but the hold isn't strong enough so you will need to put a small bit of glue down the holes of the rivet pieces to really hold together this connection.
And once that's dried you're all done! If you have any questions then you can hit me up on twitter; '@james___uk' (that's three underscores) or in the comments below (although twitter may be better). And if you have any suggestions for this build then you can put them in the comments below :)

Participated in the
Halloween Props Contest

Participated in the
3rd Annual Make It Stick Contest


