

Introduction: How to Make an Espresso Tamper


Here's my first Instructables project and I made it at Techshop. A shiny new 58.4mm espresso tamper! I started with a 2.5"x12" copper round rod and a basic understanding of how to use a metal lathe and a vertical mill. As it turns out, making a round thing into a smaller round thing just isn't that difficult.
Here's what I did:
Step 1: Roughly Shape the Sides


I used a steady rest because the material I was working with was too thick to fit through the headstock of the lathe and too long to be stable on its own. First I machined the face flat, then brought the diameter down close to the final dimension I was looking for - in this case I ended up at 59mm with the plan that the finished tamper would be 58.4mm.
Step 2: Shape the Top


I used the compound rest to curve the top of the tamper then drilled a 5/16" hole in the center.
Step 3: Finish the Sides

Once I had a way to support the copper rod from both ends I removed the steady rest and turned the material down to the target size.
Step 4: Tap the Hole


Start with the tap in a drill chuck so you can be sure it's square, finish by hand. Copper is miserable to tap, this was the most irritating part of the project. On the bright side, I got to test fit the handle afterwards.
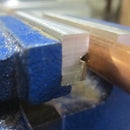
Step 5: Chop It Off!

Throw the thing in a horizontal bandsaw and cut it off.
Step 6: Flatten the Bottom

I used a fly cutter on the mill to flatten the bottom, figuring that it was easier to get the piece level using parallels than it would be by hand in the lathe chuck.
Step 7: Clean Up and Assemble


Remove the burr if there is one, screw the handle on and take it home.
Step 8: Put It to Use!


Participated in the
Holiday Gifts Contest


