

Introduction: How to Program an Arduino Accelerometer for Motion Controls


Motion control is always something that has peaked my interest. This is especially so recently when I found out how easy Arduino makes them to program. Once set up properly this can easily become an awesome door that opens up so many possibilities. You could for instance program an rc plane or quadcopter. You could put motors in inanimate objects and amaze your friends. As with just a few simple hand gestures you can manipulate a chair to go any way you want it. Think of all the possibilities to be motion controlled, because any thing you can plug into the arduino can now be motion controlled.
Step 1: Getting the Parts
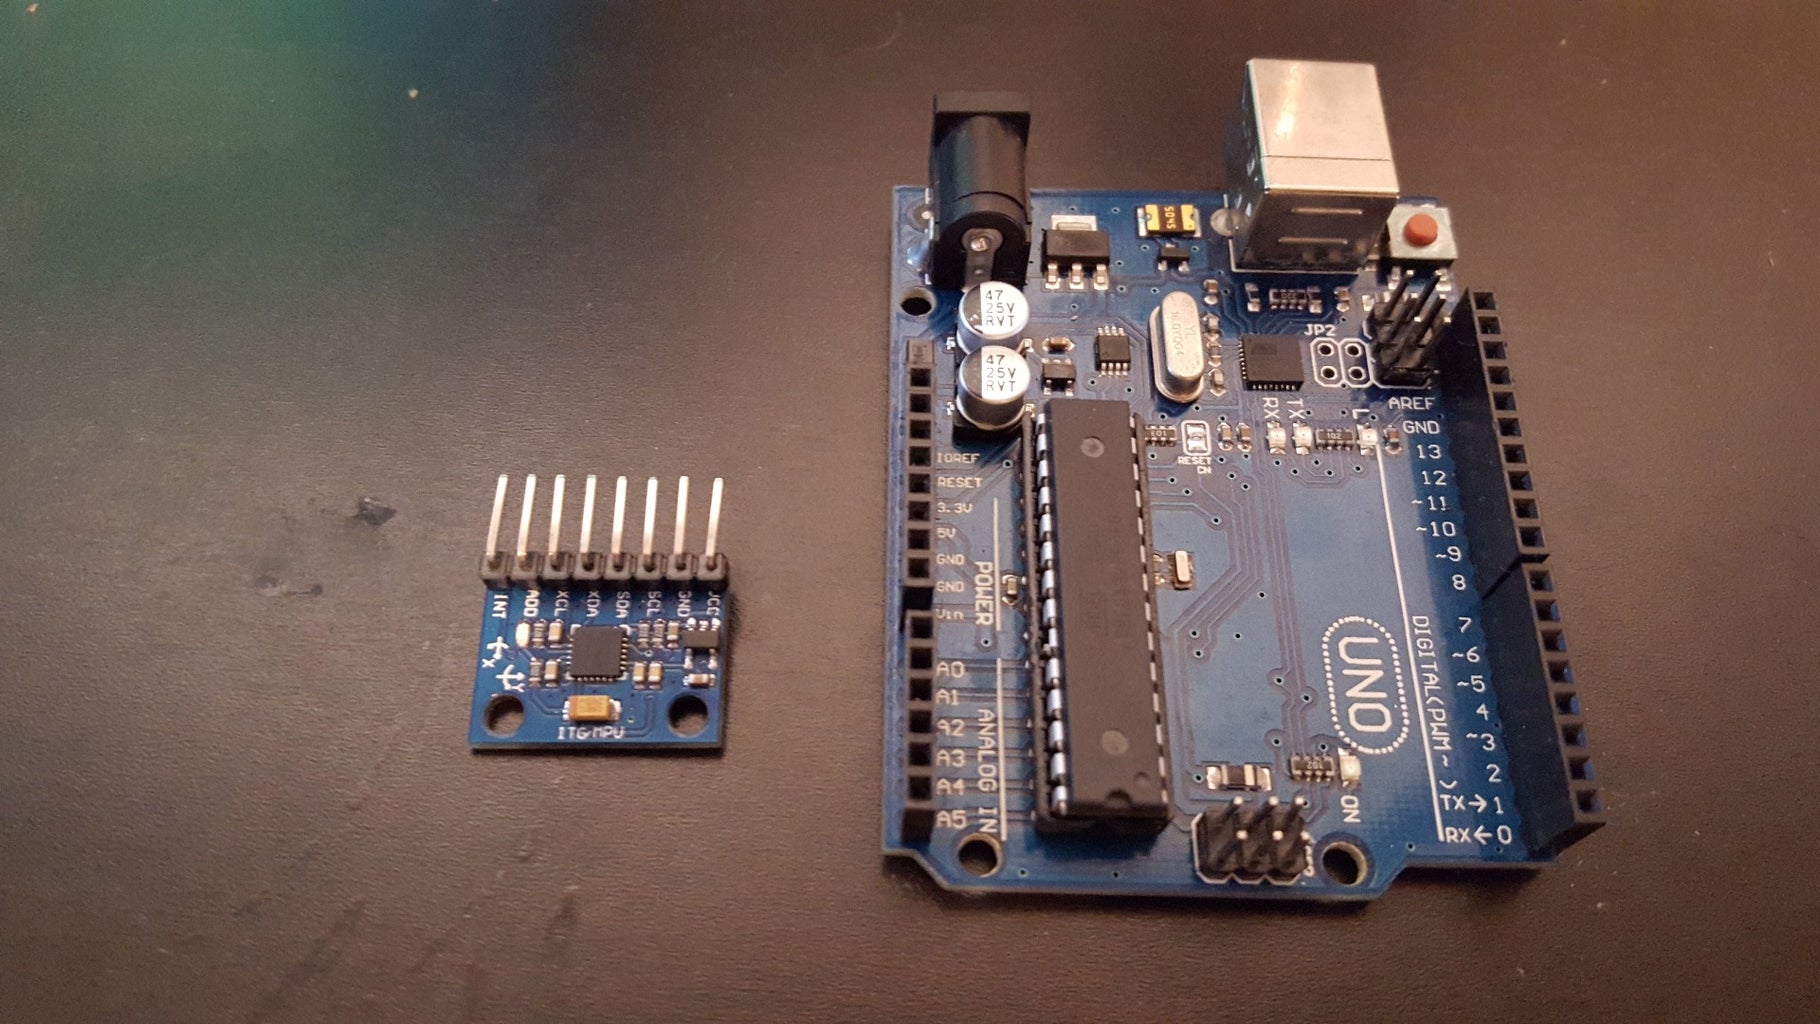

The main parts are the arduino uno and the Gy-521 3 axis gyroscope/accelerometer or the mpu-6050
You will also need wires, soldering skills, solder, and solder iron
Step 2: Getting the Program
If you don't already have arduino's software here it is: http://www.arduino.cc/en/Main/Software
Here is the code I used just copy paste it to arduino's software: http://playground.arduino.cc/Main/MPU-6050?action=...
Now that you have the program ready to go you have to plug in the uno to the accelerometer.
Step 3: Connecting the Two Boards
to connect the two boards first you have to solder the pins to the accelerometer. Then use the other set of pins in the box to solder to one end to each of four wires you need to cut then strip.
You then need to connect the ucc on the accelerometer to the 5v on the arduino uno board.
next connect the gnd to gnd. This should then power the accelerometer when the uno board is plugged in.
next to get information to pass from the accelerometer to the uno board you will need to connect the scl to a5 and sda to a4
Step 4: Finishing Touches
Lastly you need to run the code and then open the serial monitor. If it displays random values then you know its on and working.
Lastly something I didn't add in my video is that if you want to program it to do something with those values then you need to do a digitalwrite on whatever number you want to turn on and off. You then need to write an if else statement to have the light or whatever you decided to turn on and off respond to your accelerometers decisions.
Here is a page I found explaining digital writes:https://www.arduino.cc/en/Reference/DigitalWrite
Here is a page I found explaining if else statements:http://www.arduino.cc/en/Reference/Else
This will be explained in greater detail and in a video with my next video on how to use this method to actually program something.


