

Introduction: Hybrid Aquaponic / Soil Indoor Winter Garden


In this instructable I will illustrate how we integrated soil grown plants into our indoor aquaponic system, The benifits are well worth the trouble, and most of the materials can be easily sourced for free, and /or already found in your shop, or toolbox. The plants are able to reap the rewards of the nutrient rich aquaponic water, which makes them WAY healthy, and the gardener reaps the rewards of a wintertime vegetable garden that requires very little maintainance to THRIVE! Additionally, I am confidant that plants that will not do so well in aquaponics alone will do very well. These buckets are very easy to build, and can be chained to add more plants to the system quite easily as well. Make sure if growing tomatoes, that the varieties that you grow are determinate, as most determinates will not get any taller than about 3 feet and are more bushy, whereas indeterminates will vine, and get out of hand quickly These buckets could easily be used in conjunction with an outdoor system as well, which we will be trying this summer!
MATERIALS
2 frosting buckets from your local bakery, one tall and one short. Mine are 32lb, and 16 lb, as long as the shorter will fit into the larger leaving a 5 or so inch gap between their bottoms when pushed together, your good to go (ours were free from Wal Mart's bakery)
Hand drill (electric or battery)
2 1/2" thread to slip pvc male adapters (under $2.00 for a bag of 10 at home depot)
3/8" drill bit ( or close to, holes have to be small enough that dirt will not fall through)
1/2" hole saw ($6 Home Depot)
1/2" tap (to thread holes in the large buckets)
plumbers tape (.99 cents a roll in my area wal mart)
PVC cement, if you choose to glue, there is no pressure to worry about, so glue is not a must. (under $3.00 at home depot
1 pair of hole-ey cotton socks. ( I think we all have a couple of these laying around!)
Determinate tomato seeds. (We chose the Hierloom O.S.U. Blue tomatoes from www.madriverseeds.ecrater.com )
Step 1: Preparing the Buckets


first, measure up 4 and a half inches from the bottom of your larger bucket, and using your 1/2 " hole saw, cut a hole through the wide side of your bucket, as shown in the picture, next you will use the 1/2 " tap to thread the hole you have just cut, turn over the bucket, and repeat on the opposite side. Use plumbers tape to coat the threads on the male adapters (generously, I might add) and thread them into the side of the bucket, from the outside. (fig.2) The plumbers tape should ensure that there will not be leaks. Now, for the smaller bucket, turn it over upside down, and drill lots of 3/8" holes all over the bottom of the bucket, (helps with areation) with one larger hole in the center, which will be where the wick will punch through into the water below. Now, take your pair of socks, and tie a knot in them, as close to the top as possible, (fig.3) and feed them through the bottom of the smaller bucket as shown in fig.4. Fig 5 shows inside view of deeper bucket once male adapters are in place. all that is left now, is to put the smaller bucket into the larger, as shown in fig. 6 and 7. We painted our 4 bucket system green, the best paint we have found for this job is Krylon Fusion, as it adheres to the plastic exceptionally well. All that is left is to plumb the bucket, or buckets into your aquaponics system, fill with good soil or compost and the method of doing so is limited only by your imagination, on the next page I will show a couple of pictures of how we accomplished this. Keep in mind, that the tomato starts pictured are the exact same age, and have been grown under a regular T-8 shop light with daylight bulbs, the only difference between the two, is that the 2nd pic is of a plant that has been in the bucket for about a week.
Step 2: Final Plumbing (our Version)


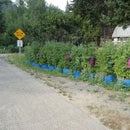
As I stated before, the final plumbing design is limited only by your imagination. we split off of a pipe that feeds a 2nd aquaponic bed, and put in a ball valve to regulate pressure, (you only need a trickle) and then piped the water directly to the buckets, it goes through the four buckets in line, and on the other end is piped around to the back side of the buckets, gravity feeding back into the reservoir (figure 8) if anyone has any questions I would be glad to answer them!
Happy Gardening!

Participated in the
Hydroponics and Indoor Gardening Contest

Participated in the
Manly Crafts Contest


