

Introduction: Install Ubuntu 18.04.4 LTS on Your Raspberry Pi Board


The Ubuntu team released the Ubuntu 18.04.4 Long Term Support operating system for Raspberry Pi 2 / 3 / 4 ARM single-board computers.
Brief overview
As we know, Raspbian is based on Debian distro, which is the official operating system for the Raspberry Pi. It is lightweight and remains a top choice, and one of the most popular Raspberry Pi Linux distros. However, there are plenty of additional Raspberry Pi desktop options. Installing Raspbian is easy as well but the problem with Debian is its slow upgrade cycles and older packages.
Running Ubuntu on the Raspberry Pi gives you a richer experience and up to date software. Also, if you work with ROS (Robot Operating System), you know that the main supported OS is Ubuntu.
We have two options when it comes to running Ubuntu on your Raspbian Pi.
The first option is the easiest and the quickest to set up while the second option gives you the freedom to install the desktop environment of your choice.
In December 2019, Canonical published a support roadmap for the latest Raspberry Pi 4 single-board computer on their Ubuntu Server operating system and pledged to fully support Ubuntu on all Raspberry Pi boards.
Recently, the Ubuntu team released the latest point release of our 18.04 Long Term Support operating system 18.04.4, and with that release comes support for the Raspberry Pi boards. You can download the 18.04.4 release of Ubuntu from official website of Ubuntu. This is an official distribution of Ubuntu Server 18.04.4 for Raspberry Pi board.
Ubuntu currently supports Raspberry Pi 2, Raspberry Pi 3, and Raspberry Pi 4 models, and images are available for Ubuntu 18.04.4 LTS (Bionic Beaver), which is the latest LTS (Long-Term Support) release supported until April 2023, and Ubuntu 19.10 (Eoan Ermine), supported until July 2020.
In this tutorial I will show you how to install Ubuntu 18.04.4 on a Raspberry Pi 4 B board.
Supplies
To follow this tutorial, you need:
- Raspberry Pi 2/3/4 board
- A 16GB or more microSD card.
- HDMI Cable.
- An USB Keyboard.Ethernet Cable.
- Power Adapter for Raspberry Pi.
- A laptop or desktop computer for installing/flashing Ubuntu image on the SD card.
Step 1: Download the Ubuntu Server Image for Raspberry Pi
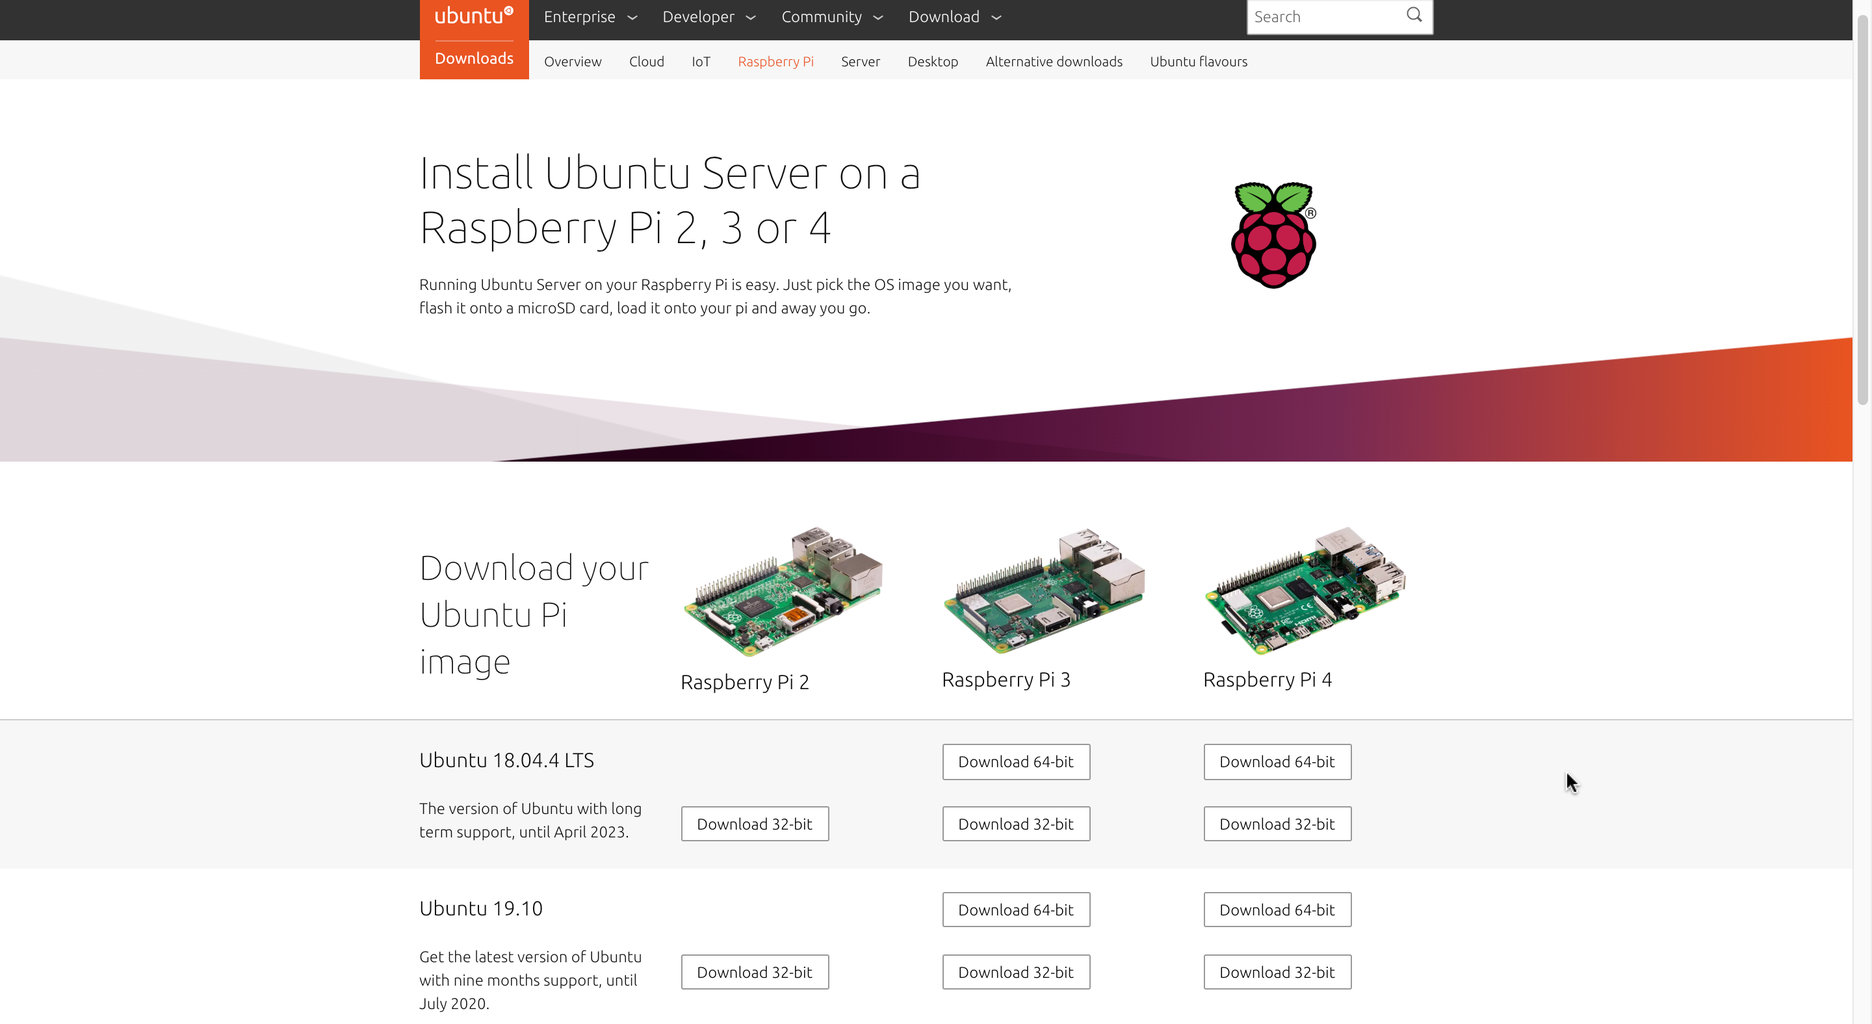
First you have to download the OS image. Go to the download page of the Ubuntu official website.
Now, scroll down to the Download yourUbuntu Pi image section and click on the download link for either Raspberry Pi 2, Raspberry Pi 3 or Raspberry Pi 4 depending on the version of Raspberry Pi you have. I have Raspberry Pi 4 Model B, so I am going to download the Raspberry Pi 4 image with 64-bit version.
Step 2: Flashing Ubuntu Image on MicroSD Card

You can flash Ubuntu image on your microSD card very easily on Windows, Linux and macOS operating system using Etcher. Etcher is a really easy to use software for flashing microSD cards for Raspberry Pi devices. You can download Etcher from the official website of Etcher.
Launch Etcher and select the image file and your SD card. The process will take a few minutes, so be patient. When Etcher is done, you can remove your card from the computer.
Step 3: Setting Up the Raspberry Pi
You probably already know that you need a few things to get started with Raspberry Pi such as a mouse, keyboard, HDMI cable etc. You can also install Raspberry Pi headlessly without keyboard and mouse but this tutorial is not about that.
- Plug in a mouse and a keyboard.
- Connect the HDMI cable.
- Insert your MicroSD card.
- Plug in your Ethernet cable, if you’re using one.
When everything else is set up, power it on your Raspberry Pi by plugging the power cable.
Step 4: Boot Your Raspberry Pi
After powering on your Raspberry Pi, wait for the boot process to complete and you should see the following message on window.
Ubuntu 18.04.4 LTS ubuntu tty1
ubuntu login:
Login with the default user. The default credentials are:
login: ubuntu
password: ubuntu
The first time you log in, you’ll be asked to change this password.
You are required to change your password immediately (root enforced)
Changing password for ubuntu.
(current) UNIX password: _
After changing the default password, you should be greeted by a message confirming that you’re now on Bionic Beaver:
Last login: Thu Mar 3 13:00:00 UTC 2020 on ***.***.***.***
Welcome to Ubuntu 18.04.4 LTS (GNU/Linux 5.3.0-1017-raspi2 aarch64)
* Documentation: https://help.ubuntu.com
* Management: https://help.ubuntu.com
* Support: https://help.ubuntu.com
System information as of Thu Mar 5 15:41:49 UTC 2020
System load: 0.89
Processes: 126 Usage of /: 1.3% of 117.11GB
Users logged in: 0 Memory usage: 6%
IP addresss for wlan0:***.***.***.***
Swape usage: 0%
0 packages can be updated.
0 updates are security updates.
Your Hardware Enablement Stack (HWE) is supported until April 2023.
Step 5: WiFi Setup Using Netplan
Starting from Ubuntu 18.04 LTS, Ubuntu uses Netplan to configure network interfaces by default. Netplan is a utility for configuring network interfaces on Linux. Netplan uses YAML files for configuring network interfaces. YAML configuration file format is really simple. It has clear and easy to understand syntax.
To be able to setup Wifi on Raspberry Pi, you first need to get the name of the wifi card by showing physical components using the following command:
sudo lshw
In my case it was wlan0. Then navigate to /etc/netplan/ using the cd command
cd /etc/netplan/
Edit the Netplan YAML configuration file /etc/netplan/50-cloud-init.yaml with the following command:
sudo nano 50-cloud-init.yaml
Add your WiFi access information. Make sure not to use tab for space, use the spacebar to create the blank.
# This file is generated from information provided by
# the datasource. Changes to it will not persist across an instance.
# To disable cloud-init's network configuration capabilities, write a file
# /etc/cloud/cloud.cfg.d/99-disable-network-config.cfg with the following:
# network: {config: disabled}
network:
version: 2
ethernets:
eth0:
optional: true
dhcp4: true
# add wifi setup information here ...
wifis:
wlan0:
optional: true
access-points:
"YOUR-SSID-NAME":
password: "YOUR-NETWORK-PASSWORD"
dhcp4: true
Change the SSID-NAME and the YOUR-NETWORK-PASSWORD with your information. Close and save the file using ctrl+x and press yes.
Now, check whether there’s any error in the configuration file with the following command:
sudo netplan –debug try
If any error encounters then you can check with this command for detailed error information.
sudo netplan --debug generate
Apply the configuration file with the following command:
sudo netplan --debug apply
Finally, reboot your PI
sudo reboot
Step 6: Updating and Upgrading Linux Software on Your Pi
To make sure all dependencies are up to date, run the following command
sudo apt-get update
If you want to get the latest versions of software you installed already, run
sudo apt-get upgrade
This command upgrades all the software on your Pi to the latest version. It can take a while to run, so you don’t need to do it often. You have to press Y and Enter to confirm.
Step 7: Install the Desktop Components (GUI) on an Ubuntu Server
Ubuntu server is designed to use minimal resources. A GUI will lead to high resource usage, however if you still want a GUI, you can install only what's required. Sometimes you need the GUI on your Ubuntu server to handle simple day-to-day tasks that need quick interaction without going deep into the server settings. You also do have the option of installing a desktop environment. Install the default Unity desktop environment with the following command:
sudo apt-get install ubuntu-desktop
To install the Unity desktop environment without addons like (Email, OpenOffice):
sudo apt-get install --no-install-recommends ubuntu-desktop
To install a very lightweight desktop environment run bellow command
sudo apt-get install xubuntu-desktop
or
sudo apt-get install lubuntu-desktop
Afterwards type
sudo reboot
and you are done. Congratulations. You successfully installed Ubuntu desktop on Ubuntu Linux server.
Step 8: Conclusion
Ubuntu 18.04.4 for Raspberry Pi is a great general-purpose OS with a full desktop environment and a large community filled with resources. It also comes with the added bonus of being available in a 64-bit version to use the Pi to its full potential.
You’re officially ready to use Ubuntu on your Raspberry Pi. Keep an eye on the developer’s website for future builds.


