

Introduction: JGaurora A3S Replacement LCD Board


My 3D printer suddenly stopped working after a couple of years of trouble-free operation, straight out-of-the-box.
The LCD screen went white all over - no icons, nothing. When I switched the printer on, the word 'booting...' appeared on the screen but then it went white. Strangely, the touch-screen worked; I could home the printer if I could remember where the icons should have been, and the other operations worked fine.
I ended up buying a replacement, but couldn't find a "MKS TFT28 V3.0" and had to buy an "MKS TFT28 V4.0". This is working fine, despite not being specifically supported in the firmware details.
This required a straightforward modification to the front panel and flashing the LCD board.
This Instructable describes the initial testing and the steps needed to fit the new board.
Step 1: Trouble Shooting

Knowing nothing about the way in which the main board and LCD board interact. I first asked a question in the excellent JGAURORA WIKI. Their Forum is brilliant - full of knowledgeable people ready to help.
My first difficulty was knowing where the problem was - main board, LCD board or wiring, etc.
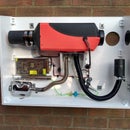
I ended up taking out the LCD board, connecting it to a 12V supply (you have to alter the position of a small link on the board to set it to a 12V input) and seeing exactly the same blank white screen as before. Whether the board is in the printer or completely separate (just with external power), the LCD screen should show the normal Icons (that's what the firmware loads in).
When taking out the LCD board, you have to undo the hot-glue which is holding the Filament-out socket onto the board. This is done with a hair dryer. The excellent Da Hai Zhu video shows the process perfectly. (I didn't bother re-gluing it at the end - we will see whether this was a mistake!)
I flashed the LCD board first with the original firmware and then the 'community' firmware (see later step) but still it was blank. This is very bizarre, because during the flashing process, the screen worked fine, showing the progress and filenames, etc.
I ordered a new board from Amazon, but could not get a version 3.0 board and had to buy a version 4.0.
Step 2: MKS TFT28 V4.0 Board Differences


The V4.0 board has a metal frame surrounding the LCD screen. It fits into the case, but will not screw fully home and leaves a big gap between the clear plastic screen and the LCD screen, so the touch screen operation is poor.
I tried to remove the metal surround by fashioning a hook to pull back four tabs, which I thought were holding the frame onto the screen. Don't try this; without the tabs, the screen flops about inside the frame. The V3.0 screen has a plastic foam behind the screen (see photo) to counter this, but the V4.0 screen does not (in any case, the frame didn't come loose).
Step 3: Modifying the Printer's Case


After carefully measuring the case, it looked like the LCD frame would just fit flush inside the case's aperture.
I cut away the clear plastic face of the printer with a razor blade, to reveal the full aperture in the sloping front. There should not be any plastic overhanging the aperture, as the frame pushes right through and protrudes 0.5mm proud of the plastic (it looks great).
I used a black felt-tipped pen to hide the white painted metalwork before mounting the LCD screen. It is a perfect fit (a firm push-fit) and the 4 screws line up beautifully and screw fully-home. Impressive.
Step 4: Loading the LCD Firmware and Testing


As soon as the new board arrived, I connected it up to 12V (adjusting the link again) and it had the REPRAP firmware on, I could see their icons on the screen.
I flashed the 'community' firmware V3.03 onto the to LCD board following the excellent instructions on the forum. The process goes like clockwork.
(It is sensible to flash the firmware in the main board as well because there are various improvements which have been added by the community).
I connected the LCD board up to the ribbon cable from the main board and switched on the power. I could move the X-axis and everything looked good. At this stage the printer was in pieces and the Z-axis could not be moved - it needed homing, also, I had disconnected the Y-axis wires so that could not be moved either.
The printer was put back together (a rather slow process getting the various wires back in the zip-ties, etc). The axes were homed, and everything worked fine.
I put in a USB stick, but (as warned in the forum posts) it did not see any files, this is changed in the settings option from the first set of icons.
All seems to work fine now - I will do a test print and report back if I find any hassles.
Step 5: Lubricating the Y-axis


I took the opportunity to clean and lubricate the runners of the Y-axis.


