

Introduction: Joystick Keyboard


In this project, we will create a keyboard using a joystick for selection and input and an LCD screen for display.
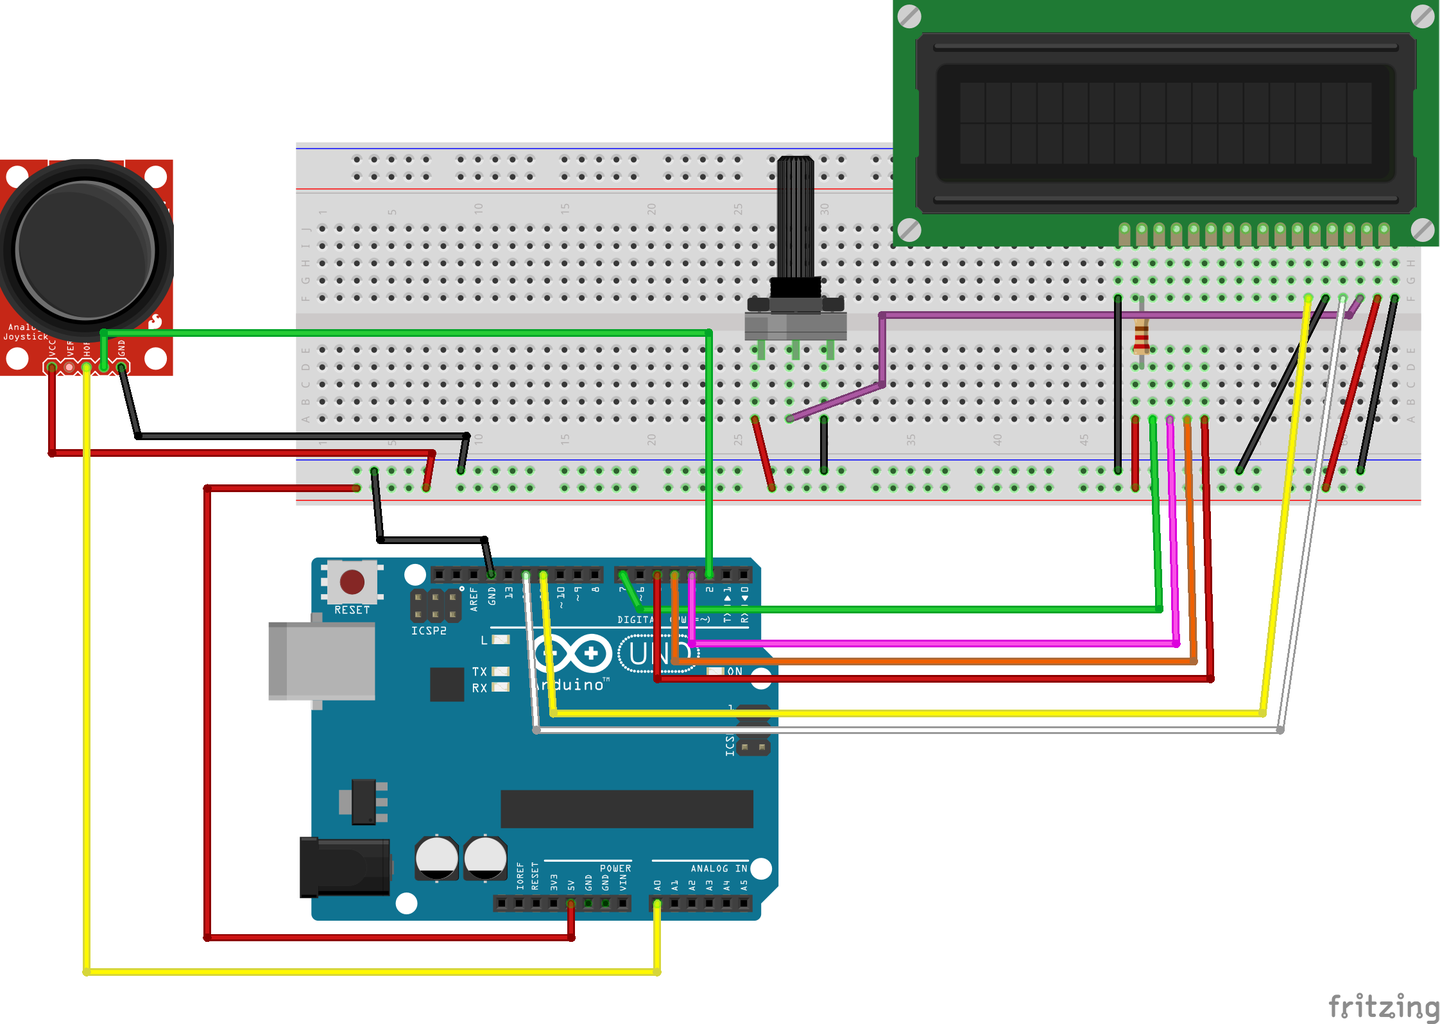
Step 1: Add an LCD Screen

1. Connect an LED screen to the breadboard
2. Connect LCD VSS pin to ground (-) on the breadboard
3. Connect LCD VDD pin to 5v (+) on the breadboard
4. Connect one end of a jumper wire to LCD V0 pin and the other end somewhere on the breadboard. This will later be connected to a potentiometer to control the contrast of the LCD screen.
5. Connect LCD RW to ground (-) on the breadboard
6. Connect LCD RS pin to digital pin 12 on the Arduino
7. Connect LCD Enable (E) pin to digital pin 11 on the Arduino
8. Connect LCD D4 pin to digital pin 4 on the Arduino
9. Connect LCD D5 pin to digital pin 5 on the Arduino
10. Connect LCD D6 pin to digital pin 6 on the Arduino
11. Connect LCD D7 pin to digital pin 7 on the Arduino
12. Connect a 220 ohm resistor to 5v (+) on the bread board
13. Connect LCD K pin to ground (-) on the bread board.
Steps 12 and 13 will power the LCD backlight
Step 2: Add a Potentiometer

1. Connect a potentiometer to the breadboard
2. Connect the left side to 5v (+)
3. Connect the right side to ground (-)
4. Connect the center pin to the other end of jumper wire that is connected to the LCD screen
Step 3: Add a Joystick

1. Connect the GND pin on the joystick to ground (-) on the breadboard
2. Connect the +5v pin to 5v(+) on the breadboard
3. Connect the VRx (x-axis) pin to analog pin 0 (A0) on the Arduino
4. Connect the SW (switch) pin to digital pin 2 on the Arduino
Step 4: Code for Keyboard
Attached is the code for running the joystick keyboard project on an Arduino Uno.


