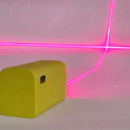
Introduction: KICKLAMP - the Easy Proximity Lamp
This is my first tutorial so please "bear" with me. I will try to be as clear as possible.
I'm going to try to show you how to build a simple yet stylish lamp/nightlight using an Arduino Nano (or any similar board) a RCWL-0516 proximity sensor and a Neopixel LED strings.
A few weeks ago, while researching sensors, I found one that apparently was both cheap and could see through certain materials. The RCWL-0516 is brand new(?) proximity sensor that uses doppler radar microwave to detect human or non human (water bottle) presense in a room, as long as they are in movement, this awesome sensor will pick it up. Jdesbonnet's Github contains more indepth informations about the RCWL-0516 jdesbonnet's RCWL-0516 Github.
To make the Kicklamp you will need some knowledge of the Arduino board environment and basic solder skills.
I'm using an Arduino Nano because I ordered a bunch a few months ago and still had some spare. It's size, plenty of GPIOs and 5V output makes it perfect for this project. I have also tested the code on a Uno and Mega, so I'm sure it will work on all similar boards.
Do not worry, if you do not have access to a 3D printer to print the diffuser. You can decrease the intensity of the light in the code to something that suits you.
To make this lamp I have used:
DESIGN:
1 x 18cm (7") Plastic craft ball (smaller or bigger, it's up to you, you can find them in any art/craft stores)
1 x 25cmX25cm (10") Pegboard
ELECTRONICS:
1 x Arduino Nano
1 x RCWL-0516 proximity sensor
1 x Neopixel string (2x 12 pixels), any size or format would work too
1 x breadboard or perfboard
1 x 1000uf Capacitor
1 x DC power connector (female)
[1 x LED + 220Ohm resistor (not really needed)]
Electric cables
TOOLS:
Hand saw
Glue gun
Soldering iron
Sandpaper of different grit size
Zipties
Step 1: Kicklamp
I called it Kicklamp because the first prototype was build in a metal pasta enclosure with a pringle top. The case made it hard for the microwave to propagate, so I physically had to pass my foot on top of it to activate it. Thus the name kicklamp.
Step 2: Prepare the Body
The design is quite simple, you will only need two pieces to build the basic Kicklamp. First get your hands on some plastic craft ball (like those for bathbombs), you can find them in most art/craft stores. Once you have one, use some sanding paper (1000) and finish with some (200) to make everything a little less scratch looking.
Take the piece of pegboard, place the sanded part of the ball on top and trace its contour. Take your handsaw and cut at least 3mm inside your initial shape, this will allow the pegboard to fit inside it without falling out.
Once you are done, let's move to the electronics.
Step 3: Connect the Internals
Either you use a breadboard or solder everything this part is up to you.
Download the fritzing file at the bottom
RCWL 0516 Connect
rcwl-0516 ---------------- arduino Nano
OUT ------------------------ Pin 8
Ground ------------------- Ground
5V ------------------------- 5V
Neopixels
Don't forget to place a 1000uf cap in between ground and power to protect your strip. You will also need a 470 Ohm resistor between the OUT pin and Pin 5 of your Nano.
Neopixels ---------------- Arduino Nano
OUT ------ 470Ohm ---- Pin 5
Ground ------------------- Ground
5V -------------------------- 5V from DC power.
Arduino Nano
Connect the DC power to your Arduino's VIN and Ground as shown in the Fritzing file and you should be good to program your it.
Attachments
Step 4: Putting It Together
This part is quite easy. Using your soldering Iron make a hole large enough to fit your DC socket. Place your breadboard or perfboard on the pegboard and use zipties to hold everything securely together. Make sure to have your RCWL-0516 placed face up or down (depending of the sensitivity you want) on the top of your pegboard. Place your neopixels LED strip anyway you want and hold them with zipties.
Step 5: Coding and Testing Your Kicklamp
Copy the following codes into the Arduino IDE of your choice and you should be good to go. I'm not a professional developer so if you have any ways to make this code better please let me know :)
/* o-o o-o o-o o-o o-o o-o o-o o-o o-o o-o o-o o-o o-o o-o o-o o-o o-o o-o o-o <br>
o  o o-O-o   o-o o  o o      O  o   o o--o      o   o  o-o    0
| /    |    /    | /  |     / \ |\ /| |   |     |   | o  /o  /|
OO     |   O     OO   |    o---o| O | O--o      o   o | / | o |
| \    |    \    | \  |    |   ||   | |          \ /  o/  o   |
o  o o-O-o   o-o o  o O---oo   oo   o o           o    o-o  o-o-o

BY ARNAUD ATCHIMON
o-o o-o o-o o-o o-o o-o o-o o-o o-o o-o o-o o-o o-o o-o o-o o-o o-o o-o o-o */
#include #include
//NEOPIXELS
#define PIN 5  // NEOPIXEL INPUT
#define PIXEL 12  //NUMBER OF PIXELS
#define BRIGHTNESS 200 // SET BRIGHTNESS
Adafruit_NeoPixel strip = Adafruit_NeoPixel(PIXEL, PIN, NEO_GRB + NEO_KHZ800);
//RADAR PIN
int  detectPin = 8;
bool detect    = false;
//CONTROL LED USE THIS IF YOU DON'T HAVE NEOPIXELS
int  led       = 13;
bool lightOn = false;
//TIMING
elapsedMillis timeElapsed; //DECLARE IT
unsigned int interval = 17000; // 1000ms = 1SEC INPUT YOUR DELAY HERE
//CHOOSE A COLOR YOU LIKE
uint8_t i = 0;
uint32_t white = strip.Color(255, 255, 255);
uint32_t white_light = strip.Color(127, 127, 127);
uint32_t red = strip.Color(255, 0, 0);
uint32_t red_half = strip.Color(127, 0, 0);
uint32_t green = strip.Color(0, 255, 0);
uint32_t green_light = strip.Color(50, 255, 50);
uint32_t green_half = strip.Color(0, 100, 0);
uint32_t blue = strip.Color(0, 0, 255);
uint32_t blue_light = strip.Color(0, 0, 150);
uint32_t red_orange = strip.Color(255, 50, 0);
uint32_t orange = strip.Color(255, 125, 0);
uint32_t orange_light = strip.Color(127, 75, 0);
uint32_t yellow = strip.Color(255, 255, 0);
uint32_t yellow_light = strip.Color(127, 127, 0);
uint32_t yellow_green = strip.Color(125, 255, 0);
uint32_t turquoise = strip.Color(0, 255, 100);
uint32_t cyan = strip.Color(0, 255, 255);
uint32_t cyan_light = strip.Color(0, 127, 127);
uint32_t cyan_blue = strip.Color(0, 100, 255);
uint32_t violet = strip.Color(100, 0, 255);
uint32_t pinky = strip.Color(252, 128, 128);
uint32_t magenta = strip.Color(255, 0, 255);
uint32_t raspberry = strip.Color(255, 0, 100);
//TEST YOUR NEOPIXELS
void ledDemo() { // USE THIS TO TEST YOUR NEOPIXELS
  simplewave_backward(i, 45);
  simplewave_backward(red, 45);
  simplewave_backward(green, 45);
  simplewave_backward(blue, 45);
  simplewave_forward(red, 45);
  simplewave_forward(green, 45);
  simplewave_forward(blue, 45);
  simplewave_forward(i, 45);
  strip.show();
}
void setup() {
Serial.begin(115200);
Serial.println(" KICKLAMP V01");
//RADAR
pinMode (detectPin, INPUT);
//CONTROL LED
pinMode (led, OUTPUT);
//NEOPIXEL
strip.setBrightness(BRIGHTNESS);
strip.begin();
strip.show(); // Initialize all pixels to 'off'
//ledDemo();}//END SETUP
void loop() {
  detect = digitalRead(detectPin);
  //Serial.println(timeElapsed); // PRINT TIMING // COMMENT IT IF NOT NEEDED
if (detect == true) {
digitalWrite(led, HIGH);
lightOn = true;
Serial.println(" bloop "); //GETTING A BLOOP WHEN YOU'RE DETECTED
}
if (lightOn == true) {
simplewave_forward(white, 25);
} if (detect == false) {
digitalWrite(led, LOW);
Serial.println(" ");// CLEAN SERIAL // COMMENT IT IF NOT NEEDED
lightOn = false;
}
if (lightOn == false) {
if (timeElapsed > interval)
{
simplewave_backward(i, 15);
timeElapsed = 0; // RESET COUNTER
}
}delay(100); }//END LOOP
//BACKWARD AND FORWARD NEOPIXEL PROGRESSION
void simplewave_forward(uint32_t pixelColor, int wait)
{
  uint8_t r = (uint8_t)(pixelColor >> 16);
  uint8_t g = (uint8_t)(pixelColor >> 8);
  uint8_t b = (uint8_t)pixelColor;
for (uint16_t i = 0; i < strip.numPixels(); i++)
{
strip.setPixelColor(i, r, g, b);
strip.show();
delay(wait);
}
}//SIMPLE FORWARD LOOPvoid simplewave_backward(uint32_t pixelColor, int wait)
{
uint8_t r = (uint8_t)(pixelColor >> 16);
uint8_t g = (uint8_t)(pixelColor >> 8);
uint8_t b = (uint8_t)pixelColor;
uint16_t i = strip.numPixels(); for (i; i > 0; i--)
{
strip.setPixelColor(i - 1, r, g, b);
strip.show();
delay(wait);
}
}//SIMPLE BACKWARD LOOPArduino file
Edit: you will also need the Elapsed Millis library
Download Kicklamp.ino
Attachments
Step 6: Optional: Diffuser
If you have access to a 3D printer, you can print this diffuser to make the lights refract differently and give a softer light.
PRINT SETUP:
Layer Height: 0.2
Speed: 60mms
Temperature: 210 degrees
Infill: 20%
Download Kicklamp Diffuser:
Attachments
Step 7: Your Kicklamp Is Done
You should now have a working Kicklamp.
This is my first Instructables, please leave me a comment if you find any errors or know a better way to build it.
Show me what you're building :)

Participated in the
First Time Author Contest


