

Introduction: LCD - Arduino Interfacing


LCD(Liquid Crystal Display) is one of the most attractive things in a project because it is one of the ways to display information from the micro controller to the user, let alone the serial monitor. In the beginning interfacing an LCD to an Arduino might be confusing as it involves a lot of connections. But Arduino has special libraries which make the coding part for the LCD a lot easier.
In this Instructable, I'll show you how to interface a 16x2 LCD with Arduino Uno and Display some words on it.
Step 1: Components Required


For this project you will need :
- Arduino Uno.
- 16x2 LCD.
- 5k pot.
- Hook-Up wires.
- Bread Board.
Step 2: About the LCD

LCD stands for liquid crystal display. Character and graphical LCDs are most common among hobbyist and DIY electronics circuit/project makers. These are a great way to display the sensor data or any messages to the user.
Out of the box, the LCD will not have any pins connected to it. So, you'll have to manually solder 16 Male Header Pins to the LCD. Once You're done with that, You're ready to roll.
All character LCDs have:
- Eight(8) data pins D0-D7
- Vcc (Apply +5 volt here)
- Gnd (Ground this pin)
- Rc (Register select)
- Rw (read - write)
- En (Enable)
- V0 (Set Lcd contrast)
Step 3: Connections


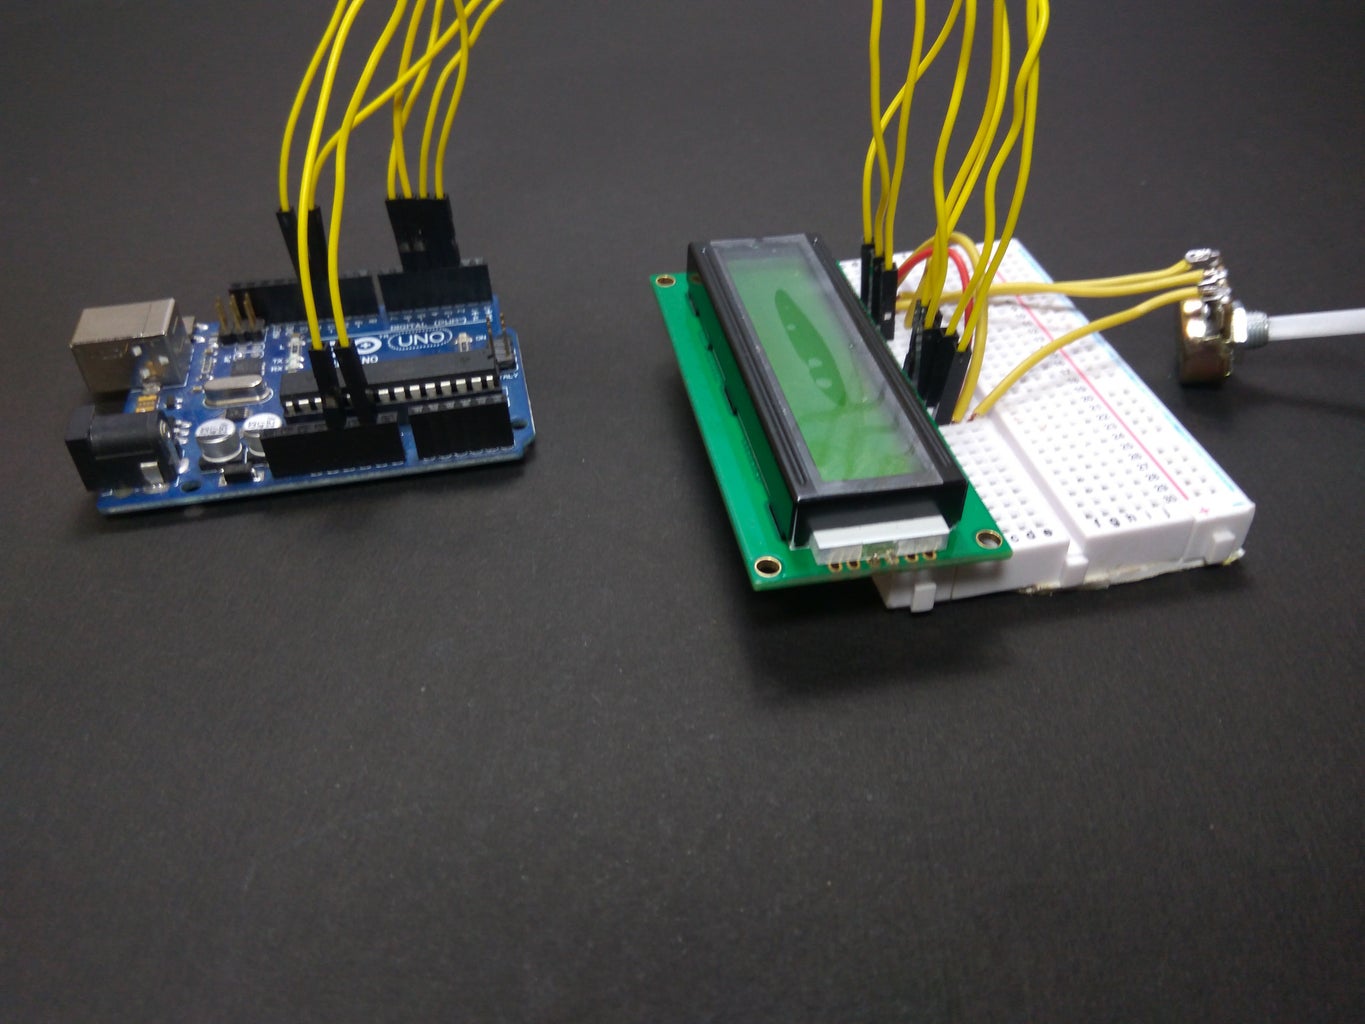
Follow the Circuit Schematics and make the connections with the help of hook up wires.
The circuit:
- LCD RS pin to digital pin 12
- LCD Enable pin to digital pin 11
- LCD D4 pin to digital pin 5
- LCD D5 pin to digital pin 4
- LCD D6 pin to digital pin 3
- LCD D7 pin to digital pin 2
- LCD R/W pin to ground
- ends to +5V and ground via 5k pot
- wiper to LCD VO pin (pin 3)
Note: ThePot can be rotated to adjust the contrast of the LCD
Step 4: Code
There are a lot of examples available in the Arduino LiquidCrystal library. You can find it in the examples section in the IDE.
#include <liquidcrystal.h>

// initialize the library with the numbers of the interface pins
LiquidCrystal lcd(12, 11, 5, 4, 3, 2);

void setup() {
  // set up the LCD's number of columns and rows:
  lcd.begin(16, 2);
  // Print a message to the LCD.
  lcd.print("hello, world!");
}

void loop() {
  // Turn on the display:
  lcd.display();
  delay(500);
}
Step 5: The Output


Once you've written and uploaded the code on to the Arduino, you will see the LCD Display your message. You can also get creative and write some animations to be displayed on the screen like I've shown here.
The process of connecting an LCD to an Arduino is tedious. To make it easier , there are few circuits available . I'll show you how to use them in another Instructable.
That's All Folks !!! Stay Tuned for More !!

Participated in the
Makerspace Contest 2017


