

Introduction: LED Beating IPhone Case


Hey guys! I'm back, but now I'm back with style! I was recently thinking on a way to make a new phone case using a 3d printer but that wasn't enough I thought. What if I added leds? That blinked along to the music?? That would be Awesome!!! So I actually got the inspiration from Pop Sci's book The Big Book Of Hacks and found it on Instructables too, right here from motadacruz!! Lets get started!!
Step 1: STL Files
The first thing I did was design the case, though this is not perfect due to the scaling being off while it exported. I can provide the files in any format for you guys, just leave a comment.
Because of the scaling problem the 3d printing software has a scaling option and the dimensions (mm) L,W,H are..
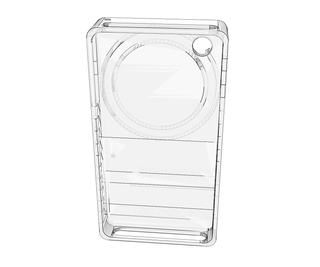
Case- 65x31x120
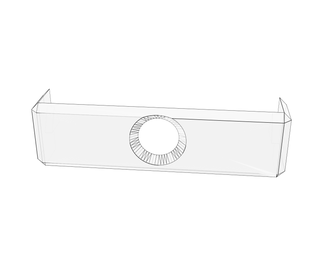
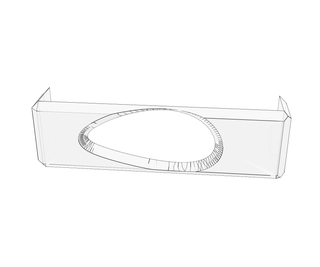
Home Button- 62x12x20
Camera- 62x12x20
* If you are within a 2mm tolerance you should be fine.
Step 2: Printed Pieces


These were the finished pieces, only the case printed with support.
*After the print I realized that the left side of the camera piece was in the way of the silencer so I snapped it off.
Step 3: Electronics

The electronics needed are fairly simple to get and can be bought at any electronics store like RadioShack
9v battery
TIP 31 transistor
Small speaker
Aux cord
2 LEDs
Step 4: LEDs


First I Soldered the 2 LEDs together and snapped them into place on the top.
Step 5: Transistors and Battery Attachments


Next I glued the tip transistor into its designated corner. After this solder the 9v battery clip onto the LEDs and TIP transistor. (Positive to the positive side of the LEDs and the Negative to the right lead of the transistor.)
When you are done solder the middle of the transistor to the negative lead of the LEDs
Step 6: AUX and Speakers


I was trying to get an aux cord but for some reason they all have cotton on the inside of them so I gutted it down to the bare minimum and worked from there. So solder the positive side of the speaker to the left side of the transistor and than the negative side to the right. To save wire and space I snipped the rubber off right in the middle of the speaker cord. When you are done with that solder the speaker wires to the aux cord.
Step 7: Glue on the Speaker


After plugging in my phone to make sure it actually works (it did), I hot glued the speaker to the left of the transistor. When you have done this glue the camera piece into place so you can slip your phone in and out. I did not glue the button piece in place as it snaps on and off.
Step 8: Finished Product!


Though this case may not protect my case very well it looks beast! I was thinking of adding a cover but you know you kinda have to show off all of your hard work. And as a side note the side railing on the volume control side fell off, it didn't effect performance. The LEDs blink and though the speaker is not perfect, you can help its output by changing the EQ of the music. Settings> Music> EQ. Have fun, add an infinity mirror, or what ever but style it to express you!
Step 9: The Videos
Here are the videos, and though you cant see the LEDs beat too well (due to the light), they will beat with a stronger beat or maybe even more voltage, I hope everyone enjoys!
Attachments


Participated in the
Remix Contest

Participated in the
Tech Contest


