

Introduction: L.E.D. Pallet Wood Garden Arch for Climbing Plants

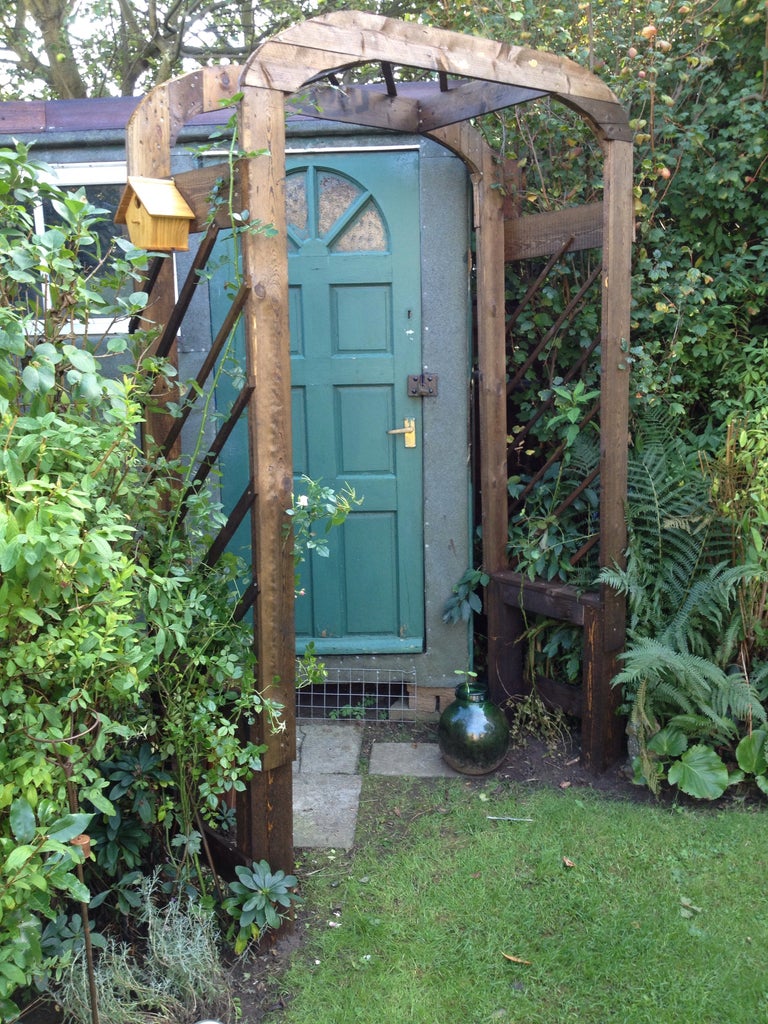


My wife decided that I was to make a new arch for my climbing roses. We used to have a cheap tubular steel one but this lasted a year before it needed to be recycled. Obviously my wife didn't want to make it too easy for me, so she decided she didn't want a rectangular frame with curved corners inside just a curved frame, oh and I had to use my pallet wood and off cuts to make it.
Step 1: Build Base Structure


Firstly I built a base for my arch. I deliberately over engineered this using chunky fence post off cuts. I measured the width I required, cut to size using a chop saw, remember to wear goggles and ear protection. I then screwed three chunky pieces together and added some pallet wood further down to help support the structure. Treat this frame with your choice of wood preservative, I would recommend at least two coats. I used creosote, if you use this wear gloves. Once this is dry, dig the holes where you want it placed, these need to be quite deep. Place the two side in their holes, lay a plant of wood across the top of each and place a spirit level on top to check its level. Adjust holes accordingly. Using a tape measure, check that the lengths across the entire front and make sure it matches the length across the back. This will help ensure your base is square. Mix some dry sand and cement and place in the holes around wooden supports, compact this by hitting it into place using a hammer or piece of wood. Repeat until hole in nearly full, then cover with a bit of soil. Over time this will set and secure base in place.
Step 2: Top Arch and Main Frame

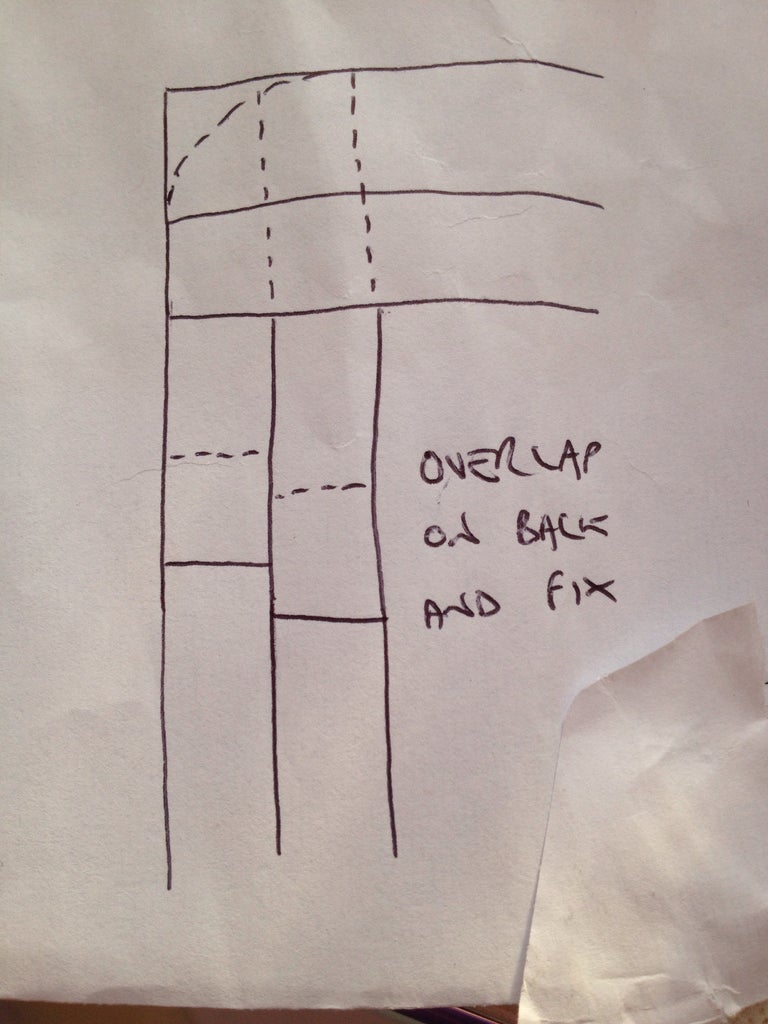
This was the trickiest part, in hindsight I should have waited until I got some wider pieces of wood. However the way I done it was to lay two pieces of wood horizontally, draw the desired curve on and cut out using a jigsaw. Then using the pieces I cut off as a template draw the curve onto the other side at the desired width and again cut out. Once this was done I layer two vertical pieces of wood behind the cures and screwed them together. I then cut off the excess to leave just a curved edge. Because I used more than one piece of wood to gain the desired thickness this was quite fiddly and fragile so I added additional supports to the back. If using wider wood this would not be needed. Then you need to decide on the height you need remember to consider the height of the base it will be fixed onto. I needed mine quite high to allow my shed door open. Measure the size of pieces you will need and cut to size, do this double thickness of planks and overlap to support each other. Screw in place and repeat for the other side. At the bottom of each allow approx 20cm to be single thickness to allow for fixing to base. You should now have one curved side, repeat to make other side.
Step 3: Add Cross Pieces


To join the two arches together measure the width of the base structure. Add the thickness of the wood you made your curved piece in the previous step x2 for both sides. Cut some pallet wood pieces to length, you will need at least 6. Measure from the base of the frame how heigh you want the bottom piece and screw in place onto the outside of the frame. Leave a 1m gap approx and screw the second piece in place. You should now have two cross pieces on one side. Repeat for other side, making sure to use the same measurements. You now need to measure the gap between the two sides of the frame and cut the remaining two pieces to length. These will fit into the top, approx 1m apart vertically between the frame, then screw in place.
Step 4: Add Diagonals


Using some thin pieces of wood I had lying around screw one piece loosely into frame set to your desired angle and the screw in other side, tighten first screw. Alternatively you may need to cut some pieces to your desired thickness. I used a 45 degree set square to set angle. Get a wide piece of wood to use as a spacer, lay the next diagonal piece along side and screw into place. Repeat until area is covered. Then using a saw trim the diagonals to length. Repeat entire process on other side and top section.
Step 5: Treat Wood
Treat frame with your choice of wood preservative, I used creosote and gave it two coats. This will prevent the wood rotting and help your arch to last.
Step 6: Assemble


Lift main frame onto base and screw in place to secure. Plant your climber at base and as they grow thread through frame. I wanted the arch to light up so I wrapped some Christmas lights around the frame. Originally I wanted to use solar lights but the ones I had didn't get enough light in that position so I then tried a rope light but these stood out too much for me. Finally I settled for some that look like berries. Thanks for looking at this project.

Participated in the
Lamps and Lighting Contest 2016

Participated in the
Backyard Contest 2016

Participated in the
LED Contest


