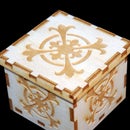
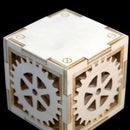
Introduction: Laser Cut Steampunk Lantern (2.75")
I have always liked the Steampunk aesthetic, dating back decades before it was labelled as such. Thus, many of my projects will reflect the same theme.
For this, my second Instructable, I give you a 2 3/4" Steampunk Lantern. Please use this project for personal, non-commercial use only.
Step 1: Materials/Tools List
- Cut file and Access to a Laser Cutter. I utilize a 50 watt laser using Adobe Illustrator, so the file I created is .ai format and color-coded for the laser's software.
- One 12" x 12" sheet of 1/8" (3mm) thick Craft Plywood or MDF
- Wood Glue or Superglue
- 120 Grit Sand Paper
- Masking or Clear Tape
- Orange Hand Cleaner
- An Old Toothbrush
- Paper Towels or a Shop Cloth
- Four small binder clips (optional)
Attachments
Step 2: Parts Inspection and Cleaning
You should have a total of eight pieces: four sides, the lid, inner lid panel, handle and the bottom (with my seal and copyright).
Inspect all of the parts for problems with the material. Whether plywood or MDF, my experience is that the parts are sticky, especially the edges, and I usually wait a day until the sap/resins dry.
Clean the edges of all the pieces with a Shop Cloth or Paper Towel dabbed in Orange Hand Cleaner. Any burn marks on the surface will be removed when you sand the parts.
The Hand Cleaner will leave some residue behind, so blot it off with a damp cloth or paper towel so the residue will not interfere with the finish later. Don't use too wet a cloth or it will cause the wood grain/MDF to swell and possibly warp your parts.
Step 3: Dry-Fit the Parts Together
When all of the parts have been cleaned and are dry, try dry-fitting them together. Dry-fitting reveals two things: 1) whether or not all of the tabs/slots and finger joints fit or need enlarging, and 2) If the parts fit together thickness-wise.
As I've mentioned before, even if the plywood is labeled as 1/8"/3mm thick, it is often times thicker, in my experience. How much the thickness is off depends on the manufacturer. So dry-fitting will help you determine how much surface area you need to remove (if any).
MDF is usually more accurately labeled, but I recommend it only if you plan on doing a metallic finish as it will give you a smoother surface than wood.
Step 4: The Lid
The lid of this project is designed to self-align the parts to be centered. Slip the handle through the slot in the Lid (the larger piece) until the small tab at the handle's bottom comes through. Then slip the smaller lid panel over the small tab. The pieces of the lid should all be flush and centered.
Step 5: Like Sands Through the Hourglass...
Sanding is tedious but necessary. If you find that you are lucky enough to only need to lightly sand, good for you! I usually don't find it to be the case.
In case you're wondering why I don't modify the plans to allow for variations in the thickness of material (wood especially), I have found that there is so much variation from different manufacturers and even from batch-to-batch that I'd be forever changing the file. So I chose 1/8" because it's the closest thickness and when working with MDF, that material is usually really 1/8".
If your material is a bit too thick and you have to sand the material thinner, sand equally from the front and back surfaces and make sure to keep checking the fit as you go.
If you choose to use an orbital sander, make sure you have a steady hand and a very strong grip to avoid accidentally sanding off your finger tips. It's usually safest to hand sand the surfaces by laying a whole sheet of sandpaper on a flat surface and sliding the material back-and-forth on it.
Step 6: Stuck With Each Other
Once the surfaces are all sanded and the parts fit together nicely, use an old toothbrush to clean all of the sanding dust off of the parts.
Note: I prefer to use wood glue to glue wood, but have had no luck with any kind of glue holding MDF together except Superglue. As mentioned in my first Instructable, if you plan on staining your wooden box later with wood stain, any drips of wood glue can be chipped off or sanded away after it dries; Superglue tends to spread into the surface and can act as a barrier that doesn't allow stain to penetrate properly. So for Superglue, I recommend Thick or Medium, at the very least, to minimize the threat of soaking into the surface.
Start by gluing one of the sides to the bottom and using a piece of masking or clear tape to hold it in place. Now add the next interlocking side and tape it to the bottom and the previously glued side. Repeat for the remaining sides, securing with tape to hold the pieces together while the glue dries. If you're using Superglue, you will simply hold each piece in place until the glue sets (around 10 seconds).
Step 7: Gluing the Lid
For this demo I am using Superglue to glue the lid together. There's no particular reason, I just did it for variety :)
Spread your glue onto the small lid panel and the side of the stair-stepped tab at the bottom of the handle and assemble as you did during the dry-fitting stage.
I use binder clips to hold the pieces together and to keep them flat, but you could lay the lid on a flat surface and put something heavy on either side of the handle to hold it all together and flat.
Step 8: Ta-Da!
Now that you've completed the assembly of your Steampunk Lantern, you can decide if you want to paint it, stain it or just varnish the wood! If there is enough interest, I will add tutorials on different finishing techniques, from metallic faux finishes to stained and varnished wood finishes.
This project was designed specifically for use as a Lantern/Tea Light (battery-operated ONLY; no open flames), but it could be filled with potpourri if you like that kind of thing. Once you've made it, what you do with it is up to you! As always, just be safe and have fun with it!

Participated in the
Wood Contest 2016

Participated in the
Makerspace Contest


