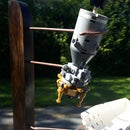
Introduction: Luke Skywalker Lightsaber Prop Turned on a Lathe
I've build a couple of lathes, (my viking pole lathe and this one) and have been turning out some fun projects. Before anyone asks, there's no instructable on this particular lathe itself since all the photos I had taken, during it's construction, were lost in a horrible memory card accident. (I lost it). With that said, there's plenty of fun to be had being creative with the lathe.
This project actually started off as a prop, for a friend, to use as a Comicon costume accessory. It was originally supposed to be painted in metallic silver and copper, but after seeing the basswood grain, I couldn't do that. More importantly, and unfortunately for my friend, I like it too much to give it up so there is a second one, in the works that I'll do my best to not get overly attached to.
This is the lightsaber that's used by Luke Skywalker in the movie 'Return of the Jedi' and is, by far, one of my favorites. It also presented the biggest challenge for me and my homemade lathe. There are tons of lines and contours in the ROTJ lightsaber that aren't present in many of the other movies that make it completely unique, but most of all, for me, it's one of the most iconic ones in the Star Wars universe.
As mentioned before, the lightsaber was turned out of basswood and incorporates all of the abstract elements, but omits some of the finer details such as the belt ring, and the smaller aspects of the switch. There were two reasons for this. The first is that I didn't want any metal parts on it. Its construction had to be completely out of wood, and secondly, there are so many variant details relating to the switch that I opted, instead, to keep it simple and aesthetic.
Step 1: Tools and Supplies
Tools;
- Wood Lathe with chisels
- Router
- Coping saw
- Belt sander (optional)
- Table Saw (optional but useful)
- Utility knife
- Drill press or Hand drill with bits
Supplies;
- Hardwood 1.5" square x 12" long
- Sandpaper
- Almond/castor/linseed oil
- Wood Glue
Step 2: The Design
90% of the lightsaber would be fabricated on the lathe, so to start, I created a template. Now unfortunately, the basswood I used was recycled, and had some defects, so I wasn't able to create the lightsaber out of one solid piece. Instead, I decided to create it in three sections, using sockets to put them together. Initially, it was supposed to be in two sections, however, there was a measuring mistake, and instead of throwing out the work I'd finished, I decided to keep the front section and create the mid section separately. The notching on the pommel and the button block would be added later.
**Note** I have to warn you, other than measuring for the sockets, and to ensure thicknesses were consistent, this project is mostly freehand, based on visuals of the original lightsaber. Essentially, every other 'ring' is based on the width of the pommel so its overall length of 10" is subjectively based on that.
Step 3: The Handle
Common sense dictates that it's easier to remove material than it is to put it back, so I had to locate the tallest part on the handle. The overall width of my blank was roughly 1.5" and, based on my diagram, the pommel was the highest point. I began by reducing the area around it leaving the pommel proud, and beveling both sides of it using the parting tool to create a crisp edge, with the gouge and round point removing the bulk of the material. Next highest piece was the tubular section next to the pommel. I reduced the entire length of the blank 1/16" giving it a crisp edge with the parting tool.
Now, I began working from the other end. I drew out lines for the 9 sections and the gaps between them. Using the parting tool, I reduced the material between them, and gave them a definitive V shape with the diamond point.
Finally, using 100 grit sandpaper, I cleaned up the surface and inside the grooves. I repeated the process using 220 grit. Sanding can be done quite easily by cutting a strip of sandpaper, and with the lathe running, draping it over your work piece. It's much easier than sanding by hand as the machine does all of the work for you.
Step 4: The Mid Section
As mentioned before, the mid and front sections were supposed to be created together, but a slip on the locking screw on my vernier caliper and the entire piece would either have to be redone, or changed to three sections. Instead, decided to create a tapered socket that was .497" thick (the size of my largest bit) that would be inserted into the handle.
I began the same way as I did with the handle by locating the highest point and working downward from there. I used the parting took to give it nice crisp edges then either a gouge or a round point to remove the bulk of material.
Again, as before, I sanded with progressively lower grits. Finally, removed the excess material using a coping saw.
**NOTE** When reducing material to a required size, you can use your vernier caliper to 'score' the material showing you how much you need to remove. There are special calipers that are used in lathe work and that have bladed edges for scoring, however a modern vernier works quite well.
Step 5: The Business End
As you can see, there was a mid section originally incorporated into this piece which was omitted when I failed to check the measurement on my vernier caliper. It wasn't a great loss as the front section turned out perfectly, and only the mid section needed to be redone.
The same principal applies to height when working on the front as with the other two sections. Material is removed from the highest section to the lowest. Again, a .497" socket was created.
After it was removed from the lathe, I cut off any extra material using my coping saw.
Step 6: Drilling the Sockets
Why did I choose to create a .497" socket? Because it's the largest drill bit I own before having to use a spade or forstner bit. Even though this lightsaber wouldn't be used, I wanted the sockets to be quite strong and unnoticeable. For the handle, I clamped a board across the platform of the press, then clamped the handle to the board which held it steady as I reamed the hole. I used a rubberized clamp instead of the metal press clamp so as not to damage the handle. My lathe is homemade, and doesn't have facilities to drill (yet) and so this step needed to be taken separately.
For the mid section, it's post made it difficult to clamp. Fortunately, the post fit perfectly into the base of my drill press which lined up exactly with the drill bit so no additional clamping was required. I drilled the hole in the handle 1" deep and the mid section 3/4".
For the opening in the tip, I used a 3/4" forstner bit to hollow it out, using the same hole in the platform of the drill press to hold it steady. There's no picture of this, unfortunately as it turns out I didn't take one, but it's method is really no different than drilling the others.
Step 7: Joining the Sections
Before joining the sections, I flattened them using the rotary wheel on my bench sander. This would allow a perfect fit without any gaps between the joints. I was careful not to remove too much material as it would alter the dimensions of the sockets ruining the symmetry of the lightsaber.
When all the surfaces were ready, I filled the socket with glue and inserted the pieces using a wood mallet to tap them into place.. Clamping wasn't necessary, as the sockets were a tight fit, however, I lay the entire assembly on a table, ensuring that all sections were centered and lined up properly. This is the same technique I use when installing field points on arrows.
Step 8: The Pommel
To do the notches on the pommel, I opted to use my router. Without having a way to brace the piece, it can be a bit tricky, and potentially hazardous to your fingers, but I've done this before and was completely confident. The bit was extremely sharp, and I wasn't worried about it bucking at all. In fact, I had to be careful not to remove too much since there was very little friction and cutting was barely noticeable. If you're not confident enough to do this, I suggest creating a jig that will keep your hands well away from the spinning blade. Clamping it to an L shaped board, should work and shouldn't slip on you. If you don't have a router, you can perform this action using a rotary tool with a micro sanding drum.
Before you start, you need to mark out the six evenly spaced notch positions on the pommel. Then carefully, remove the material to the depth of the two depressions on either side of it. My router bit had a bearing on it that would stop it when it met with the lower edge, preventing me from cutting too deep, but if you're using a rotary tool, you'll need to take care not to dimple it.
Step 9: The Switch
On the ROTJ lightsaber, there is a grill cover on the top of the button switch. I didn't have facilities to cut it out, so I omitted it, instead using a file to create two grooves down its length. I may add it later (as soon as I figure out how to create it cleanly) but for now, I opted to keep it simple.
The block for the switch was roughly 3/8" high x 3/8" wide by 1.5" long, I used a drum sander that was roughly the diameter of my lightsaber to concave one surface of it. This surface would be glued to the body of the saber itself. Once the block was complete, I glued and clamped it in place.
Step 10: Finished
Some light sanding with 220 grit paper, and some almond oil brought out the grain of the wood nicely. I finished it off with my polish which you can find here; High grade beeswax polish.
That's it. You're done. As usual, thanks for following and I hope you enjoyed the instructable.

Participated in the
Reuse Contest


