

Introduction: MINI IRONING BOARD


Anyone who has ever ironed a shirt knows how hard it is to iron those little spots like the shirt shoulders and cuffs. I made this little mini ironing board to use in conjunction with a regular ironing board; not to replace it. I set it on the big ironing board as needed. I can slide a sleeve or pant leg onto the small end and iron the complete sleeve by rotating it. My wife and I don't use it much now as we buy cotton / polyester blends that require less ironing, but my grandson recently brought over a 100% cotton dress shirt that needed major help from an experienced Grandma with an iron and her little "MINI IRONING BOARD".
Step 1: Parts Needed


I made this mini ironing board in the 1970's out of an old doghouse I no longer needed. I made it specifically to use in my business of making, selling and hanging window draperies. Sorry I cannot provide photos of the doghouse, but I did make it 46 years ago, long before the internet and Instructables.
1 - 1x6" board 18" long for base.
1 - 1x4" board 22" long for top
1 - 2x4" board 10" long for spacer
A jig saw or band saw
A belt sander
8 to 12 - 2" screws, w/countersunk heads
Drill and bit to drill holes for screws
A countersink taper bit
Wood filler to cover countersunk screws
8" x 26" pieces of fabric and pad to cover top. I used an old insulated ironing board cover that had a hole in the end, but the part i used was like new. The pad is some quilt batting I had.
Air or electric powered stapler & 3/8" staples
Sandpaper of various grits
Stain (if desired)
Clear spray sealer / paint (if desired)
Step 2: Dimensions


BASE = 17" x .75" x 5.5" (a 17" 1x6)
Cut the base and round the corners. Round all edges and sand smooth. Round the TOP of this board more severely than the BOTTOM of it. You don't want it snagging the big ironing board cover or the clothing you are ironing.
TOP = 22" x .75" x 3.75" (a 22' 1x4)
Cut the top. Taper the front to 3" wide. Round all edges and sand smooth. Round the BOTTOM of this board more severely than the TOP of it.
SPACER = 10" x 3.75" x 1.75" (a 10" 2x4
Refer to photos. This piece needs to have a lot of the center section removed so that shirt sleeves can be slid onto the tapered end of the top as far aa possible.
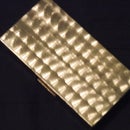
Step 3: Stapling on the Fabric


Any time you staple fabric, start in the middle on the longest side and work out, stretching towards the ends. See the drawing. Consecutive number show how to get cover tight. After these staples are set, you can go back between them, stretch and install more staples.
Hey guys, make one for your wife. She'll appreciate the one you make for the next 46 years too.
I hope this helps someone. It has been a useful tool in our family since I made it in the 1970's.

Participated in the
Reclaimed Wood Contest 2016


