

Introduction: Macintosh Classic II Color Hackintosh


Mac Classic II (M4150 built in 1992), The story of a Classic II Hackintosh.
I came into possession of a vintage 1992 Mac Classic II and thought it would make a great conversion. After a long time of searching for the correct sized LCD panel to replace the tube, I started this project. The physical build is complete, just some minor software fine tuning before I call it golden. There are over 60 photos in this guide, if there is something you don't see, let me know and I will try to add it.
Project Goals:
- Minimal physical appearance changes (Don't mod the case too much)
- Additional features (IR, wifi, BT, Ethernet, HDMI, etc)
- Retain some Classic features
Things my Classic II will NOT have that the original did have:
- Printer Serial port
- PhoneLink Serial port -SCSI port
- Floppy port
- Floppy disk drive
- Internal Speaker
- Power-On from the Keyboard
- Black and White Cathode Ray Tube
- 40Mb Quantum SCSI Hard Drive
Things my Classic Conversion WILL have that the original did not have:
- Apple IR sensor (apple remote)
- 1024x768 Color LCD backlight screen
- LCD IR sensor (remote power of LCD screen)
- 2x USB 3.0 on the front
- 2x USB 2.0 on the rear
- HDMI output (mirror or extend)
- HDMI input (to internal LCD only, no capture capability)
- Wifi (internal and external antennas) -Bluetooth (internal antenna)
- Wired Ethernet
- 2.5 128Gb internal SSD boot drive
- 2.5 500Gb internal Hard Drive
- 3.5 3TB internal Hard Drive
- macOS Catalina 10.15.4
- Mac OS 9 emulation through SheepShaver
- System 7.5 emulation through Basilisk II
- System 6 emulation through Mini vMac
Ports that stayed the same:
- Audio input
- Audio output
- Apple ADB keyboard/mouse port
- Power plug -Reset/Interrupt on the left side
What's inside for other components:
- Intel Mini-ITX DH61DL motherboard (circa 2013) LGA1155, 3 Sata, 1 mPCIE, 1 PCIE 2.0 x 1 (short slot)
- Intel i7-3770 3.4GHz -SolidGear 350W Flex PSU
- low profile CPU cooler
- SilverStone FW81 fan to suck in air from the bottom of the case
- 2x8Gb Kingston PC3-12800U RAM
- Apple BCM94331CD 802.11 a/b/g/n with Bluetooth 4.0
- 8.0inch 1024x768 LCD (LED backlight)
- multi-input LCD driver board (accepts VGA/HDMI/composite1+2), on screen menu, IR remote control
- Apple IR sensor connected to internal USB
- Drakware ADB2USB adapter https://drakware.com/product/ADB2USB
- PCIe mining riser 1x to 16x
Parts I had to 3D print:
- LCD mounting frame
- LCD Controller Board mount to add to the back of the LCD
- Fan shroud for fresh air intake
- LCD panel button control
Supplies
- Lots of computer parts
- Common hand tools
- Some power tools
- A whole lot of free time
Step 1: Preliminary Thoughts


I don't like to dive right in. I think there is a time for thinking and dreaming, and then things need to fall in place. I have seen many Mac SE/Classic conversions, including PC components, iPads, and even Raspberry Pi. I decided to use a Mini-ITX the was destined for a G4 Cube project instead. Since I didn't want to cut the case for the IO panel, I had to decide how to fit all my ports in the same space. Thus I built a new interior panel to mount all my ports onto, and built my own internal frame to hold all the components.
I figured I could either sell the A- quality guts on eBay, or make an acrylic case to show off the old guts. Originally the Classic II fired up fine, but before disassembly I got the dreaded checkerboard, which means I will have to replace the motherboard capacitors to get it working again. I will post that Instructable when I get it done in the future.
I have successfully installed High Sierra 10.13.6 on my replacement parts on an open bench (no proper grounding). Since it has an NVIDIA card, I initially did not want to install Mojave or Catalina, because of lack of drivers. Later in the process, I found that the GT730 card was a Kepler device and it did in fact work in Catalina, so this box will boot in High Sierra or Catalina. The reason for dual boot is the IR remote... somehow Apple botched the IR remote support in Catalina, so to run something like iTunes or Kodi, I will have to boot in High Sierra.
Step 2: The Build


Gut the old
There are only 4 screws on the back of the Classic II that hold the case together. Two on the bottom near the ports, and two on the top near the built in handle. Removal of the two near the handle require a longer tool to reach in the deep sockets. Once the screws are removed, it was a little difficult prying the front panel from the rear. I am not sure if it is designed that way or if it was the age of the plastic. Essentially the internals are mounted on a frame and screwed to the front panel, so the back is just a cover.
I think there are other Instructables on how to cut the front glass off the old tube, but I wanted to save that as it still worked. There are also Instructables on how to properly melt a piece of transparent material to fit the curve (I failed several times). Mine is far from perfect, but works just fine.
Find a screen
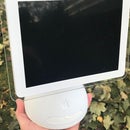
I searched around and found others who have done a similar mod. There are really no high definition panels out there in this small of a size. I suppose an iPad mini with retina display at 7.9 inches would be high resolution, but good luck finding a driver for it. The best I could find was 8.0 inches at 1024x768. There are plenty of 800x600, but I wanted the best I could find. I could not find anything between 8 and 9, as 8.7 would have been optimal. The 1994 Color Classic had a 10" CRT with 512x384 resolution. The Classic II had 9" monochrome CRT 512x342. My mod has a smaller screen and 4x the pixels.
The screen I chose was off eBay, a kit with LVDS driver board. When I received it, initially it worked great, then it fizzled out. I think it was a bad driver board, so I ordered a separate replacement, and it failed to work as well. I then thought it was possibly the screen so I ordered a 2nd screen. The 2nd one was dim, so I ordered a 3rd screen. Still dim, so ordered a 3rd board, different design. Screen one was confirmed dead, screen 2 and 3 worked fine with board 3. Lots of waste on this project, SMH.
The driver board supports multiple inputs (VGA, HDMI, composite 1 and 2). There are on screen controls to adjust the typical LCD monitor and the original controller came with an IR remote as well as a control panel. The 3rd driver board did not have the IR sensor mounted, so I stole it from the first fried controller. Since the original Classic II had tube monitor adjustments hidden on the rear behind a detachable panel, I thought that was the ideal place to put this screen control panel as well. I had to design and 3D print an interface panel, and figure out how to mount it, and then cut out a hole for it in the back case. I could not see the button icons when printed in black, so I printed them in white for the contrast. The internal VGA out from the GT730 drives the LCD VGA input. The HDMI input is directed to the rear panel so this Classic II can be used as an external monitor (just a pure goofy effect). The HDMI from the GT730 goes to the rear panel so you can drive an external monitor with this Hackintosh (think HTPC in the living room, or large desktop monitor).
Step 3: Frame It


Determine the ports
The DH61DL has two USB3.0 ports on the rear panel and two USB2.0 ports. It has 3 additional dual USB2.0 headers. The PCI Express 2.0 x1 is short, so I needed a mining USB riser to get a longer slot. The motherboard also has a serial and parallel port, but who uses those nowadays, so keeping the motherboard completely internal and using extender cables was my route to maintain the case integrity. The only mod to the back cover is that the Ethernet port is a little too large for the old phone port, so a little bit of filing gave me enough room for the wired Ethernet.
Design the interior layout
The HD61DL has only two fan headers, so one for the CPU cooler and a case fan that will suck air from the bottom of the frame. This is the original design of the Classic II, having a fan pull fresh air from the bottom. I decided to install the motherboard vertically, with the ports facing the bottom, so the extension cables would have the shortest path to the exterior port panel. I left enough space for a 3.5in hard drive to fit between the motherboard and exterior case wall. The PSU sits in the center and its fan blows out near the original back vents. On the left hand side, two 2.5 drive mounts and the mining riser for the GPU. The GPU should be a simple swap, with something more powerful if required.
Build a frame
This task kicked me hard. I modeled what I could in 3D, for sizing and spacing. I found a couple 3D models of different Classic Macs, so not the perfect exact match, but close enough, or so I thought. I wanted to just use one flat piece, and bend everything from that one piece. I made miniature paper samples and eventually built a full size card stock version to check all my measurements. Lots of adjustments later, I was ready for the metal version. Everything cut and drilled fine, but as I started bending, I got distracted and bent some items the wrong way. There is no do-over or going back after that. So I had to cut off some pieces and replace them with other metal. I also did not measure properly, and I had to cut and rivet some other places to make things fit. Luckily, this ugly monstrosity will all be hidden inside, never revealed to the user (except you readers). The original frame is a two-piece, base and left side. I ended up having to cut off my failed left side attempt and rebuild a new left side panel. This left side panel houses the video riser, two internal 2.5 drives, the power input, the power switch, and the LCD control panel.
Step 4: Build a Port Panel (I/O Shield)


The original Classic II had all ports on the mainboard facing the back. Since my motherboard ports would never be seen, I had to build a panel to mount all the extenders onto. Again I chose a single piece of metal with a few bends. The panel mount extenders all have mounting holes that take up space, and a few had to be carved down to fit properly. The two HDMI ports had to be mounted together by cutting off the adjacent mounting holes completely and zip tying them together. All in all, a pretty good lineup. One HDMI is out, the other is HDMI in (So I could watch Roku or PS3 on it?).
The Drakware ADB2USB adapter comes in a 3D printed case, so I assume it is either custom hardware or a programmable chip inside. ADB on one end, micro-USB on the other. I built a small metal clip to hold it in place and the micro-USB is wired to an internal USB2.0 header along with the Apple IR sensor.
Step 5: Fine Tune Minor Pieces (IR, IR2, Buttons, Ports, Internal Antennas)


A lot of custom cables were built for this project. I could have soldered a lot in place, but in the process of design, prototype, build, rebuild, rebuild, rebuild... I wanted the parts removable.
I wanted the IR sensor to be inside the screen, but I had enough problems with that already. Instead I opted to put both the Apple IR sensor and the LCD IR sensor in the floppy slot with two USB ports. I was planning on the rear port being USB 3.0 and the front 2.0, but in the end I swapped them, 2.0 on the back and 3.0 on the front. I used some transparent tape to test it before the final 3D printed plate and hot glue action.
The Apple wifi card has 4 antennas. I used two old salvage surface mount antennas internally attached to the LCD frame. One is BlueTooth and the other is Wifi. Since the interior of the Classic II case seems to be painted with metallic paint (RF shield), I also included an external antenna on the back panel.
The power switch on the back turns on and off the original Classic II, but a modern motherboard does not function that way. Since the Classic II contains the Reset (triangle) and Interrupt (circle V) buttons on the left side, I decided to wire those to Reset and Power on the motherboard. I had a dead router with button switches, so I cut off the piece of the router motherboard and mounted them to the frame. I 3D printed some button enlargers to make their surface contact area larger, and soldered on leads to go to the motherboard.
The case is a little yellowed, so I want to try Retr0bright https://en.wikipedia.org/wiki/Retr0bright or "Clairol pure white creme developer 40". Maybe later...
Step 6: Assemble


There is a sequence to all of this, as some screws are not accessible when other parts are installed.
- Mount the LCD panel and LCD control panel to the front of the case
- Install surface mount antennas to LCD frame
- Install the power/reset buttons and the LCD control panel on the frame
- Install the floppy slot USB and IR sensors onto the frame
- Mount the frame to the front panel
- Install the fresh air intake manifold
- Install the motherboard on the frame
- Install the Video slot riser and the video card
- Install 3.5 HDD and 2x2.5 HDD/SSD
- Connect all known wiring including the back panel
- Connect 3 antennas to WiFi card
- Install WiFi card on motherboard
- Connect Power Supply cables and mount PSU
- Power on and test everything
- Install frame into back case and install screws.
Step 7: Hardware Done


Once tested, this completes the physical build. There is some software fine tuning that must be done, but that will come later. Benchmarks are mild, but this is mainly going to utilized as a media player. I took the completed unit down to the living room to test with a big screen. I will emulate Mac OS 9.0.4 on SheepShaver, System 7.5 on Basilisk II, and System 6 on Mini vMac. I also stacked a few of my other builds next to it for size comparisons.

Runner Up in the
Trash to Treasure Contest


