

Introduction: Make Chess Pieces Out of Mosaic Tiles


After making my $5 Tile Chess Board Christmas Present for my kids, I needed some chess pieces (and later checkers.) This is how I made said chess pieces.
Materials:
- Thirty-two 1x1" mosaic tiles
- Matte acrylic gel medium
- Matte clear spray paint
- Black fine point permanent marker
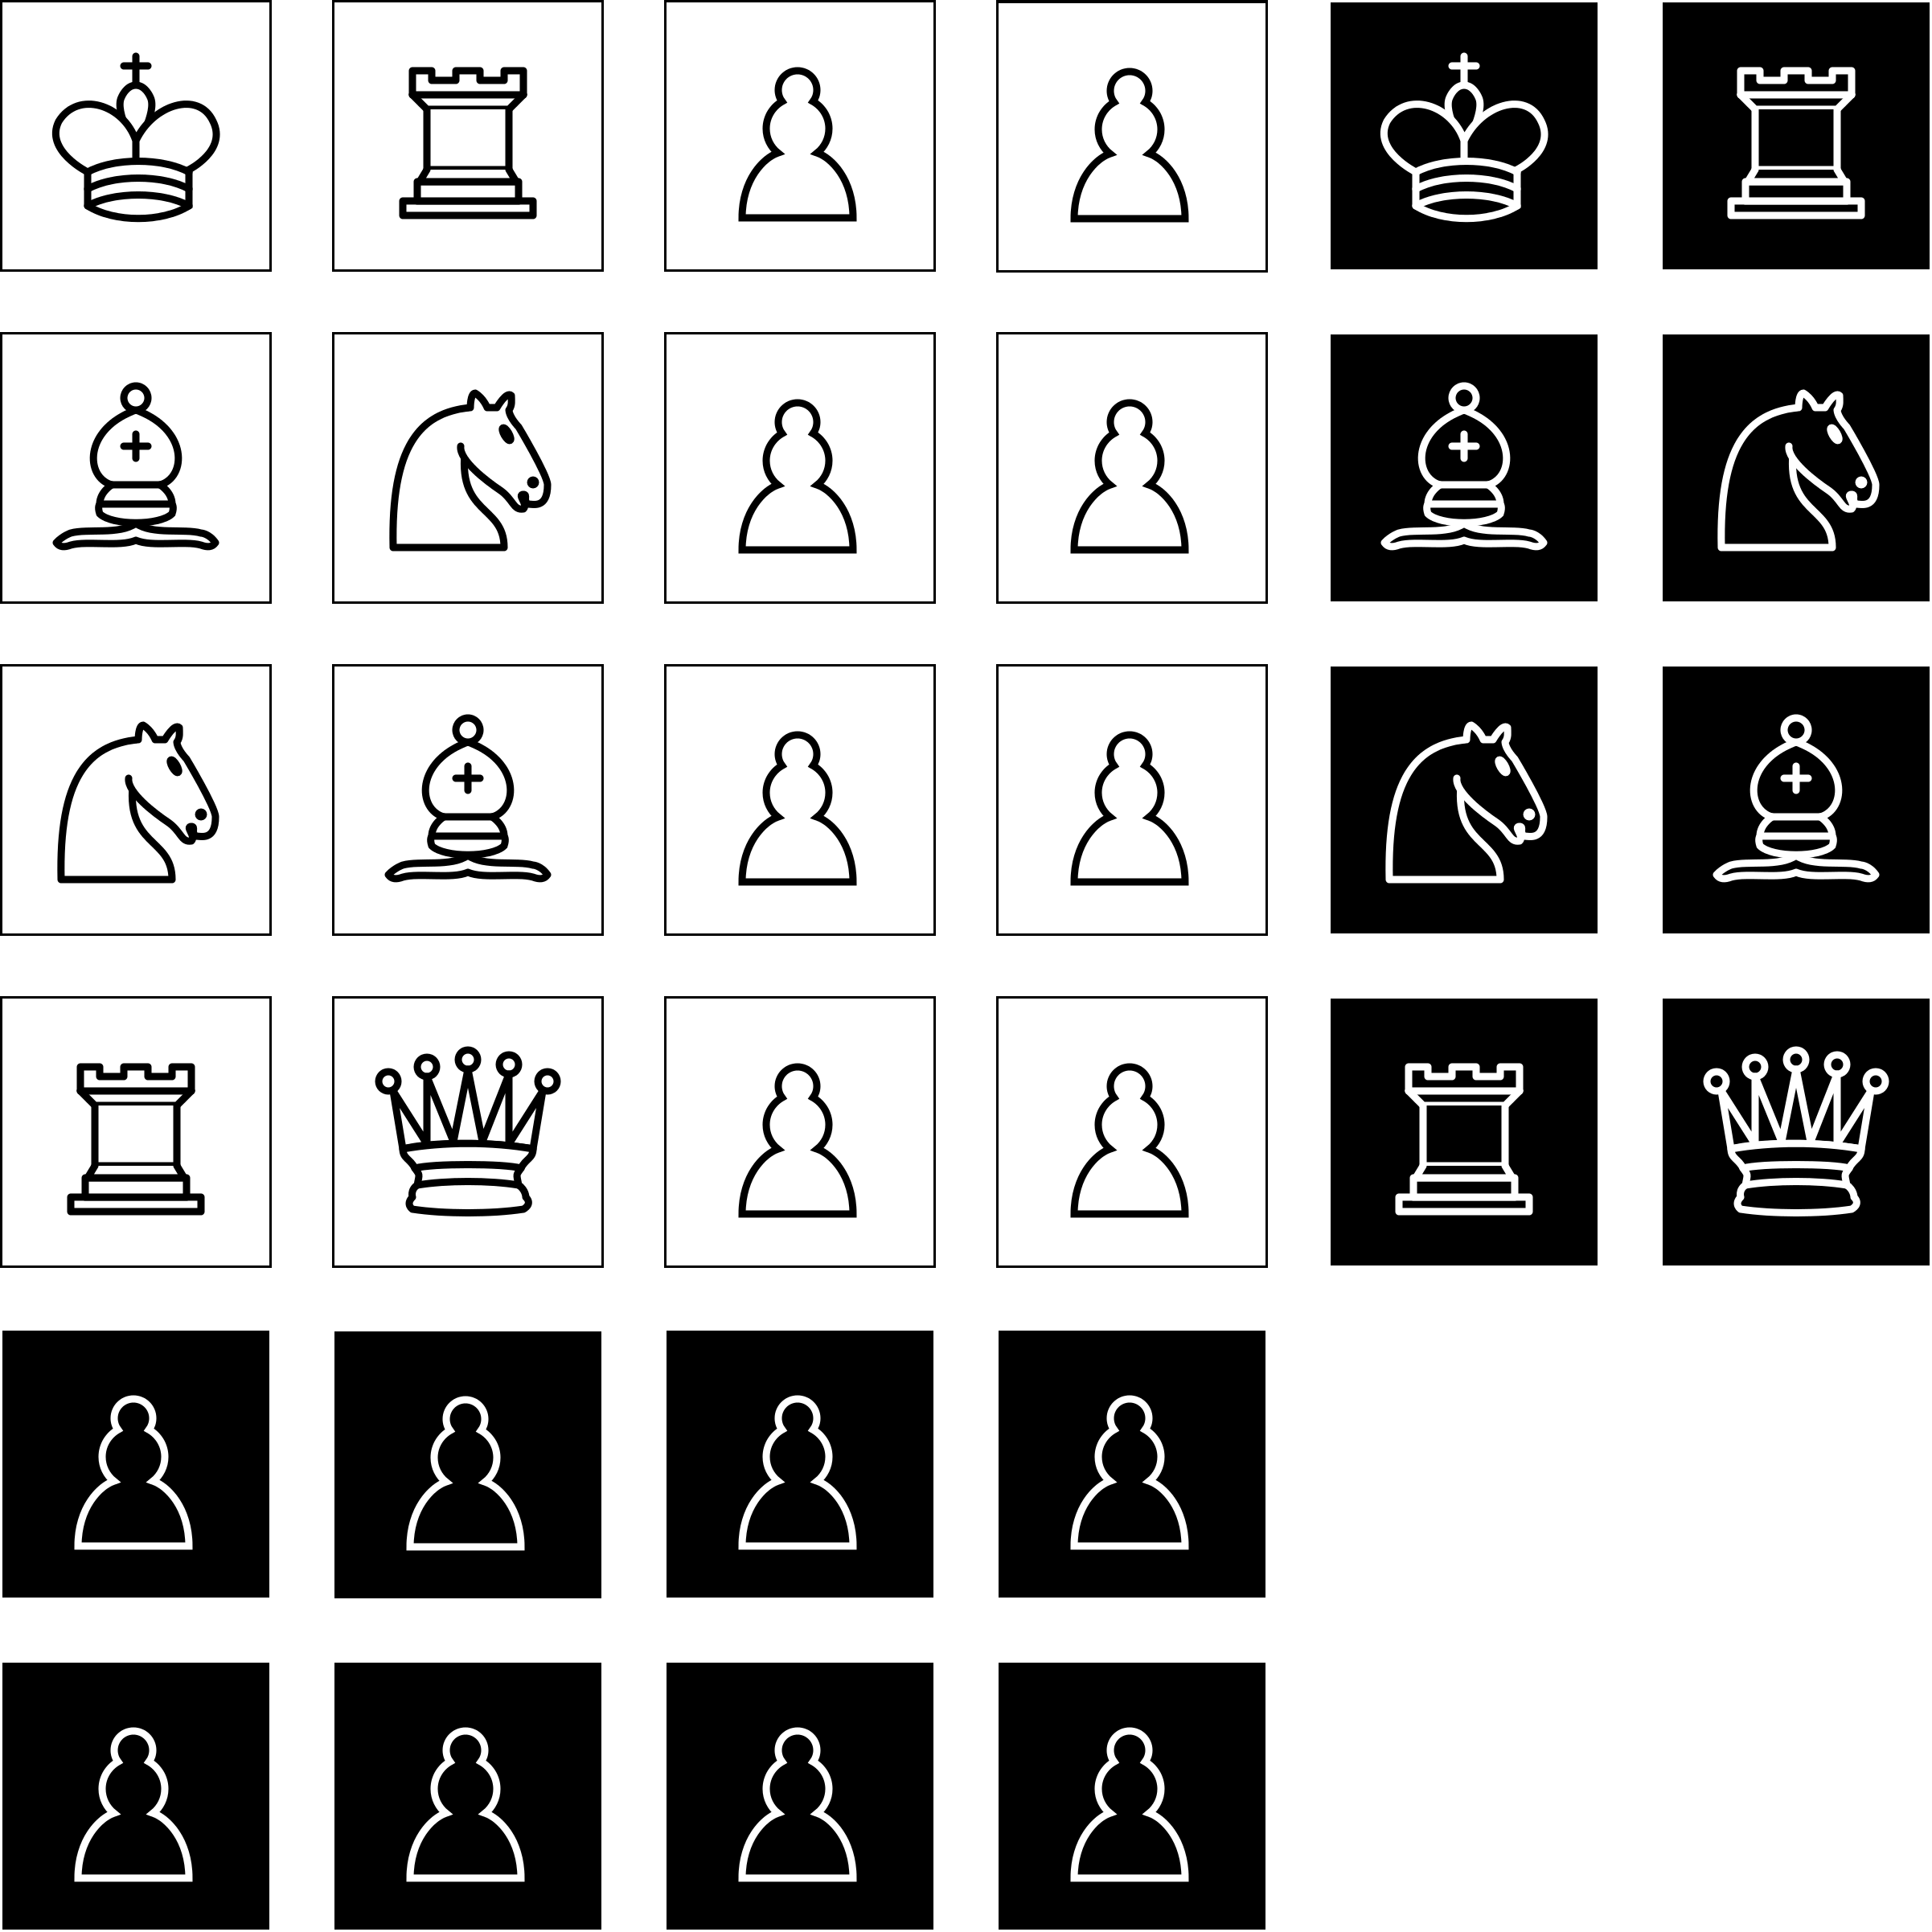
- Printout of chess piece designs. This printout MUST come from either a laser printer or photocopier, a printout from an inkjet will not work. (Original chess piece designs are from here, my design sheet can be found here and can be printed out at 300 DPI)
Tools:
- Foam brush
- Razor utility knife
- Water (Not exactly a tool, but we will roll with it!)
Step 1: Separate Tiles Glue to Design Printout


With your your materials and tools in front of you (sheet of mosaic tiles, acrylic gel medium, design printout, foam brush, and razor utility knife are needed for this step), separate 32 tiles from the mesh backing. After these have been separated, inspect for any overhang from the glue used to adhere it to the mesh and carefully trim as needed on the edges of each tile (remember, cut away for safety!). Make sure all tiles are free from debris that has been cut away.
Dip the foam brush in to the acrylic gel medium, coat the top of a tile lightly, and firmly press the tile upside down on to a symbol from the design printout. Repeat for the rest of your tiles and symbols on the design printout. Let the acrylic gel medium fully dry (overnight is best.)
Step 2: Remove the Tiles From the Design Printout


After the acrylic gel medium on the tiles has had a chance to fully dry, flip the tiles over so that the paper is facing upward. Wet your fingers with water and lightly coat the paper in the areas where the tiles are adhered. Carefully peel as many layers of the paper off as you can, separating the tiles as you go (see pictures). After you have peeled as much of the paper off as you can, let the tiles once again dry.
Once dry, moisten your thumb (or other finger if you prefer) and gently rub the remaining paper away. Be careful to not get the tiles too wet. Sadly, some areas will not adhere to the tile very well and will be rubbed away. This is mostly due to dimples and other uneven areas of the tile surface.
Step 3: Touch-up and Clear Coating


As you can see in the first picture above, some tiles do not look too well (mainly the black tiles, since it has the most toner), to correct this we can use a fine point permanent marker. Sadly, the only one I could find was rather blunt and it did not do the best at filling in some of the details (not that I would have been able to do any better if I had a fine point).
After all touch-up has been done, it is time to take the tiles to a well ventilated area (garage or outside both work) and coat the tiles with the matte clear spray paint.
Step 4: Success!


Now that your tiles have been touched up and have a nice protect coat, it is time to get out your $5 tile chess board and have some fun!
Sadly, you cant knock over the king when you get your opponent in a checkmate :( )

Participated in the
Homemade Gifts Contest 2015


