

Introduction: Mementos of Blood and Fire


In 2011 I participated in the reconstruction of the Gwozdziec Synagogue in Poland. This project was a collaboration between Handshouse Studio in Boston and POLIN, The Museum of the History of Polish Jews in Warsaw. I spent three weeks in the mountains of Poland in Sanok learning wood working by hand from Timber framers from around the world. We spent eight hours a day five days a week on the construction site without any power tools building a 75% replica of the synagogue ( all of which were burned between WWI-WWII) they way it would have been built by the communities in the region.
The structure which was built entirely of white pine comprised thousands of wooden pegs which were hammered into the beams to keep the structure stable in addition to dovetail joints.
My sculptures Mementos of Blood & Fire came out of this project. I returned home to Chicago with one of these pegs I had carved and transformed it into iron replicas and then sent it back to those from the project as a memento to our work and the permanence of friendship. The iron that flows in our blood and which the pegs are made of was forged within the same stars. The objects take on new meaning and new properties as unburnable testaments to the histories we are recognizing and the support structures of human relationships.
Step 1: Gather Object to Be Transformed and Mold Making Materials


Gather the following
1) Object to be transformed: in this case we will be using the wooden peg from the Gwozdziec Reconstruction project I carved.
2) Materials for creating a simple plaster mold, which can be used to cast many materials including wax, which if you wish can be turned into metal as was done in this case.
You will Need
- A release agent : Murphy's Oil or another oil based liquid such as Vaseline.
- A brush for spreading release over object, a knife or sculpting tool to refine mold (rasp is optional but is good to flatten out uneven surfaces)
- A bucket for mixing plaster and bag of fine plaster
- Clay, can be water or oil based (plasticine is nice because it never dries out and is reusable)
- Safety mask to keep plaster dust and particulates from going into your body
Step 2: Prep Object With Release and Setup Box for Pouring Plaster


1) Pour a small amount of Murphy's oil or Vaseline and put it into a cup
2) Brush the oil on the entirety of the surface of the object
3) Make sure you have not missed any spots
4) Find a thick box (6-12in high) that can be used to pour plaster in to create the two part mold.
see this instructable for more information-
Step 3: Sculpt Clay Around Object to Bisect It Without Overhang ( >90 Angles)


1) Find your midline, which is the line that bisects the object without creating angles that exceed 90 degrees. For this object there are no pieces that jut out so this is relatively easy ( note that complex objects may need a mold that has more than two parts if you are using plaster )
2) Begin building up clay on half of the object so that you are left with one half covered and one half exposed
3) Continue to build clay around your object in your mold making box along the midline you have identified (if you need you can even draw this midline but it is not necessary)
4) Push clay into the crevices of your mold making box to ensure you do not have leaking plaster when it is poured.
Step 4: Mix and Pour Plaster Over Mold


1) Add plaster to COLD water (NEVER start with hot water- you can be scalded by the heat that comes form the chemical reaction as it thickens) in a flexible plastic bucket (makes it easier to clean afterwards)
- The amount is often 1:1 but there is an easy method for getting the right amount (see below)
- Add plaster to water, you will begin to see a little mound peak above the water, once this mound stays like an island for more than 10 seconds you will probably have a good mix.
2) Mix plaster, I prefer using my hands (if you want to wear gloves you can)
- Stir your hand in a circle feeling for any clumps (break them between your fingers)
- Keep stirring for several minutes until the plaster thickens ( you will feel it getting warmer from the chemical reactions)
- The plaster is thick enough to pour when it coats your hand like a white glove
3) Take a handful of plaster and use your fingers to flick it on your object in the mold making box ( the plaster is thinner and will fill in any small cracks easiest) , quickly do this until you have covered the surface of your object.
4) Now take the bucket of plaster and pour it into your box over your object so that the plaster is about 1-2 inches above the top most part of your object's height.
5) Once you have poured the plaster and it has completely covered your object, gently tap the edges of the box with the palm of your hand or a hammer to release air bubbles that are inside as this can create imperfections in your mold ( you will be able to see these bubbles rise to the surface)
Step 5: Remove Clay From 1st Half of Mold, Create Keys and Pour Holes, Prep for 2nd Half of Mold


1) After plaster has hardened and cooled down remove mold from mold making box ( you can either disassemble the box if it was screwed or clamped together or run a knife around the perimeter of the plaster to loosen it so it pops out of the box with your clay and object.
2) Pull Clay off the plaster and object
3) There may be some clay residue on the plaster, try to remove most of it
4) Gently take your object out, loosening with a knife edge if need first, so that you can see the 1st half of your mold.
5) Take a knife or blade and carve a circular crater in the plaster while it is still soft ( this is called a key and it will help keep the mold together after the 2nd part is poured )
-Make several of these keys around the 1st half of the mold (make sure to only put keys where there is at least 1/2 inch between the edge of the key as well as to the mold of the object itself)
6) Identify a place in your mold that can connect to your object that can be at least 1/3 inch in diameter (in this case this is at the tip of the peg as seen in the picture)
- Carve a Pour Hole, which is funnel shape from your object's indentation to the edge of the plaster mold. The opening needs to be largest at the edge of the plaster mold and smallest leading up to the object's indentation (this will be where you pour your casting material into the mold and it needs to be big enough for your material to flow easily)
7) Like you did before pouring the plaster the first time, put your object back into the first half of the mold and coat with oil, also coat the plaster, keys, and pour hole so that they all release once the second part of your mold has hardened.
Step 6: Pour Second Half of Plaster Mold

1) Place the first half of the plaster mold back into your mold making box with the mold and object covered in your release agent.
2) Mix plaster the same way as you did in Step 4.
3) Quickly flick the plaster over the exposed part of your object and 1st half of the mold to fill in all of the small cracks.
4) Pour plaster over the 1st half of your mold, again tap the sides when done and watch for the air bubbles that rise to the top.
Step 7: Separate Both Parts of Plaster Mold, Refine 2nd Half, Inspect


1) Gently loosen the now two part plaster mold from your mold making box, again you can either run a knife along the edges of the plaster to loosen the mold from the box or unclamp/unscrew the box.
2) Take the two part mold and gently begin to separate it by loosening it up around the middle all the way around the place where to the two halves meet. ( DON'T BE INPATIENT, this can be very delicate).
3) Pull apart the two halves of the mold and inspect.
4) You will be able to see the positive mounds that have been created from pouring the 2nd half of the mold from the craters you carved in the 1st half (a.k.a. keys).
5) Create the other half of your Pour Hole on the 2nd half of your plaster mold as you did in Step 5.
6) Clean the edges of your mold, removing any excess clay and debris.
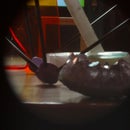
7) Admire your mold, which will now allow you to transform your object into many materials many times over. ( in this case I made positive foundry wax casts from my mold, which I have turned into iron - I have a few videos from this process to show you what you can do or have someone else do for you. Note- if you are contracting a professional to cast work for you it can save you a great deal of money or you can at least better understand what you are paying for if you do some of the process ahead of time)
Step 8: Look at the Details You Can Get From Plaster Molds


The following images show the retention of detail using the plaster mold making process. The grain of the wood and carving marks are clearly visible in both the wooden and iron cast version of the forms.
I have included detail shots of the peg as it was transformed from wood, to foundry wax, cast in iron, and after a year of oxidation what the iron cast looks like.
Step 9: EXTRA: See the Foundry Wax Pouring & Iron Casting Videos
*Special thanks to Margaret Bobo Dancy and the crew at Chicago Crucible!!!*
Wax Pour:
Wax Cast:
Filling the Crucible:
Seeing the liquid Iron in the Molds:


