

Introduction: Model Railway DCC Arduino Wireless Commands on a Dead Rail System


Further to my previous Instructable on a wireless DCC control of a garden train, I have developed a method of wireless transmission of DCC packets from a Command Station to allow dead rail control of locomotives. The basic design is covered here on the circuits and Arduino coding required. The circuits fit into 'G' garden scale locos. However, I leave it to the reader to develop this system into a smaller size for mounting into HO / OO scale trains.
The system was originally developed using the uRF328 (Arduino Uno with wireless). The nRF24L01+ along with an Arduino Mini Pro provides a cheaper option, therefore the system has been adapted to use these modules.
Download the Arduino driver for nRF24L01 http://maniacbug.github.com/RF24
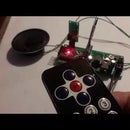
Step 1: DCC Packet Transmitter
Components:
Arduino Mini Pro
nRF24L01 wireless transceiver
SN754410 H-bridge
DC regulator 5v output
DC regulator 3v3 output
Rectifier diodes 1N4001 (2off)
Resistors 10K and 4K7
Capacitors 22uf, 3.3uf, 3.3uf
The circuit above, is the transmitter. A pair of resistors reduces the input voltage to acceptable levels for the Mini Pro. I used the 5volt version of the Mini Pro. The 3.3v version may be used which would eliminate the need for a 5 volt regulator. The Arduino code is based on great work done by Geoff Bunza in the Model Railroad Hobbyist Magazine forum.
The loco commands are extracted from the DCC signal. The packet data is therefore isolated from the signal and transmitted as digital instructions to the receiver via the nRF24.
Transmit sketch updated 4 April 2018: To send data in one array instead of a byte at a time.
<p>// nrf24 - transmit DCC data 1 April 2018</p><p>#include
#include
#include
#include "SPI.h"
#include "NmraDcc.h"</p><p>//Settings
 RF24 radio(9,10);
 NmraDcc  Dcc ;
 DCC_MSG  Packet ;
 struct CVPair{
  uint16_t  CV;
  uint8_t   Value; };</p><p>const byte slaveAddress[5] = {'R','x','A','A','A'};
char dataToSend[20] = "DD,9,63,0,54,";</p><p>void setup() {
  Serial.begin(115200);
    radio.begin();
    radio.setDataRate( RF24_250KBPS );
    radio.setChannel(108);
    radio.setRetries(0,0); // delay, count
    radio.openWritingPipe(slaveAddress);

  Serial.println("Ready");</p><p>  Dcc.pin(0, 2, 0);
// Call the main DCC Init function to enable the DCC Receiver
  Dcc.init( MAN_ID_DIY, 100,   FLAGS_DCC_ACCESSORY_DECODER , 0 );
  Serial.println("Ready");
}</p><p>void loop(){
Dcc.process();
}</p><p>extern void notifyDccMsg( DCC_MSG * Msg ) {
 if( ( Msg->Data[0] == 0 ) && ( Msg->Data[1] == 0 ) ) return;  //reset packlet
 if( ( Msg->Data[0] == 0b11111111 ) && ( Msg->Data[1] == 0 ) ) return;  //idle packet
String s1 = String(Msg->Data[0], DEC) + ",";
String s2 = String(Msg->Data[1], DEC) + ",";
String s3 = String(Msg->Data[2], DEC) + ",";
String s4 = String(Msg->Data[3], DEC) + ",";
String Message = "DD," + s1 + s2 + s3 + s4 + '\0';</p><p>   int Msg_size = Message.length();
  for (int i = 0; i <= Msg_size; i++) {
    dataToSend[i] = Message.charAt(i);
  }
    Serial.println(dataToSend);
    radio.write( &dataToSend, sizeof(dataToSend) );
}</p>
Attachments

Step 2: DCC Packet Receiver

Components:
Arduino Mini Pro
nRF24L01 wireless transceiver
SN754410 H-bridge
Step up module 5v to 3v3 (or 3v3 battery)
Step down module 5v to 12v (or 12v battery)
Capacitors 220uf, 220uf, 100nf
The receiver decodes the wireless signal and extracts the loco instructions. These instructions include all DCC command data for loco ID, speed and various functions. The instruction data is combined with the DCC command clock that runs on the receiver Arduino Mini Pro. The output from pin 6 and inverse output from pin 5 provides the input for the H-bridge.
Update 4 Oct 2016:
To decrease processing time, the Arduino code has been modified and now only accepts one loco address in line 36 (int locoAdr = 3).
The use of preamble + 3 bytes or preamble + 4 bytes (depending on DCC Command station in use) must be entered into line 53 { { locoAdr, 0, 0, 0, 0, 0, 0}, 3} // enter 3 for 3 byte and 4 for 4 byte
I have not been able to complete this automatically in the Arduino code as yet.
Also, I have removed the 'printf' functions and other radio functions not required and the speed is a lot better.
Update 13 Jan 2018:
This sketch also includes a faster switching of the DCC output by avoiding 'digitalWrite()' operations.
The nRF24L01 internal supply is very unstable and a 220uf capacitor must be connected across the +/- supply pins.
I have used one pair of the SN754410 H-bridge, the load capacity may be increased by connecting the other pair in parallel.
By using a suitable set of LI-Poly batteries to provide 3v3 and 12v supplies, the step up and step down modules may be eliminated.
Update 4 April 2018:
Updated sketches to increase wireless broadcast time - see new files included for download.


