

Introduction: Modern Huarache Sandals


I stumbled upon Bedrock brand Huarache sandals via the Huckberry blog. I was never really excited about Huarache sandals- I don't like the feel of thin string holding my sandal to my foot so I never bothered to try them.
Then I saw the Bedrock Huarache sandals and thought I would like them, I just didn't want to pay $45 for a pair of shoes I could quickly and easily make with materials I had at home. I chose these for the following reasons:
1. I like the nylon webbing. I think it will be more comfortable than string
2. I like the way the Bedrock design adjusts. I think I'll be able to get my sandals to fit and feel the way I want them to
3. They are easy to repair should they break
4. The lack of leather makes them easy to wear in salt water which I am in and around quite a bit
5. I could make them quickly and easily with materials I already had at home
The design here is completely taken from Bedrock Sandals. If you would rather buy them, here is a link:
http://bedrocksandals.com/earthquake-sandals.php
Here is what you need:
-thin posterboard- a flattened cereal box will do
-a ball-point pen
-sharp, adjustable craft knife
-a rubber cutting mat or cutting board
-scissors
-tubular nylon webbing either 1/2" 5/8" or 3/4" I bought 6 feet and had less than 6 inches leftover
-2 plastic ladder locks the same width as your webbing
-Vibram or other flexible comfy soling that suits your taste
-a lighter
-something to punch holes / cut slits with. I'll be using leather punches but you can use other sharp implements
-a mallet or hammer
Optional items to make your sandals nicer:
-rotary sander
-hot knife
This project took me around an hour, not including the trip to REI to get webbing and the ladder locks
I don't know how much soling costs, my parents have a leather shop where we make leather sandals, so we had a bunch laying around. I paid less than $5 for the webbing and ladder locks.
Step 1: Tracing Your Feet


Lay out your poster paper on the floor. Trace around your feet, holding the pen as vertical as possible. Mark between the base of your big toe and the toe next to it. Then make a mark right next to your foot at the front of your heel/back of your arch on either side of both feet.
Step 2: Adding Room to Move

Add 1/8" to 1/4" around the outline of your foot. The amount you need really depends on personal preference. I like sandals that hug my foot so I don't trip. Other people I know want more room around their toes for protection. Play around with it and err larger. You can always cut them down later
Step 3: Cut Your Patterns Out and Punch Holes and Slots

Cut out your patterns now. Grab a hole punch if you have one, and a slot punch the same width as your webbing. If you don't have a hole punch, you can space out two holes the width of your webbing and then cut away the material between them.
Punch a hole at the mark by your big toe, and punch slots at the marks by your heels.
Step 4: Cutting Out the Soles


Mark your soles right and left. Then decide which side of your sole will be the bottom.
Lay your soling with the bottom facing up.
Put your pattern on the sole with the top facing down (the marked side should be against the sole)
Trace around your pattern onto the sole with a pen that shows up on the sole or a silver sharpie works well
This way, your marks won't show when you wear the shoes. I didn't do this, I did it wrong and my shoes have silver marks on them.
Carefully cut out the soles with your knife.
Once your soles are cut out, punch the holes and slots.
Step 5: Attach the Webbing


Grab your webbing and insert one end into the hole by the big toe.
Pull about 1.5" webbing through so it sticks out the bottom.
Go outside and find some concrete or a brick.
Light the end of the webbing (on the side of the bottom of the sole) and hold the lighter there until the nylon starts to burn and bubble.
When it's bubbling, pull the webbing so that the bubbling part is close to the sole and squish it flat against the ground while the nylon is still bubbling and hot. It will melt and make a "plug"
There is a great video on how to do this here:
http://www.youtube.com/watch?feature=player_embedded&v=yuRl_UIhkgs
Step 6: Rigging Your Sandals


Now the hard part is generally over. Now that your webbing is connected to the sole, slide the ladder lock onto the webbing.
Slide the webbing through the non-locking side of the ladder.
Put your foot in the sandal and slide the ladder so that it sits around your instep.
Put the webbing through the slot on the outside of your foot, heading downward from top to bottom.
Take the end of the webbing out from under the sole, bring it up and around behind the forefoot strap.
Step 7: Rigging the Heel


Now put your shoe on and bring the webbing around behind your heel.
Push the webbing down through the slot next to your foot.
Bring it up from the bottom and around behind the heel strap to head forward toward the ladder lock
Now put the webbing through the ladder lock where it locks so that you can tighten the strap and it holds.
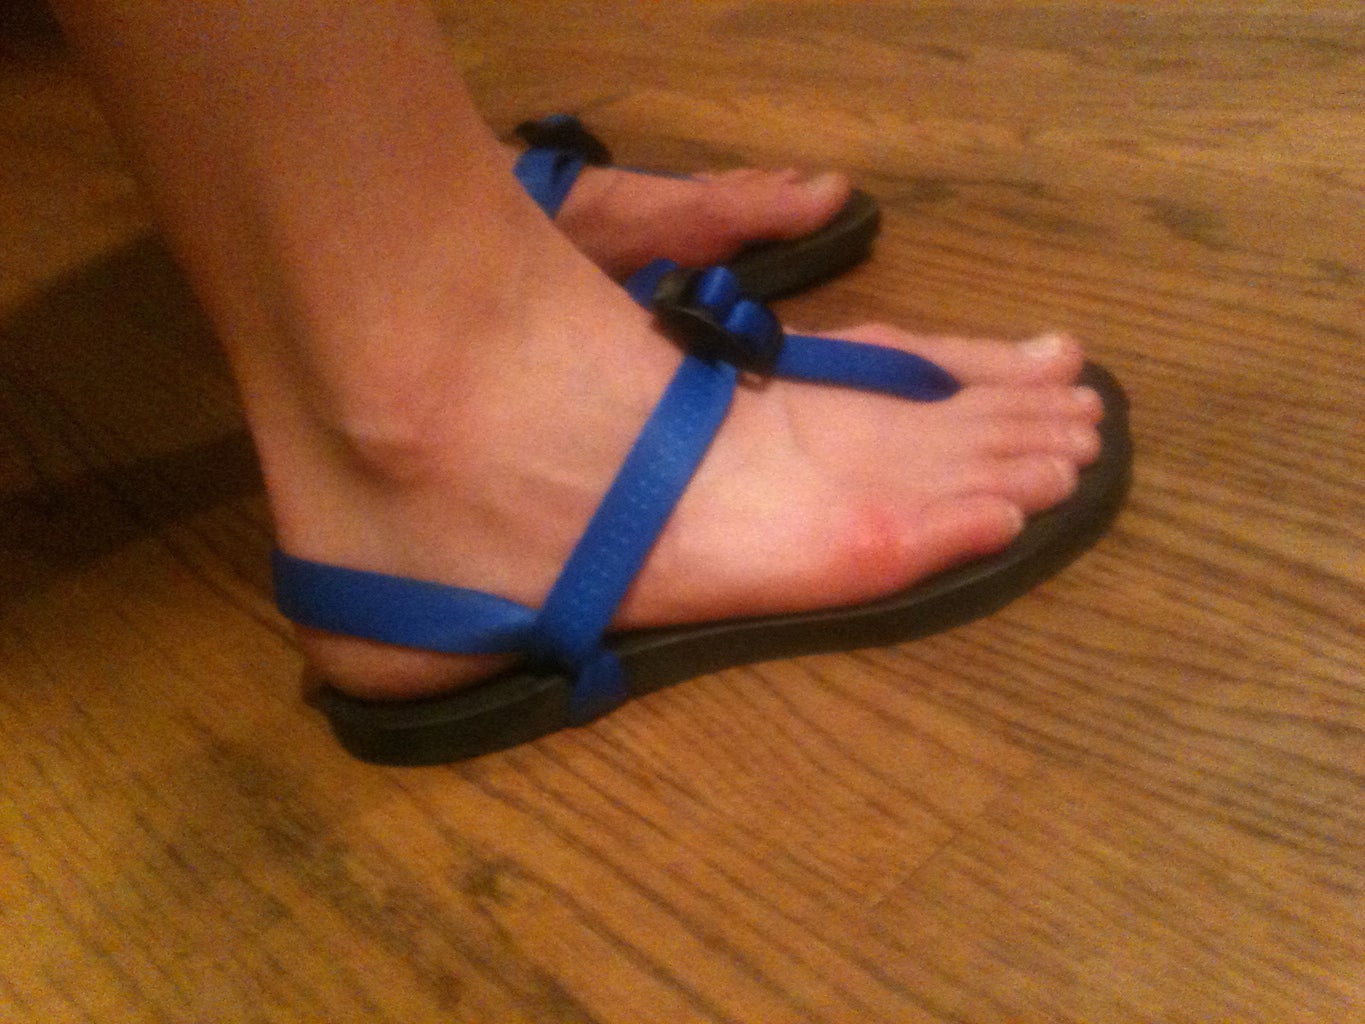
Step 8: Adjustment

Adjust your straps so that they're comfortable before you do any cutting. Make sure you walk around in your sandals with the straps the way you like them before you trim excess sole away.
Once you've adjusted the straps, cut the excess webbing away and trim your sole, and you're ready to explore in your new sandals.

Participated in the
Fashion Contest


