

Introduction: Most Reliable Goldfish


My on-campus townhouse doesn't allow pets. Well, not entirely; they allow goldfish. Why not get a goldfish? But they require lots of care and electrical appliances to sustain; there's no way I could take Grouper home! But a fake goldfish? Perhaps it would easier to take care of. And it's stylish!
Step 1: Materials

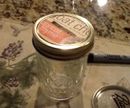
- 1 Ball jar and lid. I had one leftover from my snow globe project.
- Polymer clay (I used orange for my fish, various shades of green for eyes and seaweed, and a tiny amount of black for pupils. I also used a toothpick for shaping
- Bag of small pebbles. Bought for $1 at the Dollar Store. Next time, I'd definitely consider using sand or colored pebbles.
- 1 small flat pebble
- Paper clip
- Mod Podge
- Scotch tape
- Small sewing needle
- Thin string, or clear thin string
- Some sort of adhesive, like Loctite or Duco
Tools:
- Pliers
- Small paintbrush
Step 2: Make Your Fish

My figurines included a fish and an algae plant hanging out on the bottom of my diorama. My fish was just made with a larger orange ball for the body, two flat triangular-ish pieces for the fins, a fin-like addition for the tail, and a fin on top. Two small green circles made its eyes and two black dots made its pupils. Make your fish as simple or complicated as you want.
Slightly tricky- around the middle section of the fish, push the sewing needle through the fish. This will make the hole where the string runs through the fish. My hole was made a little more towards the front, and as a result, my fish appears to be swimming upwards instead of parallel with the tank. Place your hole depending on how you want your fish to balance when hung.
Step 3: Make Your Algae, and Bake


To make the algae, roll strands of different colored green clay together. Not mixing them completely and kneading it in the same direction create a marbled effect, and then shape it into a long grass-like shape. Or, just shape a plain green color into a long grass-like shape.
The armature for the algae is made from a paper clip- bend the outer wire of the clip outwards, and then cut off an L-shaped piece. Use the pliers to bend the cut end of the wire back on itself. Slide the algae onto the non-doubled end of the wire, and shape as desired.
Bake both in the oven for 10 minutes at 350 degrees Fahrenheit. I ended up turning off the oven and leaving the fish in for 5 minutes more.
Step 4: Make the Bottom of Your Bowl


The algae needs to first be weighed down, or at least attached to something. Get your flat pebble, and glue the rock to the top of the wire bended over. The flatter the pebble, the easier it'll be to attach the two pieces. After putting in the base rock or sand, this won't be seen.
Add some rocks to the bottom of your jar, until there's about two layers of rocks, enough so you can't see the bottom of the jar. Push aside some of the rocks to clear a space for your algae. Put in the algae first, then cover it with the rocks again.
Step 5: Swim, Fishy!

Make sure the hole you made is clear by using the needle, then push your string inside. Make enough knots in the string so the fish won't drop out of the string when hung. I ended up using several knots; surgeon's knots work great! Leave a good-sized tail of string. To hide the leftover string, cut it so the leftover string won't pop out of the other side if placed in the hole. Use the needle to poke it back in. At this point, I used Mod Podge to seal the knot and the fish. Feel free to also apply paint or Mod Podge to decorate or seal your work.
Time to test fit! Lower the fish into the jar until it's at an optimal height. Make a mark or tie a knot in the string at the point where the string needs to be hung. Tape your string onto the lid, then apply Mod Podge to seal the tape. It's definitely best not to leave loose ends, so I cut the leftover string so tape could completely cover it. Taping all the way around where the string hangs helps to prevent the tape from stretching! The picture only shows the string taped down without reinforcement, and it stretched a bit.
Step 6: Voila!


Put your lid on, and enjoy! This is one pet that's not going to die! Let me know what you think of this project!


