

Introduction: Mount a Video Camera on a Air Rocket


Ok so I recently made a compressed air rocket launcher that was featured in MAKE Volume 15 (see link below). It's a really simple design and the rockets go extreamly high - so high in fact that you lose track of where they are! I've seen some really cool videos on You Tube where guys stick mini, and probably expensive, video cameras on rockets and film the rockets point of view. As i'm too cheap too purchase one of these, I decided to make one of my own.
The following is my attempt at building a "rocket mounted video camera"
First check out my Youtube clup below of the rocket with video camera attached.
The below is a link to make Magazine which ddescribes how to build a compressed air rocket launcher
http://makeprojects.com/Project/Compressed-Air-Rocket/585/1
There are also some good instrucables - just type in compressed air rockets
The Parts to build the Compressed air rocket are pretty easy to find - if you are Australian then I suggest going to Reece Plumming as they have virtually all of the parts needed. Bunnings also sell the sprinkler valves.
Also, the rockets are only made of paper and masking tape. Check out the web or instrucables on how to make some cool looking rockets
Step 1: Step 1 - Parts


.
- Mini Spy Camera. These can be purchased on Ebay. The link below is the one that I purchased.
- Foam mattress - I used a thin cheap one brought at a camping store - This is used for protection of the camera
- Cable ties
- Super glue
- Masking tape
Step 2: Step - 2 Protecting the Video Camera


The rockets come down pretty fast, so to protect the camera you will need to wrap it in some protective foam.
1. Cut a peice of foam so it fits tightly around the lighter
2. Use cable ties to keep the foam secure
3. Superglue the join.
4. Make sure that you put a hole in the foam so you can see the led light that tells you if the device is on.
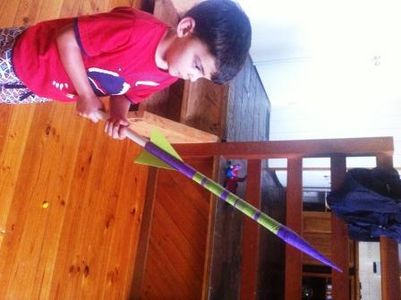
Step 3: Step 3 - Mounting the Camera to the Rocket


I first tried to use cable ties to connect the video camera to the rocket, but as it is made of paper this wasn't a good idea.
The best way is to use masking tape and wrap it around the camera and rocket body. It's up to you which way you face the camera, either pointing up or down. I tried it both ways - check out the Youtube clip at the start of the 'ible
The camera does add some weight to the overall rocket which means it doesn't go up as far - and the rocket that I used was tight around the launcher which caused a bit too much friction on launch.
My next ible is to add a parachute (I have tried a few times but with no sucess) If anyone has any good ideas on how to do this please let me know. I used the following idea from NASA (you'd expect it to work!) but had no luck.
http://www.nasa.gov/audience/foreducators/topnav/materials/listbytype/High_Power_Paper_Rockets.html
Have fun and post some videos if you make this 'ible.


