

Introduction: Mouse Prank With Arduino


The Atmega 32U4 chip has the capability of emulating a mouse and keyboard through the USB port.
With boards like the Olympia CircuitsArno or LeOlympia, Arduino Leonardo or Sparkfun Micro, you can use this capability to have some fun. We've used it to draw words and images in a paint program and enter repetitive text in forms. This project is a little more fun.
I wrote a simple sketch that takes advantage of this to annoy your friends (or enemies). There are several options in the sketch that can be selected and combined to get the effect you want.
Basically, you set a time factor and the type of action to have the cursor do when the time comes around. I made a Jitter routine that "shakes" the cursor and a Jump routine the moves the cursor across the screen. You can add a beep to those to add to the mystery.
Plug your board into a USB port on the back of a PC or a USB hub that's out of the way and wait for the confused looks. "Maybe it's a dirty mouse ball", "Are my eyes deceiving me?"...
With most computers you can plug the Arno in and the mouse and keyboard drivers will start working. There may be a few driver install pop-ups in Windows, but it will eventually start working.
This trick will work with other boards that have USB built in, such as our LeOlympia, the Arduino Leonardo, Sparkfun Micro and so on..
Step 1: Set Up Your Board

For this to work you need to get set up with either the Arduino IDE or Codebender. Then you need to set up the drivers on your computer. Go to this page for information. There are also some links to troubleshooting pages on the Oly Circuits forum.
Now you're ready to start programming your board.
Step 2: Modifying the Code

The sketch that I wrote has some options. They are in several areas.
First is the global variable for delay.
int delayLevel = 5; //set the range of time between action, set to 1-10
This is a multiplier that is used in the "routines" that have a variable delay. You can adjust to frequency of mouse action.
Lower number will decrease the delay.
Next, you select what type of action you want.
There are two many actions, Jitter and Jump. Jitter "shakes" the cursor and Jump causes it to jump across the screen. These can have a fixed or variable delay.
To use the function calls that are in the loop, remove the comment "/*....*/" marks before and after the one you want and add them to all that you don't want.
When you call the jitter subroutine, you pass a number that tells it how many times to move in a square. It is set to 12, which works pretty well, but adjust for you needs.
For jump, you pass a distance, in pixels, that is used by the subroutine. I have it set to move distance/2 in x and distance in y. If you want something different, change the Mouse.move command arguments in the jump subroutine.
I added a beep to jump and called it jumpBeep
That's pretty much it. Just hack away at the code until you have it like you want. Next step is use it.
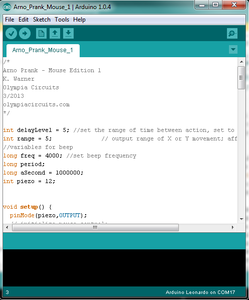
Here's the code:
/*
Arno Prank - Mouse Edition 1
K. Warner
Olympia Circuits
3/2013
olympiacircuits.com
*/
int delayLevel = 5; //set the range of time between action, set to 1-10
int range = 5; // output range of X or Y movement; affects movement speed
//variables for beep
long freq = 4000; //set beep frequency
long period;
long aSecond = 1000000;
int piezo = 12;
void setup() {
pinMode(piezo,OUTPUT);
// initialize mouse control:
Mouse.begin();
}
void loop() {
//remove comment marks from section of code you would like to implement:
/*
//========================================
//Jump with variable delay
long randomDelay = random(30,60); //generate random number for delay
long thisDelay = randomDelay * long (delayLevel) * 1000;
Serial.println (thisDelay);
long next = long (millis()) + thisDelay;
while (millis() < next){
//wait
}
//call Jump
int distance = 45; //set jump distance, direction is set in function
//jump (distance); //uncomment this to use jump without beep
jumpBeep (distance); //uncomment this to use jump with a beep
*/
/*
//===========================
//Jitter with fixed delay
jitter (12);
delay (60000);
*/
//===========================
//Jitter with variable delay
long randomDelay = random(30,60); //generate random number for delay
long thisDelay = randomDelay * long (delayLevel) * 1000;
Serial.println (thisDelay);
long next = long (millis()) + thisDelay;
while (millis() < next){
//wait
}
//call Jitter
jitter (12); //call jitter function with number of repeats/duration
//============================
//Jump with fixed delay
/*
jump (-150);
delay (125000);
*/
}
//===============subs=============
void jump(int howFar){
Mouse.move (howFar/2,howFar); // modify with math for different results
delay (2);
}
void jumpBeep (int howFar) {
//beep
period = aSecond/freq;
for(long k = 0; k < freq/10; k++){
digitalWrite(piezo,HIGH);
delayMicroseconds(period/2);
digitalWrite(piezo,LOW);
delayMicroseconds(period/2);
}
//move
Mouse.move (howFar/2,howFar); // modify with math for different results
delay (2);
}
void jitter (int duration){
int i = 0;
while (i < duration){
Mouse.move(10,10);
delay (15);
Mouse.move(-11, 0);
delay (20);
Mouse.move(10,-10);
delay(25);
Mouse.move (-11,0);
delay (20);
i++;
}
}
Step 3: Use It to Annoy or Confuse
Now you've got the board loaded up with the sketch. Just plug it into the victim's computer.
It won't need Arduino loaded on it, just the Mouse HID driver which is standard for Windows, although it may ask permission to install.
After that, it will keep running and moving the mouse. This will startle and confuse the computer's user, making them wonder what is going on.
Enjoy.
If you have success, let us know at http://www.olympiacircuits.com/

Participated in the
April Fools' Contest


