

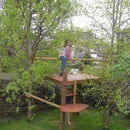
Introduction: Multi-Purpose Woodworking Bench


We recently moved into a new house (OK a year ago now..) which needs a huge amount of work doing... obviously the various bits of joinery will be a lot easier if I have a proper space to work in and a nice big bench.... Or at least that is my story and I am sticking to it....
So I Cobbled together this woodworking bench... The idea is that it can treble as a big bench, big table saw or eventually a big router table....
It took me about 12 hours to build.
Step 1: Preparation


The house is pretty old and the cellar (where the bench is to go) really shows it's age. The first image is straight after we moved in. This really doesnt do it justice, it was way more rank than this picture suggests...
So first I put up a pathetic set of shelves to get some of my huge collection of tat out of the way... Added Lights, you can never have too many lights afterall... well actually I am sure you can... but not without really trying... go for low energy lights to save money and planets...
Next we need some sounds so I used the lonely table-saw to cut a bit of 1" ply into some quick and dirty speaker brackets... The speakers are some old Wharfdales I picked up at a car-boot sale for a fiver... I get all my speakers from car boot sales, there is nowhere better....
Most of this was re-cycled wood and off-cuts... the speaker bracket wall battons were once part of a crappy bed-base...
Good tools will make any god way way easier and nicer, so you are more likely to do more (remember this advice and repeat it to your wife or significant other when needing to justify the purchase of outrageously expensive tools)
I am using a Makita Impact driver. These are super super expensive at first sight, but use one for any length of time and you will soon see that they are an absolute bargain if you value your time AT ALL... Batteries last longer (because the motor never operates at stall currents), torque is amazing but without putting a strain on your wrist, which means you can use it for much longer without getting tired.
Trust me these things are much better than normal electric screwdrivers.
Step 2: Build a Frame


As you can see, I have a dirty great stone slab in my cellar. I had no intention of ripping this out and it should form a lovely solid foundation for my new bench. So I built my frame to butt up to and fit around the slab.
The frame is just rough sawn 2by4's screwed together with 4inch long No10 woodscrews.
First I built the frame that will support the top, then laid this up on trestles and clamped it to the stone slab. A bit of fiddling about with the spirit-level to get it flat, and I was ready to start on some legs.
Becuase my floor is rough stone slabs laid straight onto bare earth it is a little uneven, so rather than cut a load of legs the same length, I measured each location and built up to the frame.
My cellar floor is also a little damp because of this, so I made a little boot for each leg to help keep it warm and dry... Just a bit of damp proof course material stapled on...
Step 3: Put the Top On.

So far I had been able to use stuff that I had "in stock" but I didnt have any ply for the top. So I ordered two sheets of 3/4" exterior ply (along with some other wood I needed) and sat back and waited for it to be delivered.
When the ply arrived I cut it up in the garden partly because the weather was nice, but mainly there is no way I can get a full 8 x 4 sheet down the stairs to the cellar...
So after much freestyling with the circular saw I had these two bits to screw on...
Not wanting to spoil the smooth top of the bench with screws, I drilled and countersunk all the screws up from underneath the bench. Thanks to the impact driver I was only crawling about banging my head on the underside of the frame for an hour or so... but still not much fun...
I ground the long pointy tip off the end of all these screws to help them grip deeper into the top without breaking through...
Oh yes, and I put a shelf between the legs to hold a few tools etc...
Step 4: Make an Insert


As you can see from the previous step. My plan was to have a space in the middle where I could drop in the table saw or a router table or any other fixture I need. The table saw is the first bit, so I cut a bit of the 3/4" ply to fit in my preprepared hole. This rest on a little ledge on all three of the enclosed sides.
Then I tried it in to check it fitted... OBVIOUSLY it fitted perfectly first time and I didnt have to trim a bit off one side or do any sanding or anything....
Next I measures up for the table saw and cut a slot for the blade. I did this using my hand held circluar saw and a bit of plunge cut action...
Step 5: Butcher Table Saw


I dont like having to modify the table saw, but it had had a hard life and I didnt thing a couple of new holes was going to be the end of the world...
I could have made some little brackets to hold the top on at the sides, but this would have made everything a bit wanky.
So instead I put a few holes in the top of the saw table to screw up through into the top... remember to look at what is underneath before you drill through into something important and/or live...
Having screwed the top on I then had to decide whether or not to hack off this bracket. The bracket is there to support the blade guard (which I wont be using*)... but in the end I decided I could work round it and left it on... but this meant cutting a notch in the table frame to clear it when the blade is at full height.
*Yes, I should use the guard... however, a guard doesnt make a table saw safe you can still lop off an arm or some fingers pretty easily. Seeing a rapidly spinning blade is a stark reminder of how dangerous the thing is and personally I think makes me extra careful....
Step 6: Put the Kettle On...


All done bar the tidying up.
Slide the saw into place and feel the satisfying thud as it drops onto it's seat. You cant really see, but in this position the legs are just clear of the ground and the top blends almost seemlessly into the main table.
You can see that I made a bit of a mistake in putting the ply for the surrounding table the way I did.
The seam from the big sheet to the narrow sheet will probably catch me out a few times until I give in and rout out a little slot and screw something in to hole the two sheets flush.
The saw blade can be wound right down out of sight for bench use, then raised quickly to cut some well supported wood...
I am pretty pleased with it....
I will probably put a couple of layers of Linseed Oil on to keep it nice....


