

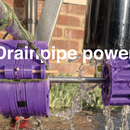
Introduction: IOT Water Pistol/plant Waterer


This is a fun project that uses the Google Home or any phone with Google assistant on it to spray water at someone or water some plants. It also has a lot of potential application for other uses such as lights, heating, fans e.t.c. If you like this then please vote for this projects in the IOT competition. Thanks.
Step 1: Resources Needed

You will need the following:
- A raspberry pi(any model that has access to the internet)
- A 12v water pump(This is the one I used)
- A 12v power supply(Use this one or one lying around)
- A 5v 2 channel relay(This is the type that I used)
- Some female to female jumper leads
- A plastic box to hold water
- Some way for the water to be squirted out of the pump(I bent a plastic tube but you could just use a straw)
We used relays as it allows to remotely turn it on with the raspberry pi rather than having to physically be there to turn on it on as you would if it was just a switch.
Step 2: Google Assistant
Make sure you have some way of accessing Google assistant. You could use a google home or a phone.
Step 3: Cutting Wires

Use wire cutters to cut and then strip the ends off your 12v supply and pump so they can be attached to the relay. Make sure to strip enough of the sheath to allow a solid connection.
Step 4: Attach Pump to Relay

- Unscrew the middle terminal on both relays
- Insert wires from the water pump
- Screw in again
Step 5: Attaching Power Supply to Relay

- Unscrew terminals
- put wires from the 12v power supply in
- Screw them back into place
Step 6: Connecting Raspberry Pi to Relay

Connect raspberry pi to relay as shown in the diagram above. You will need to connect the relay to ground, 5v, and 2 GPIO pins.
Step 7: Securing the Pump

Use either blu-tack or duct tape to secure the pump into a plastic container.
Step 8: Directing Water


If you want the water to squirt someone in the face it needs to be directed. To do this I used a heat gun to bend a plastic tube into the shape shown above. I then taped a pen lid onto the top. Alternatively, you could use a straw.
If you want to water some plants you could add a plastic tube or the inside of a pen.
Step 9: Putting Everything Together


I added another plastic box and put the raspberry pi and relay into it to stop it getting wet.
I have included a circuit diagram above to make the circuitry a little clearer.
Step 10: Testing Hardware Works
To test the pump works run the following code on the raspberry pi. This should turn the pump off and then on(or the other way round).
from gpiozero import LED
import time
#this will import the relevant modules we need for this code

relay = LED(14)
relay2 = LED(15)
#assigning the relays an LED

while True:
	relay.on()
	#you guessed it… turning the relay on
	relay.off()
	#you guessed it… turning the relay off
	time.sleep(1)
	#sleeping for 1 second
	relay.on()
	#relay on
	relay.off()
	#relay off
	time.sleep(1)
	#sleeping
Step 11: Importing Flask

The easiest way for the google assistant to control the raspberry pi is by getting it to host a web server. We can then get Google to visit a page on that server whenever you say something and code the raspberry pi to turn the relay on and off when the server is visited. If you want a more in-depth tutorial of flask then: visit this tutorial by raspberry pi.
On your raspberry pi import the flask module on python.
- Make sure you are connected to the internet
- Open up a terminal
- Type in:
sudo pip3 install flask
If this does not work:
- Make sure you are connected to the internet
- Look at this guide
Step 12: Create a Folder for Our Program and Go Into It
Do this by opening a terminal and typing in:
mkdir webapp
cd webapp
Step 13: Coding Web Server
- Open idle 3
- File > Create new
- Save it in the web app folder you just created
- Insert this code
from flask import Flask
from gpiozero import LED
import time
#these are importing modules required for this project

relay = LED(14)
relay2 = LED(15)
#assigning the relays an LED

app = Flask(__name__)
#assigning Flask a variable name so that it is easier to run code with it in later on

@app.route('/',methods=['GET'])
#doing a GET on the web page

"""this function will return what is displayed on the main page"""
def index():
    return 'Main page'

@app.route('/on')
#turning on the relays through the function below

"""turning on the relays and printing hi to check the function is working properly"""
def on():
    print("hi")
    relay.on()
    relay2.off()
    return 'on'

@app.route('/off')
#shutting off the relays through the function below
"""turning off the relays and printing hi to check the function is working properly"""
def off():
    print("hi")
    relay.off()
    relay2.on()
    return 'off'

@app.route('/go')
#running the function go

"""this function turns on the relays so it sprays water"""
def go():
    relay.on()
    relay2.off()
    time.sleep(3)
    relay.off()
    relay2.on()
    return ('go')

"""accessing the web page through the relevant port (8000 is usually home) and host"""
if __name__ == '__main__':
    app.run(debug=True, port = 8000 , host='0.0.0.0')
The comments explain what is going on in the code
Step 14: Testing Code Works
Open your web browser and enter the URL http://127.0.0.1:5000/on
You should see a white screen but you should be able to hear the click of the relay going on or if the pump is plugged in, it should go on.
To turn the pump off go to http://127.0.0.1:5000/off
Note: 127.0.0.1 means ‘home’, i.e. this computer :5000 means ‘port 5000’, which is the port the web server is running on.
If this works then you can take it a step further by:
1. Finding out your raspberry pis ip address by typing in:
hostname -I
2. On any computer connected to the same wifi as your pi visiting the pisipadress/on
This should turn the relay on.
This shows how you can control your raspberry pi from any computer connected to the same wifi as your raspberry pi.
Step 15: Tunneling
So the Google Home can visit this website you will need to create a tunnel so computers that are not connected to the same ip address as you can still turn the relay off and on. You can do this with ngrok. This is a program that you can install on the raspberry pi that will allow you to visit the flask website from any computer.
Visit their website for more info: https://ngrok.com/product
Step 16: Installing Ngrok
Enter this link on your raspberry pi: https://ngrok.com/download and follow the instructions to download and setup ngrok.
Step 17: Testing Ngrok
Make sure your flask server is running.
Open another terminal and type in cd webapp
Then start ngrok by typing in
./ngrok http 5000
This should show you a URL which you should be able to go to on any device. Copy this and email it to yourself for the next step
If this does not work:
- Make sure flask is running
- Make sure you are running ngrok in the same folder as the flask program
- Make sure you copied the right link(it changes every time you restart the program)
Step 18: IFFF

IFFF: If This Then That is a free program that can be used to make your google home visit a web server when say something to it,
To set this up follow these steps:
- Either visit https://ifttt.com/ or download the app
- Create an account
- Click create new applet(sometimes under my applets)
- Click this
- Search google and select google assistant
- Click say a simple phrase
- Under what you want to say put "activate water pistol" or anything you want
- Click create trigger
- Click that
- Search web
- Click webnooks
- Click Make a web request
- Under URL enter the URL ngrok gave you earlier/go
- Under Method select GET
- Under Content select text/plain
- Click Create
- Click finish
Step 19: Done!
Now when you say hey google (insert the phrase you chose), the pump should turn on.
If this is not working(it took me about 15 tries to get it working):
- Make sure all programs are running
- Make sure all Leads are connected
- Make sure the URL you entered into IFTT is the latest one
- Make sure raspberry pi is connected to the internet
Step 20: IOT Competition
If you liked this tutorial then please vote for us in the IOT competition. Thank you so much.

Participated in the
IoT Challenge


