

Introduction: Object Tracking Robot


Few weeks ago I thought to make robot that can track object with android phone. At the beginning I searched about it in google. I found some articles but none had source code of android app. My first thought it's "it too hard for me" and I gave up. But I could not stand that I can't make something that I want. So I tried again and after week of hard work with android code I finished my project.
Please if you like my project, vote for me in move it contest. Thanks!
Step 1: Parts

All parts (without smartphone) cost about $60:
- Arduino
- Smartphone with android
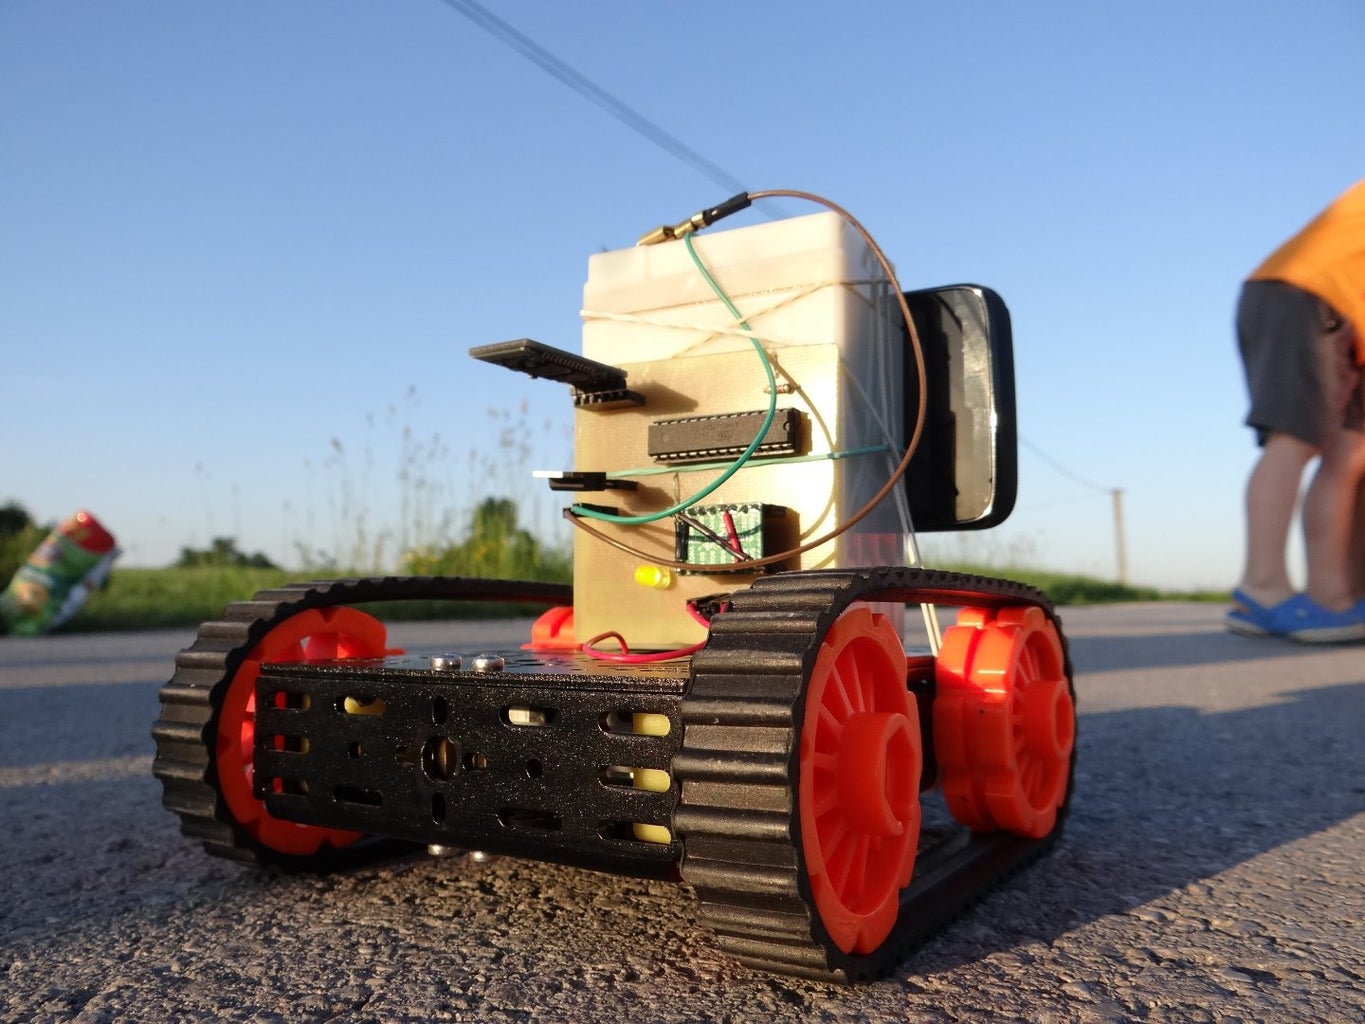
- Robot chassis
- Cables to connect it
- H bridge for DC motors
- Bluetooth module HC-06
- If you want to do PCB go to step 4
Step 2: How Does It Work?

The best way to make it, it's to use android phone with special app which check view from camera recognize position of red color and sends it to arduino over bluetooth. App uses openCV library to image processing. It calculate arithmetic average to check where is red color. Below I added piece of android code to see how it work:
bitmap = Bitmap.createBitmap(mRgba.cols(), mRgba.rows(), Bitmap.Config.ARGB_8888); Utils.matToBitmap(mRgba, bitmap);
int x = 0;
int y = 0;
int all_x = 0;
int all_y = 0;
while(x < 176) {
while(y < 144){
int pixel = bitmap.getPixel(x, y);
int redValue = Color.red(pixel);
int blueValue = Color.blue(pixel);
int greenValue = Color.green(pixel);
if(redValue > 200 && blueValue < 70 && greenValue < 70){
points++;
all_x = all_x + x;
all_y = all_y + y;
}
y++;
}
x++;
y = 0;
}
y = 0;
x = 0;
x_center = all_x / points;
y_center = all_y / points;
Step 3: Connection

Above you can find schema with connection. In next step I added .sch and .brd file from eagle.
I added some jumper wires on the top of the H bridge to do PCB.
Step 4: PCB (optional)


Needed parts to make PCB:
- Everything that was mentioned in first step
and
- Atmega 8 or 128 or 328
-resistor 1,2 K Ohm
- LED diode (no matter which color)
- linear stabilizer with 5V output
- some female headers
- everything to do PCB read here
- Driller, soldering, etc.
Attachments

Step 5: Program for Arduino
Arduino code is very basic. It gets data from serial and change it to numbers.
String bluetoothRead, Str_x, Str_y, Str_p;
int x ;
int y ;
int points;
int length;

int pwmMotorA=11;
int pwmMotorB=10;
int ForwardA=8;
int BackA=9;
int ForwardB=6;
int BackB=7;


void setup() {
Serial.begin(9600);

pinMode(pwmMotorA, OUTPUT);
pinMode(ForwardA, OUTPUT);


pinMode(BackA, OUTPUT);
pinMode(pwmMotorA, OUTPUT);

pinMode(ForwardB, OUTPUT);
pinMode(BackB, OUTPUT);

analogWrite(pwmMotorA, 140);
analogWrite(pwmMotorB, 140);

}


void loop() {
int i=0;
char commandbuffer[200];


if(Serial.available()){

delay(10);

while( Serial.available() && i< 199) {
commandbuffer[i++] = Serial.read();

}
commandbuffer[i++]='\0';
bluetoothRead = (char*)commandbuffer;
length = bluetoothRead.length();


if(bluetoothRead.substring(0, 1).equals("x")){

int i=1;
while(bluetoothRead.substring(i, i+1) != ("y")){
i++;
}

Str_x = bluetoothRead.substring(1, i);
x = Str_x.toInt();


Str_y = bluetoothRead.substring(i+1, length -1);
y = Str_y.toInt();

Str_p = bluetoothRead.substring(length - 1, length);
points = Str_p.toInt();


i = 1;


Stop();

if(x < 40){
Left();

}
if(x > 140){
Right();

}
if(x < 140 && x > 40){
if(points == 1){
Forward();
}
if(points == 0){
Stop();
}
if(points == 2){
Back();
}
}
}
}
}


void Left(){
digitalWrite(ForwardA, LOW);
digitalWrite(BackA, HIGH);


digitalWrite(ForwardB, HIGH);
digitalWrite(BackB, LOW);

}


void Right(){

digitalWrite(ForwardA, HIGH);
digitalWrite(BackA, LOW);

digitalWrite(ForwardB, LOW);
digitalWrite(BackB, HIGH);

}


void Forward(){
digitalWrite(ForwardA, HIGH);
digitalWrite(BackA, LOW);

digitalWrite(ForwardB, HIGH);
digitalWrite(BackB, LOW);
}


void Back(){
digitalWrite(ForwardA, LOW);
digitalWrite(BackA, HIGH);


digitalWrite(ForwardB, LOW);
digitalWrite(BackB, HIGH);
}


void Stop(){
digitalWrite(ForwardA, LOW);
digitalWrite(BackA, LOW);

digitalWrite(ForwardB, LOW);
digitalWrite(BackB, LOW);
}
Attachments
Step 6: Android App


Instruction how to install app:
1. the first step is download FollowBot.apk file
2.Send apk file to your phone
3.Open file manager and find FollowBot.apk file
4.Click on it and click install (if you have enabled the option to install applications outside the google play you need to turn it on)
5.You have finished the installation, you can run the application
Attachments
Step 7: Android App (source Code)
Bellow I added source code of my app. This app uses simple bluetooth communication to send data to arduino. OpenCV library is very simply, at the beginning I had some problems with use it but I read about it on internet and easily understood everything. If you have problems with understanding the code, leave comment or send PM.
Attachments
Step 8: Conclusion


So at the end I can say, that my project works great and that my first thought: "it's too hard for me" was very, very bad.
Any comments welcome. If you have problems, leave a comment and I will try to help you.
Sorry for my English :)

Participated in the
Move It


