

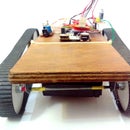
Introduction: PCDUINO Robot


A Mini PC with Arduino type Interface powered by ARM Pro Spec:CPU: 1GHz ARM Cortex A8
GPU: OpenGL ES2.0, OpenVG 1.1 Mali 400 core
DRAM: 1GB
Onboard Storage: 2GB Flash, SD card slot for up to 32GB
Video Output: HDMI
OS: Linux Android
Extension Interface: 2.54 mm Headers compatible with Arduino
Network interface: RJ45 and USB WiFi Dongle
So lets start building.
Step 1: PARTS

Now you need to get all the hardware-
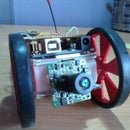
PCDuino
T bridge
l298 IC
HC 05 Bluetooth module
l7805 IC
PCB
Connector pins
Motors 2x
TOOLS
Soldering iron
Driling machine
Screw drivers
Step 2: 5v Regulator


Unlike the Arduino the PCDuino doesnt have a on board voltage regulator so you need to build one . The PCduino uses 5v 2A supply. So lets build a voltage regulator to power on you PCDuino. Follow the circuit and it is quite easy to build it, cut the PCB to a requires size and solder it all on it. You could roughly use 9v to 15v as the input to get 5v output.
Step 3: MOTOR Driver


I was lucky to work with my arduino motor driver in this robot. You could make your own or just buy one. And you will be needing a t brige to go with the pcduino, as the pcduino unlike the arduino gives a output voltage of 3.3 volt and not 5v.
For the motor driver use l298 for further infor mation and how to build reffer my previous instructable. And for the bluthooth connecton is also listed in the same instructable. I dint want to waste my time in typeing it all again.
Step 4: CODE

Code is easier to type in pcduino than the arduino start ubunto and find the aduino ide in programing. And start this code uplode to bord and you are ready to go. The pcduino ide is very similar to the arduino ide . Dont forget to check the examples to get cool new codes to experiment with your Pcduino.

Participated in the
Microcontroller Contest


