

Introduction: Pan & Tilt Servo Bracket Controlled by Arduino


Hi, in this instructable i am showing you how to build a very nice and very sturdy pan & tilt turret for your rc / arduino projects.
(Please don`t judge my english grammer etc. i`m from holland)
The things that you need for this project are not expansive or hard to find so it should be easy to build.
You don`t need expansive tools or anything to build this, just use your imagination and some handy hands :D
Step 1: Materials

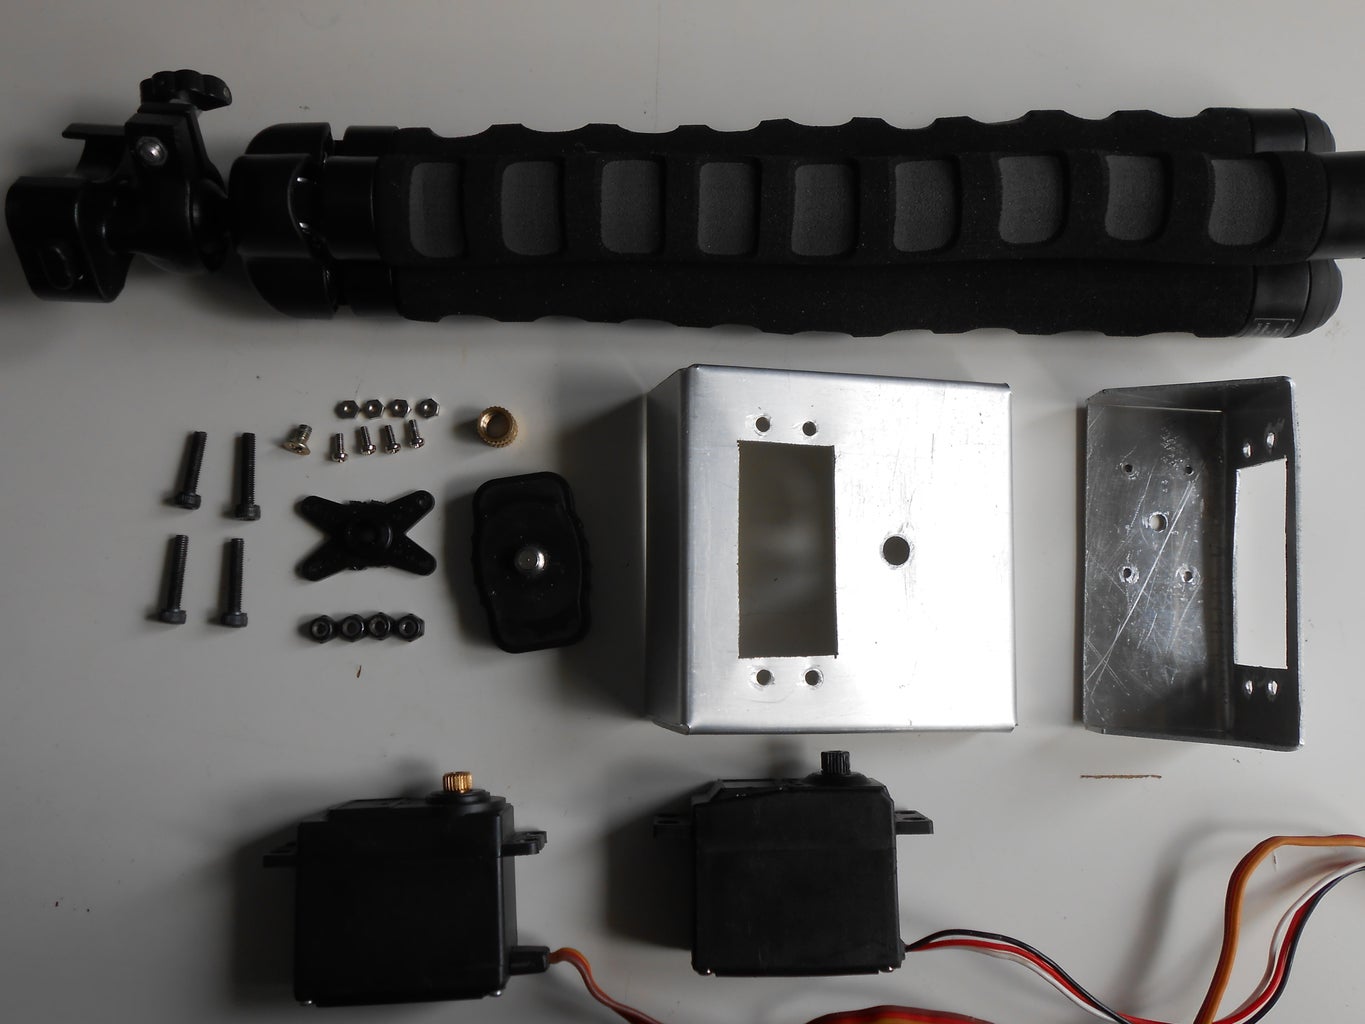
The materials and tools that you're going to need.
Materials:
- Arduino Uno (or other)
- example code (included)
- 7 wires
- breadboard
- camera tripod (i used a small one)
- aluminum plate (1mm thick)
- 4 miniture nuts and screws
- 8 (3x10mm) allen screws and 8 nuts
- 1 servo horn at least with 4 holes
- 1 big nut for the tripod (i got this from an old camera)
Tools:
- miniature jigsaw
- ruler
- pencil
- the design of your brackets (included)
- sandpaper
- drill
- screwdriver
- vice (for bending)
Step 2: Design


Step 3: Jigsaw


Now you need to saw the design out of the aluminum very carefully with the jigsaw.
try to make the saw lines as smooth as possible so when it's done it looks really nice.
WARNING !!!
Mension that in the second picture there are no holes for the screws to mount the servo, i've done this because the dimensions of every servo are slighly different !
So you must figuer that part out by yourself !
Step 4: Bending


Now you're already at step 4!
These are the thing you should have done already:
- draw the designs on the aluminum plate
- cut out the design with a jigsaw
- cut out the holes for the servo`s
- drilled holes for the servo screws (you must do this last 2 steps by yourself because the dimensions of every servo are different
Step 4 includes bending the aluminum plates you've cut out in step 3.
For the bending i used a vise, just align the plate to the vide and bend it over (SLOWLY) with a piece of wood (plank)
Step 5: Assembling

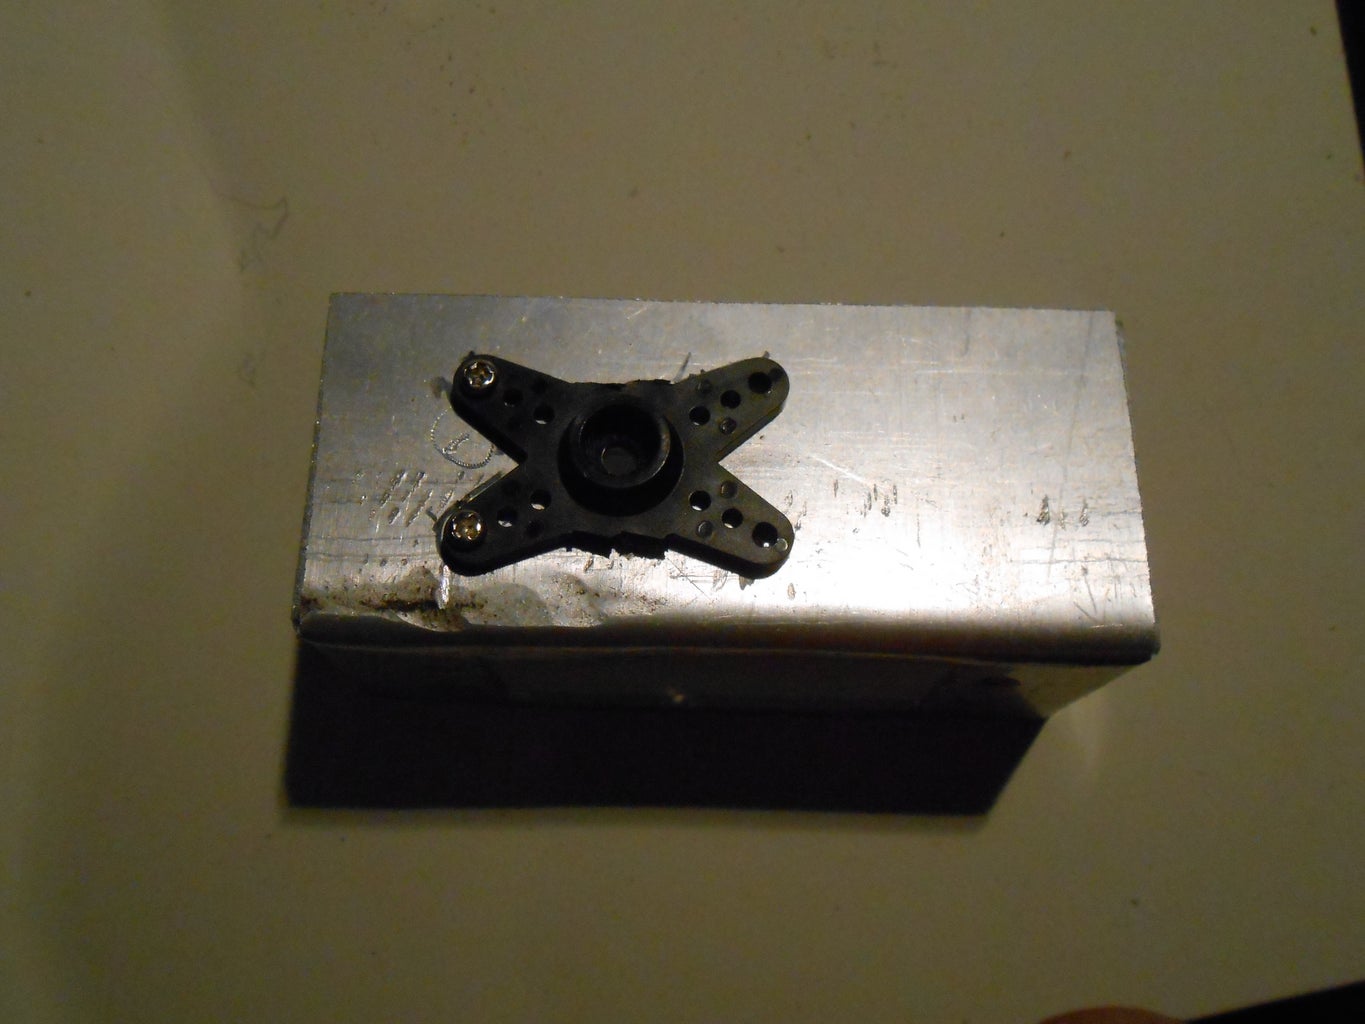


These steps are all about assembling your pan & tilt bracket to your servo's.
1. mount the main bracket onto the tripod with the golgen nut :)
2. mount the first servo underneath the main bracket with 4 screws
3. mount the servo horn underneath the TOP bracket with 4 miniature screws
4. mount the top bracket with the servo horn attached onto the first servo with a servo horn mounting screw
5. finally, mount the last servo onto the top bracket
Step 6: Arduino


for this step you will need:
- the arduino
- 7 wires (2 black, 2 red and 3 yellow)
- code (it's just the sweep library from arduino 1.01)
Wiring:
- connect the plus from the servo to the 5v on the arduino
- connect the ground from the servo to the ground on the arduino
- connect the signal (yellow) from the servo to pin 9 on the arduino
Code:
// Sweep
// by BARRAGAN <http://barraganstudio.com>
// This example code is in the public domain.
#include <Servo.h>
Servo myservo; // create servo object to control a servo
// a maximum of eight servo objects can be created
int pos = 0; // variable to store the servo position
void setup()
{
myservo.attach(9); // attaches the servo on pin 9 to the servo object
}
void loop()
{
for(pos = 0; pos < 180; pos += 1) // goes from 0 degrees to 180 degrees
{ // in steps of 1 degree
myservo.write(pos); // tell servo to go to position in variable 'pos'
delay(15); // waits 15ms for the servo to reach the position
}
for(pos = 180; pos>=1; pos-=1) // goes from 180 degrees to 0 degrees
{
myservo.write(pos); // tell servo to go to position in variable 'pos'
delay(15); // waits 15ms for the servo to reach the position
}
}
Now when you've connected everything to the arduino and uploaded the sweep libray your pan & til turret is finished ! :D
A video of my turret :)
--------------Thank for reading this instructable and i hope this was helpfull for you ! ---------------
---------------------------------Have questions? leave a message behind.----------------------------------


