

Introduction: Paper Mache Mask


While this tutorial could be used to make any mask via the paper mache method, I will show you specifically how I made the mask to resemble that of Dr. Henry Killinger from the Adult Swim show The Venture Bros. You can make masks for cosplay, you can make masks with kids, or you can just make them as decorations. I think I'll just keep mine as a decoration.
Step 1: Supplies and Materials
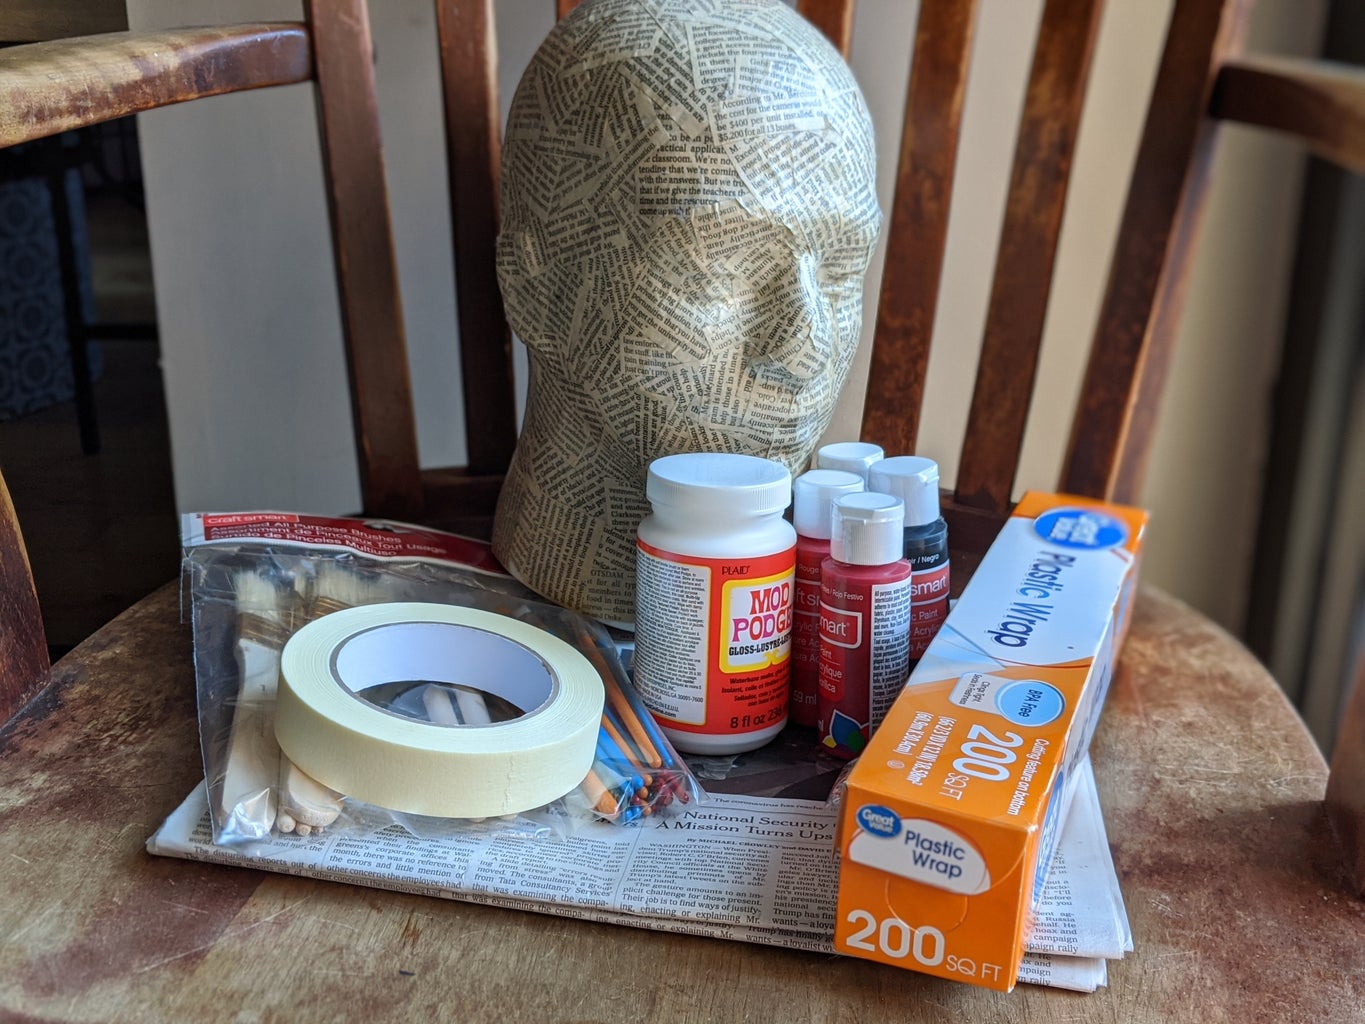

To make a mask, you'll need:
- Newspaper
- Masking tape
- A foam head
- Plastic wrap
- Paintbrushes of varying sizes
- Paint
- Mod Podge
- Scissors
- X-acto/craft knife
Alternative to Mod Podge: You could, of course, use a flour-water mixture (1 part flour to 5 parts water), plus a little salt to prevent molding.
I also used some transparent orange sheets (see second photo) I had in a drawer for the eyes of my mask. But that's not necessary. Honestly, I would have preferred to use yellow transparent pieces of plastic but I used what I had.
Step 2: Set Up Your Foam Head


Place some plastic wrap around the whole foam head. Again, just to reiterate, mine has already been covered in newspaper strips from a previous craft, so that's why my styrofoam head looks the way it does.
Start placing masking tape over the face part of the foam head. Make sure you put smaller pieces of tape around the curve-y areas, like the nose and the eyes.
Step 3: Paper Mache


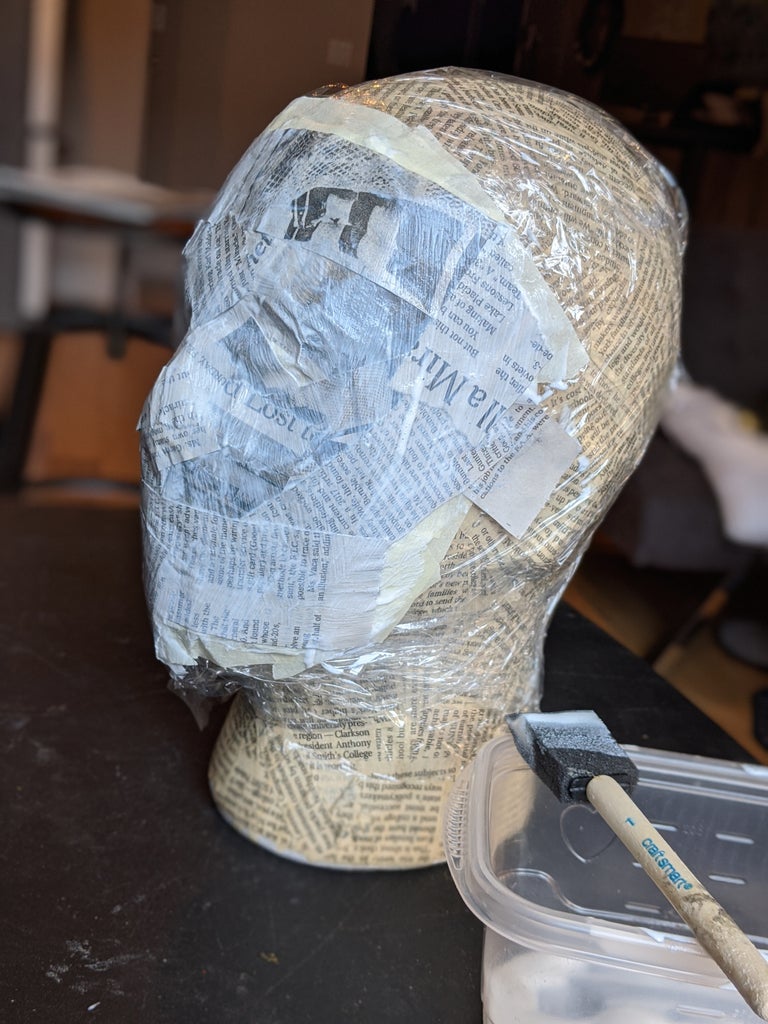
Cut or tear some strips of newspaper about 1" wide. Pour some Mod Podge into a small container (that way you don't have to keep the Mod Podge container open) and start painting on newspaper strips on top of the masking tape. Again, use smaller pieces around the curves -- nose, eyes, mouth. Let dry completely before going to the next step.
Like I said at the beginning of this i'ble, instead of Mod Podge, you could use a flour-water mixture (1 part flour to 5 parts water), plus a little salt to prevent molding if you want. That's the classic way to do paper mache. But I use Mod Podge because it's easy and because I had some. Both ways work the same.
Step 4: More Layers
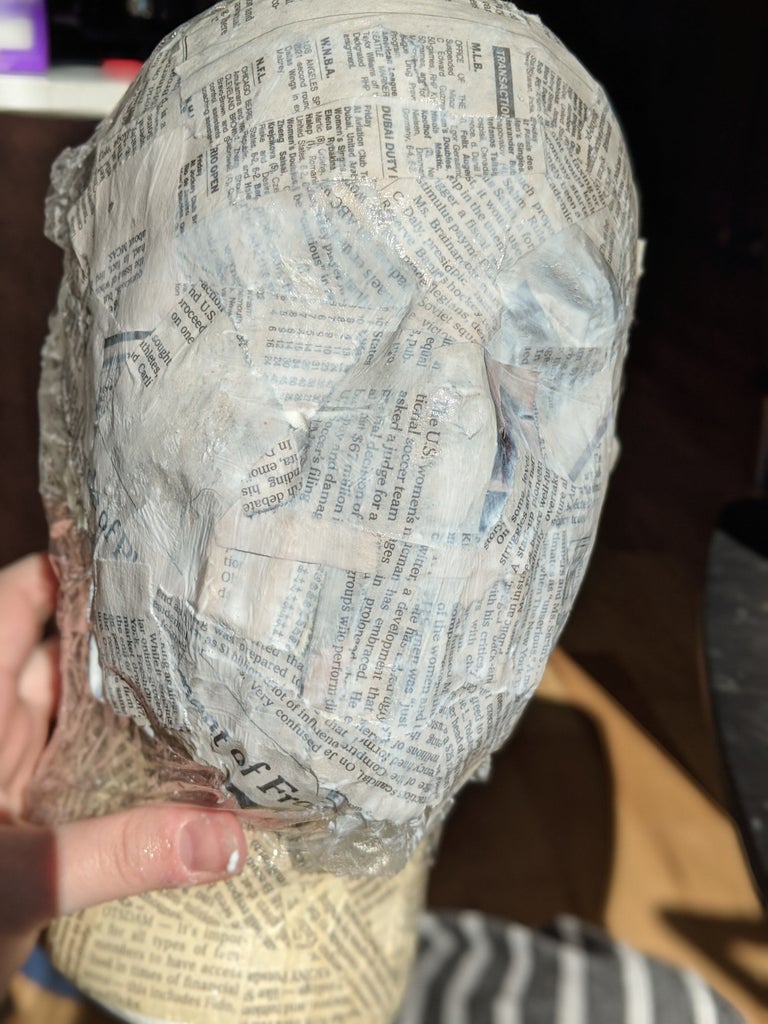


Once your first layer is dry, do another. At this point, you might start thinking that it looks terrible and nothing like a mask. This is how you know it's working.
Once that layer is done and completely dry, do another!
Step 5: Mouth Details

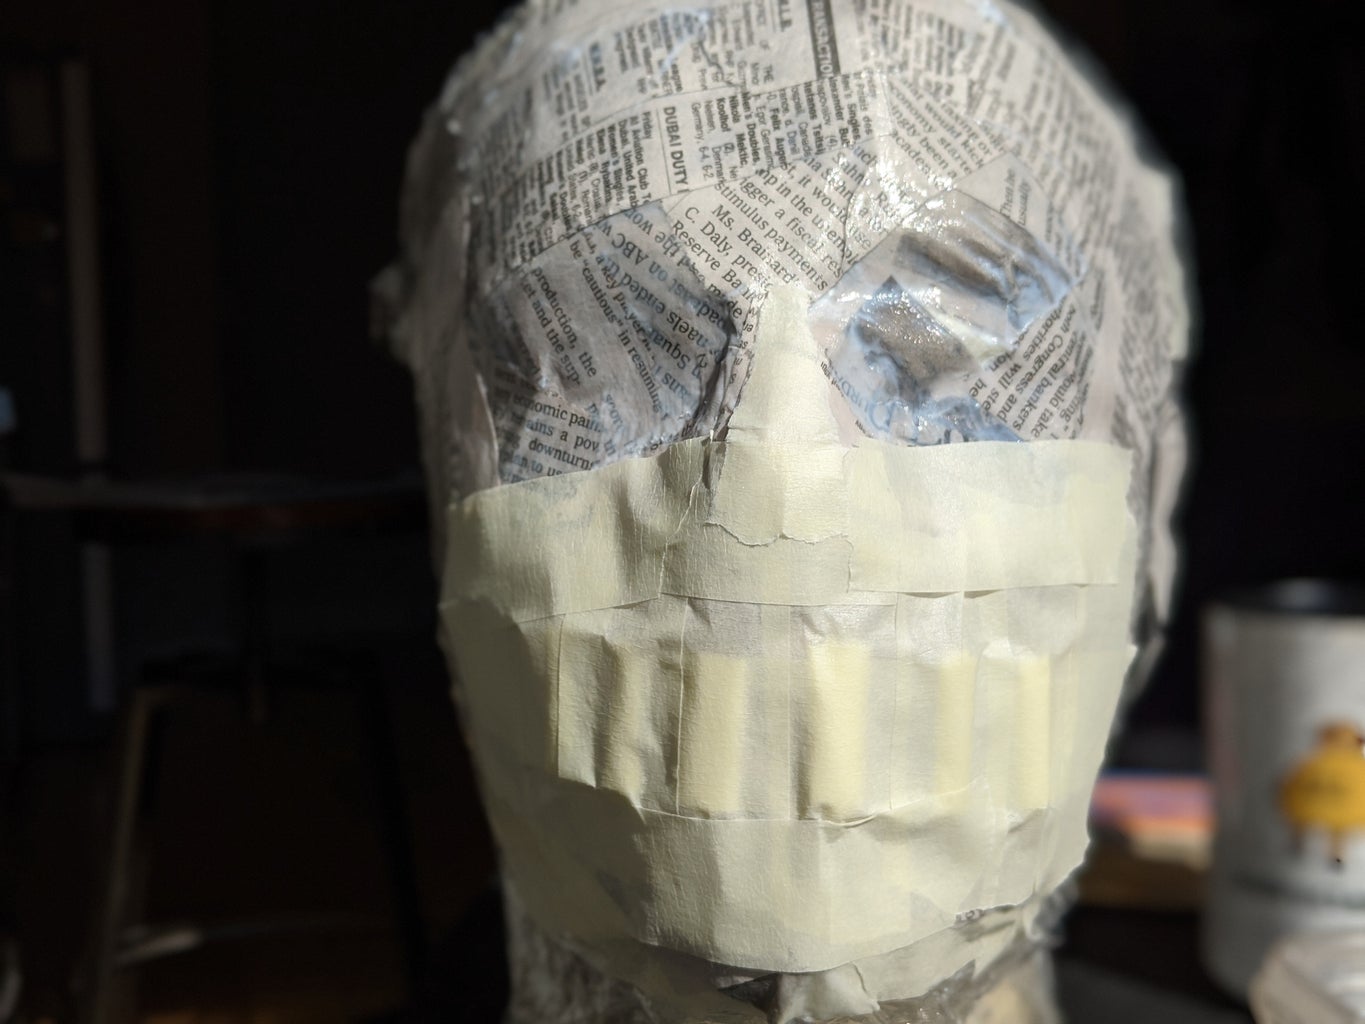

For my mask, I needed some bumpy mouth/teeth details. To do that, I rolled pieces of tape and stuck them on, then taped over them. At this point, I also took the mask off of the foam head and cut out the face shape with a pair of scissors.
After that, I did another layer of paper mache.
Step 6: My Eyes! My Eyes!


After the glue dried, I cut some eye holes using an X-acto knife and a pair of scissors. You can also see that I cut out more of the face shape than in the last step. I used some skinny pieces of tape to cover the raw edges around the eyes. After that, I did one more layer of paper mache.
Step 7: Paint the Mask


Using some acrylic paint and a paintbrush, put a base coat on top of the mask. Once that dries, slap on another coat if you need to.
Step 8: Paint Some Details


Dr. Henry Killinger's mask has some red swirly details and some orange around the eyes. I used a fine-tipped paint brush to do those details while I looked at a picture of the mask. It's not perfect, but I figure it's good enough.
Step 9: Last Details ... Almost


I had these transparent orange stencils so I cut some circles out of them and taped them to the back of the mask. After that, I painted over the masking tape with a coat of black acrylic paint and let it dry.
Step 10: One Last Thing


Use a hole punch to punch some holes on the sides of the mask and string some yarn through it. Now you have a head strap! You could also use elastic or ribbon.
Step 11: All Finished


It's not perfect, but I do really like the way it turned out. I would like to do other masks, too. Maybe a lion, a tiger, or a bear ... oh my!
All in all, it was a really fun rainy day project. It's relatively inexpensive, it uses items you might already have around your home, and it's a great craft to do with kids.

Second Prize in the
Paper Contest


