

Introduction: Parade Float Dogs (Foam Dogs)


How to Make a Parade Dog Float
By Monica Diebllo-Hitta
I am a 7th grade student at High Tech Middle Media Arts also known as HTMMA. We are building our floats for the 39th Annual Ocean Beach Holiday Parade that happens every year on December 1st. For almost 40 years the surfing village of Ocean Beach has hosted one of the best Holiday Parades in California. We wanted to build something that represents the High Tech Schools, OB, and the Animal Pad.
High Tech Middle Media Arts is a public charter school in Point Loma which all of us attend. OB also known as Ocean Beach is a vibrant, native neighborhood, with a California beach vibe. Surfers and sunbathers fill the beach.
Ocean Beach Pier is a popular local fishing spot with great views. In addition, Newport Avenue is filled with antiques shops, beachwear and surf boutiques, organic groceries, and breweries. There is also a Ocean Beach Farmers Market that provides great food, live music, jewelry, and clothing.
The Animal Pad is a nonprofit organization that rescues and provides care to the dog until they get adopted or have a foster home available. There mission is to focus on rescuing dogs from high kill shelters in Southern California and off the streets of Mexico. They are currently a foster based organization with plans to build a sanctuary here in San Diego.
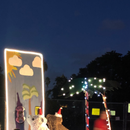
The concept of the float was to have a replication of the Ocean Beach Pier so that it is related to Ocean Beach and so that you can see that it represents Ocean Beach. We also thought about having beach towels and tents on the sand. While on the water there are dogs surfing the waves. We came up with this idea because Ocean Beach is also known for its dog beach so when we thought about dogs and the beach we came up with surfing dogs. Which ended up being the final element for the float.
Our groups float element was the dogs. At first I thought we got one of the easiest jobs but after actually doing the wok it ended up being more time consuming and difficult than I thought. We had to make two dogs and one of them ended up falling and breaking so we had to stop and glue it back on using gorilla glue. Overall I think there were some parts that were challenging, but fun at the same time.
The foam dogs were instructed from the following materials
- Insulation foam (for the dog’s body).
- A bandsaw or a foam cutter (to cut out the shape of the dog).
- Constructive adhesive (to glue the dog shapes together).
- Different grits of sandpaper: 60, 150, 220, and 400 is optional (to sand it and make it smooth).
- Paint (to make it look more realistic).
Our concept was to have two surfing dogs next to a pier, to represent the dog beach at Ocean Beach We would also have the logo of the Animal Pad on all sides of the float. We will have truck driven by some HTMMA parents to pull the trailer.
We first made a 3D model on Rhinoceros, which is a “commercial 3D computer graphics and computer-aided design (CAD) application software.” Then we laser cut a 3D model put all the pieces together. In the process of scaling the dog and making it life size. At first Rhino was hard, but once i learned everything it was very fun and easy to use.
Step 1: Tracing and Cutting the Foam (Challenging)


First we traced an image of a dog on the piece of foam, which was about 8 ft. by 2 ft. We then we cut it out. We started out by using a foam cutter, but it took too long and the smell was not healthy to inhale so we used a bandsaw instead. The band saw was much faster, but there was a lot of foam bits to clean up at the end. That’s why this step was more on the challenging side.
Step 2: Assembly (Very Easy)


To glue all the pieces together we used Construction Adhesive, and let it sit overnight. The glue doesn’t take that long to dry, so one might not have to wait 12 hours.
We put the Construction Adhesive along the edges of the dog and in the middle to keep it together. One does not need that much glue. If you one make little dots, that will work.
This step was easy because the glue didn’t take that long to dry, and once it was dry, it was an easy transition to the next step.
Step 3: Sanding (Challenging)


Once all the pieces were glued together, we started off by rounding the edges of the dog with a 60 grit sandpaper. When all the edges were rounded and there were no more holes, we moved onto a 150 grit. The 150 is the make the dog soft and to cover up any rough edges. We then move onto 220 which is the final touch to make the dog smooth (400 is optional). This was my favorite step because I felt very satisfied sanding down the dogs and making them smooth. Some people might find this step annoying though, becauses sanding foam takes a long time, and it uses a lot of patience. After sanding for a while my arms got tired easily so it took longer for me to make.
Step 4: Painting (Easy)


Since the foam was already a light blue, we put a coat of brown paint for one dog and white for the other. Make sure to sand and and paint the ears before gluing them on. We didn’t have an exact size for the ears. We just cut out what looked right. This was not the easiest step because we had to make several ears until we found an appropriate shape that looked like dog ears.
Overall the process of making the dogs was simple except for the for a few steps. The two hardest steps were cutting the foam, and sanding it. Cutting the foam was challenging because it took a long time and it was extremely messy. I had tiny foam bits all over my clothes and hair. If you have long hair like me, then I suggest wearing something over your hair to prevent foam bits from getting stuck because washing it later will be a pain. Sanding the dog was also challenging because it took the longest and it wears out your arms quickly. I hope you found this helpful and will use it for whatever you need a foam dog for.


