

Introduction: Phi Box


The attached file is a scalable vector graphic made from Corel Draw.
I made this to be cut on the UNIVERSAL 60 Watt CO2 Lasers in the Chandler, Az TECHSHOP.
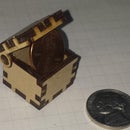
This is a laser cut pattern that assembles into a box with a wooden hinge. Its about (approximately, almost, nearly) the size of a cigar box with proportions that are supposed to fit the PHI proportion
(http://www.goldennumber.net/what-is-phi/).
When finished, the inner dimensions are 5.715 X 3.360 X 9.503
I believe this file can be imported to several other drawing or CAD programs. It should be possible to scale up or down to accommodate thicker or thinner wood.
When I cut this file, I use three ply maple veneer plywood from Lowes. The wood is 1/4 inch but the finished dimension is 0.210 inch thick.
Features:
1) The tabs on the larger panels are wider than the slots on the receiving panels to compensate for the 0.005" kerf of the laser.
2) There is an additional gap between the back top panel and the bottom back panel so the pieces do not rub when opening.
3)The hinge is made so the lid only opens about 120 degrees and stops.
4) The tabs that stick down between the four central hinge points are mostly there to aid in assembly
5)The additional four hinge points are for strength
6) I use both CA gel and watered down wood glue to assemble the parts. The CA glue sets up fast and holds the joints together while the wood glue soaks in and dries.
HTMF = Havin' Too Much Fun
3/18/2016 Revision
If you use the bushings cut from the 'Dremel Chop Saw' (size of the bushing are the ones mentioned in Chop Saw Instructable) the hinge will be sturdier..
Attachments

Step 1: Cut the Pieces Out Using the Laser Cutter


Start with the pattern cut from the file.
These are the pieces you should have.
Step 2: Lay Out the Pieces for the Lower Part of the Box


Set the pieces up like this and get ready to glue the bottom together.
Note: There is a front and a back and a left and right side. Look at the picture.
Arrange the pieces like the picture before you glue the lower part of the box together.
The circled corners on the side panels should be next to the panel with the additional cutouts for the hinge pivot tabs..
I put CA gel glue at a couple tabs to hold the pieces together quickly during assembly. for the rest of the tabs I use a watered down (50/50) wood glue solution.
Note: regular strength wood glue works fine but excess may ooze out and turn yellow when it dries. Careful application may minimize 'ooze'.
SPECIAL NOTE: DO NOT GLUE the hinge pivot tab
Step 3: Put the Bottom of the Box Together


Assemble the box using hand pressure to temporarily hold the pieces together. The CA gel glue bonds almost instantly. The wood glue takes a bit longer.
Note: I've used clamps before. My experience has been that the force applied by clamps can warp the panels.If you are working with exceptionally warped panels, it might be necessary to use clamps.
Step 4: Assemble the Pieces for the Lid of the Box


Note: The following steps my require some practice. For the first assembly, I would recommend accomplishing the following steps without glue.
Assembly order will be up to you.
I start with the outer side panels. The hole in the side panel fits over the hinge pivot tab in the bottom back panel.
Then I install the four center hinge braces. The holes in the braces fit over the hinge pivot tabs in the back panel. The front of each brace rests on the bottom front panel until the lid front panel is installed.
Then I install the lid back panel. The two tabs that extend down go between the hinge braces at the hinge point. The outer edges should fit into the outer hinge panels.
Then install the front panel.
Note: This will require some patience/practice. The tabs fit into holes, but there are several pieces to move around during the assembly process.
After you have assembled and disassembled the lid a couple times, you should be ready to glue the parts together.
Step 5: Install the Top of the Lid


I add CA gel glue to a couple points to hold the piece together while the wood glue sets up
Lay the lid in place and patiently push the pieces together. All the tabs fit into the slots of the opposing parts. It is not necessary to pound the parts together. When they line up, they slip into place.
If you have accomplished the dry-fit, you will understand how tricky the assembly can be, but the pieces will go together.
Once together, hold the pieces together with hand pressure.
It takes 20 to 30 seconds for the CA gel glue to set up, then another 5 to 10 minutes for the wood glue to set up enough to allow handling.
Step 6: The Finished Box


The lid opens to about 120 degrees and holds

Participated in the
First Time Author Contest


