

Introduction: Pi Bird


What it does: take pictures of birds when the pi camera senses a large change in the picture's pixels.
What we'll need:
- Raspberry Pi with usual SD card
- Pi camera module
- Pi case
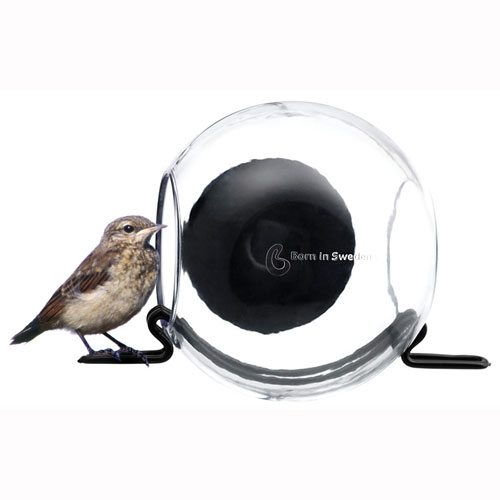
- Bird feeder
- Set of macro lenses (optional)
- 5V powerbank (optional)
- USB wifi dongle (optional)
What we'll do:
- Install the required packages on a fresh image
- Load a script monitoring the camera's output for objects passing by
- Setup a simple web interface to browse the pictures
- Fiddle with the bird feeder and the lenses to get proper focus
Step 1: Install a Fresh Image and Enable the Camera
Grab an SD card and install your favorite image. The info in this post are based on a Raspbian-based distribution but should work on others with some tuning.
I picked the Raspian Jessie Lite as there is no need for a desktop environment on this project. You may want to update the distribution and change the default password. Then:
- enable the camera module by launching raspi-config from the command line.
- disable the camera's red LED by adding disable_camera_led=1 to the /boot/config.txt file: sudo echo "disable_camera_led=1" >> /boot/config.txt
- install the Python Image Library (PIL): sudo apt-get install -y python-imaging-tk
- install packages to support a light web server; there are many options, for example: sudo apt-get install -y apache2 mysql-server php5 php5-mysql
Step 2: Setup the Motion Detection Script
In this project, the camera is not only used to record pictures but also to detect when to take the picture. This is done by taking a low resolution picture at regular time interval and comparing it, pixel by pixel, with the previous picture. If the two pictures are significantly different, a full size image is taken.
This is done through a python script that can be downloaded with wget http://www.fasyl.com/rpi/PiBird_motion_pic.py; chmod +x PiBird_motion_pic.py
This script is tweaked from an original script from brainflakes on this rapsberrypi.org thread.
You can edit line #25 to save the pictures to a different location.
To run the script automatically at startup, add a cron job. If you are not sure how to so, run: sudo sh -c 'crontab -l > 2del && echo "@reboot `pwd`/PiBird_motion_pic.py" >> 2del && crontab 2del && rm 2del'.
Step 3: Setup the Web Server
There are many ways to enjoy the pictures, you could transfer them through SSH or store them on a USB drive. I decided to review them through a simple web interface and download the ones I like through my browser.
To setup that simple web interface, type: wget -O /var/www/index.php http://www.fasyl.com/rpi/PiBird_list_pics.php; rm /var/www/index.html
This works best by accessing the web server through WiFi. To do so, you'll need to setup the wireless interface. There are many ways to do so depending on the Pi and dongle you use.
Step 4: Put It All Together

Alright, the Raspberry Pi is now ready to snap pictures. Simply run ./PiBird_motion_pic.py and strike a few poses. Now, if you browse to your Pi's IP, you should see your first pictures.
It's time to put it all together. You will likely need to adapt this part based on your actual hardware.
To protect the Pi against sun and rain, you should place it in a case and seal off any large opening with tape, etc.
I used this bird feeder with two side openings, quite convenient to load the camera on one side and let the birds come and feed from the other.
To get the focus on the right spot and frame the picture nicely, I used a basic camera macro lens coupled to a yogurt cup with its bottom cut-away. A bit hacky but it worked nicely. You may get good result using some cheap phone camera lenses.
There are info out there about how to tweak the camera's focus by rotating the build-in lens; it did not work for me: quite tricky to firmly clamp onto the tiny lens body and rotate it.
It will take some experimenting to get the framing and focus right; while fiddling, you can easily snap a test picture with raspistill -o test.jpg.
Finally, you need to decide on how to provide power to your Pi; a 5V battery pack is probably the best option.
Step 5: Let's Snap Some Birds

Alright, all set.
It's time to mount everything outside, load the feeder with seeds and wait for visitors to fly in.
Have fun !


