

Introduction: Jewelry Class: Piercing Sheet Metal


Class table of contents:
- Tools, Materials, and What You'll Learn
- Beads
- Wire
- Piercing Sheet Metal (you are here)
- Torch Soldering & Going Further
This lesson introduces the tools and techniques you'll need to create finished jewelry from precious sheet metal! We'll walk through the steps to create a chevron pendant (or keychain) from copper (or sterling silver, etc. if that is your preference) by sawing, filing, sanding, and polishing the metal before attaching jump rings to a necklace chain or key ring.

For this project, you will need:
- 18 gauge (1.1mm) nonferrous sheet metal (sterling silver, copper, brass, etc.), about 6" x 3" (15cm x 8cm)
- Scissors
- Smooth jaw pliers (set including flush cutters)
- Safety glasses
- Silver-plated wire (26ga and 18ga)
- jump rings
- chain and clasps or key rings
- Small ruler
- Calipers (optional)
- Bench block
- Chasing hammer
- Rawhide mallet
- Needle files
- Bench pin
- Saw frame, blades, and bur lubricant
- Sandpaper (handi-files, wet/dry sheet, and/or sanding pads in various grits 200-1000)
- Dust mask
- Paper sketch and glue stick
- Small towel
- Apron (optional)
- Bench brush
- Center punch
- Drill bit (2mm or smaller)
- Old toothbrush and soap
- Finishing wax
As an Amazon Associate I earn from qualifying purchases you make using my affiliate links.

The metal you choose may vary based on your budget and preference, but should be non-ferrous, which means without iron (the primary component of steel). Iron and steel are very hard metals, making them less than ideal for small jewelry projects where malleability is key. Copper, sterling silver (silver alloy with a small amount of copper or other metals to make it stiffer), and brass (alloy of copper and zinc) are all soft enough to cut and shape into jewelry with ease. Gold and aluminum, among others, are also used for sheet metal jewelry, though not recommended for beginners (they are both very soft).
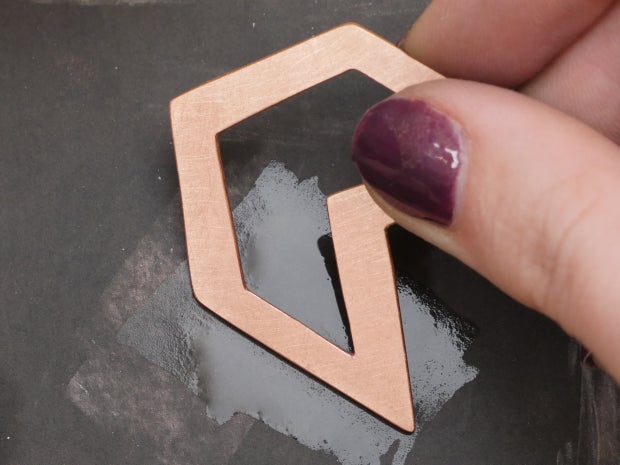
Step 1: Paper Pattern
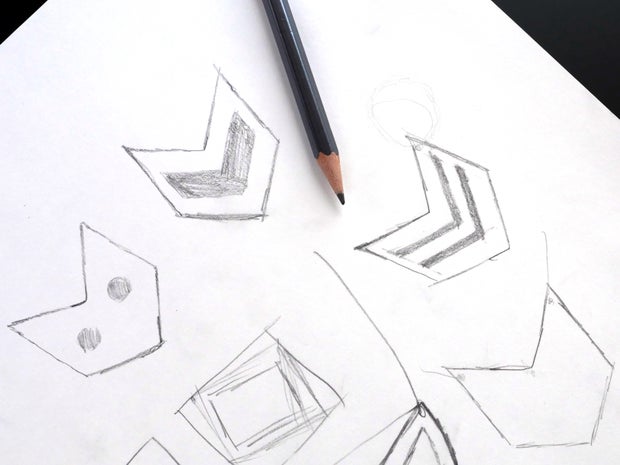

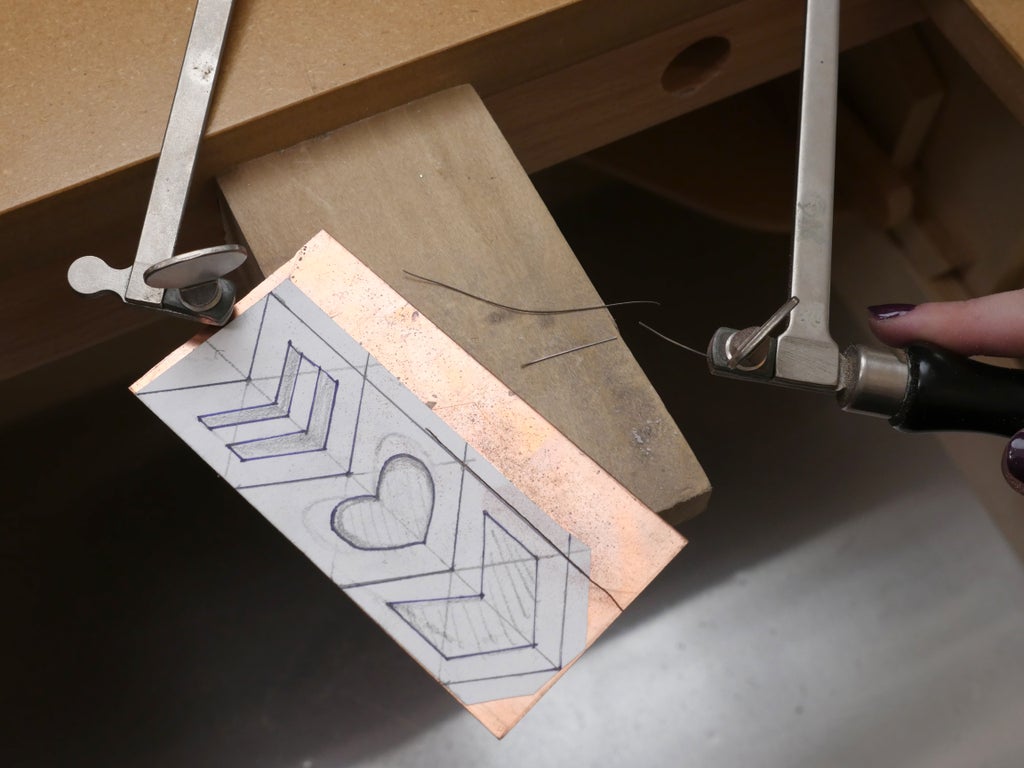
Although I've included a printable template for the cutout chevron shown in this project, I encourage you to draw and use your own designs! Use graph paper to create symmetrical designs. Sharpen up your straight lines with a ruler, and cut your pattern out with a bit of space around the outer edge. Use a glue stick to thoroughly coat the back of the pattern all the way to the edges (do this on a scrap piece of paper to catch excess glue), then firmly press the pattern to the sheet metal and smooth down the edges.

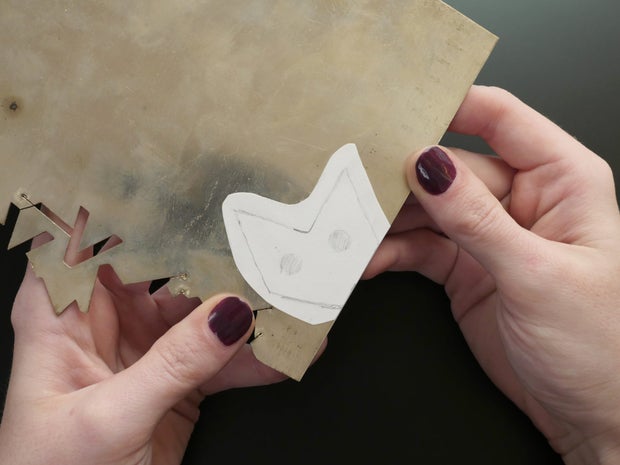
But why cut all the way around a single shape? That'll take forever! You can be economical about your cuts by placing the pattern edge along the factory edge of your sheet metal, and tiling similar pieces closely to cut the edges of two pieces at the same time. Let the glue dry for at least a few minutes before proceeding to the next step.

Step 2: Piercing With a Saw Frame

A jeweler's frame saw holds tiny blades to cut intricate shapes. Blades are held in place with two thumb screws, and the frame size adjusts with a third thumb screw for tensioning the blade.
To set up your saw frame, first grab a blade and hold it up to the light so you can see its teeth. Blades size 2, 1, and 1/0 are well suited for 18ga. sheet metal. Notice which way the teeth seem to be pointing— this is the direction the blade will cut. To take the best advantage of gravity, we want out cuts to occur on the downstroke of the saw, so the blade should be oriented with its teeth pointing downwards when mounted in the saw frame.


Loosen the thumb screw closest to the saw handle and insert the bottom end of the saw blade, ensuring the teeth are pointing forward (away from the rest of the saw). Tighten the thumb screw to secure the blade at one end. Next, loosen the thumb screw at the back of the frame, so the far section can move freely. Slide it to bring the blade's other end overlapping with the far thumb screw area, and use the thumb screw to secure the blade end.


The last step in setting up the saw frame is tensioning the blade. Pull the saw frame pieces apart, and tighten the thumb screw while the frame is under tension. Your blade should be very tight and "sing" when you pluck it.
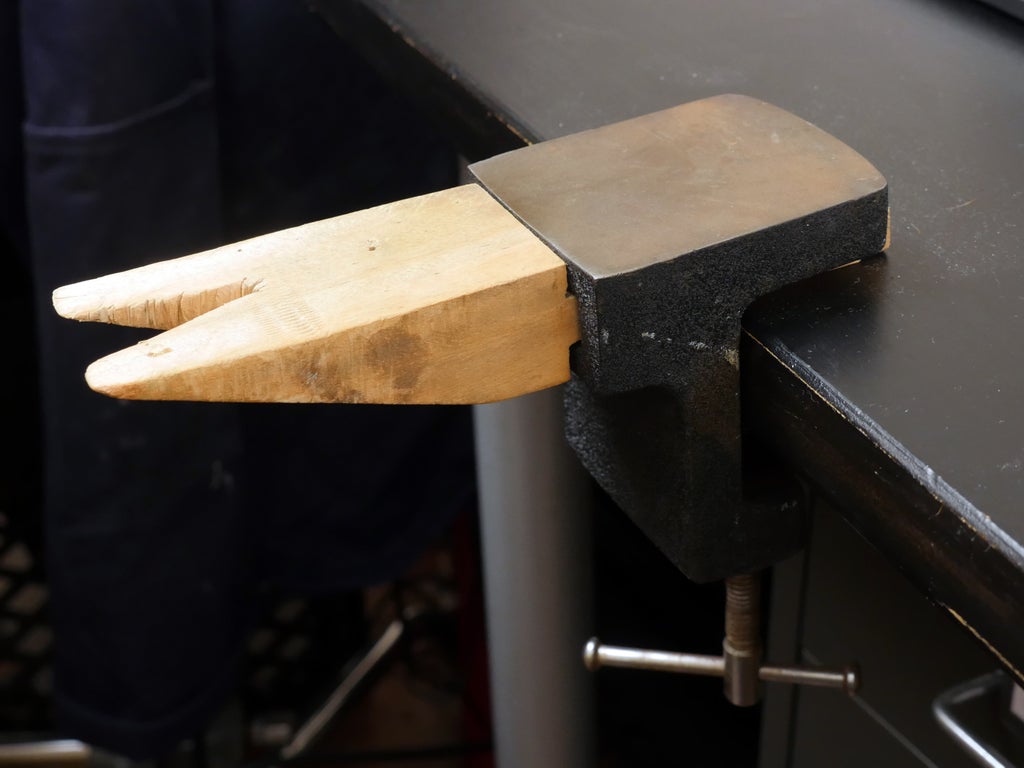
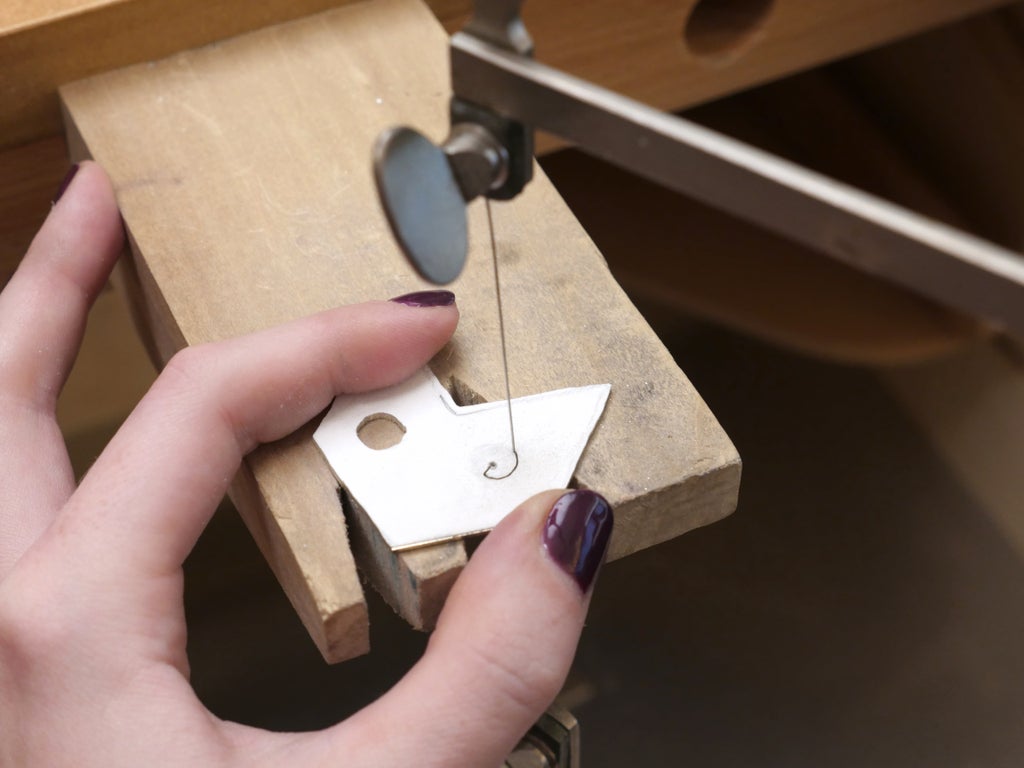
Set up your sheet metal with its glued-on template on your bench pin. This sturdy bit of wood with a V-cut is extremely helpful for piercing sheet metal, as it supports the metal on both sides of a cut.


Since you're about to create a bunch of tiny metal shavings, a few words about safety and mess: Wear safety glasses, a dust mask, and protect your lap. You will be tempted to blow shavings away from the cutting area as you saw, but this just puts more particles in the air for you to inhale immediately. Use a bench brush to move shavings away from the cut area, and use a towel, apron, or catch tray below your work to catch dust. You don't want these shavings to get into the fabric of your pants or other clothes— they become itchy and are hard to remove.
If you're working with sterling silver, definitely save your dust and scrap pieces! You can sell precious scrap metals back to most suppliers by weight. Scrap copper is much less valuable by comparison, and I don't bother collecting it at home (I recycle it with other household metals). When I was in school, the student shop collected scrap copper in a five-gallon bucket and sold it for scrap once per semester.

Right before you get ready to make your first cut, glide your blade against a stick of bur lubricant. Do this at the start of every cut, after every minute or so of sawing, or when turning tight corners with the blade. This reduces friction which not only makes the blade cut through the metal more easily but prolongs the blade's usefulness as well.

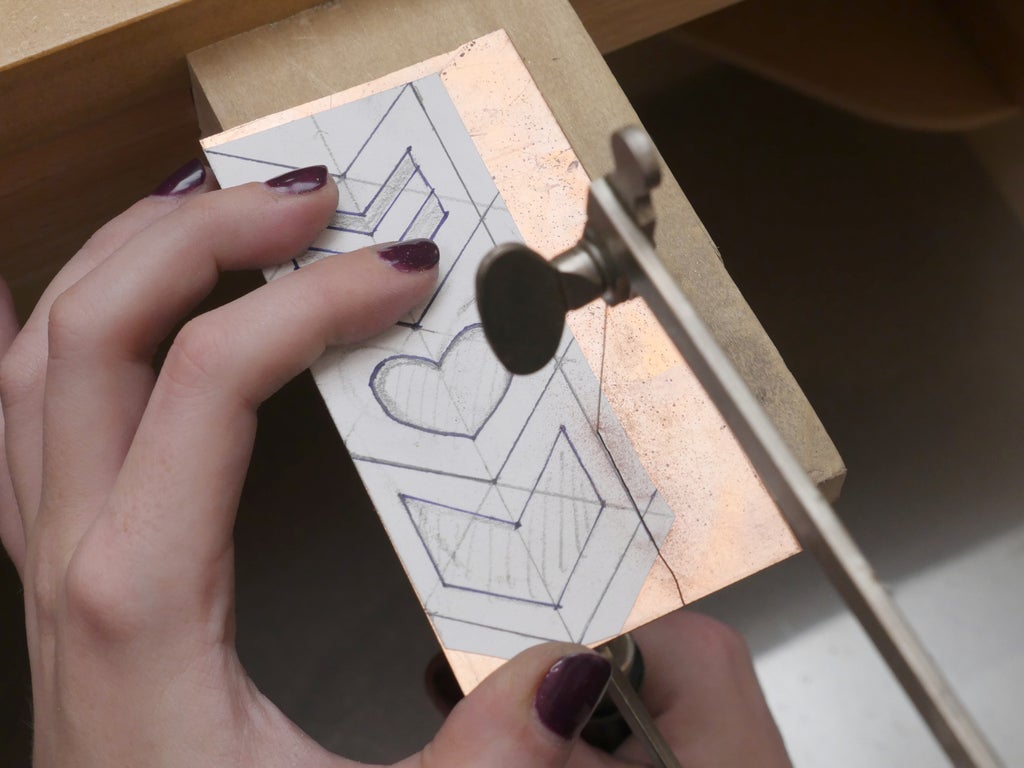
Hold the saw upright in your dominant hand, with your elbow comfortably bent. Adjust your chair height so your bench pin is lined up with your chest. Take extra time to notice your posture as you work. Since jewelry is a labor-intensive craft, it's important not to put your body in strenuous positions. Place the base of the blade perpendicular to the sheet metal and draw the blade straight down, applying light pressure on the saw in the direction of the cut.

After the initial notch has been cut, focus more on moving the blade straight up and down along the edge of the pattern line, and don't worry about applying too much forward pressure. Use smooth whole-arm motions and keep your wrist straight. The blade will do its job and nibble away bits of metal with each downward stroke.
At first, it may be difficult to achieve a straight line, and that's perfectly normal! Try to err on the outside of the pattern lines, and you can always clean it up later with a file. Use a bench brush to sweep away shavings when they start to obscure your cut line.
It's also normal to break saw blades (occasionally, more if you're a beginner). You are wearing eye protection, right? Sometimes you can remount the shorter remaining piece and use it for a bit more sawing. When securing blades after breaking one, watch out for broken blade bits in the thumbscrew areas of your saw, as they can prevent the clamp from fully grabbing the new blade.

Practice with outer perimeter cuts before advancing to cutting tiled pieces apart, where there is less room for error because both sides of the cut are used.
To create sharp points on your chevron, begin cuts at each outer edge and cut toward the middle. For the most part, try to cut in a straight line away from you, and adjust the angle of the metal, rather than vice versa. When it comes time to round a corner, gently spin the handle of the saw while moving the blade up and down, then stop to reposition the metal and saw to cut in the new direction.
Step 3: Interior Cutouts

To cut out interior shapes, first you'll create a divot in the metal with a center punch and carpenter's hammer. Drill bits tend to skate on smooth surfaces, so it's necessary to create a divot to get the drill bit started. The divot will serve to host a drill bit, which will clear the way for inserting a saw blade. Use a carpenter's hammer over a polished finishing hammer with steel tools; otherwise you'll scratch up the surface of your smooth hammer, and those scratches will transfer to other work later! It's best to punch your metal on a smooth surface like a bench block. On softer surfaces like wood, the punched metal may deform on the underside (and poke a hole in the surface as well).


Position the point of the center punch somewhere inside the metal to be cut away (closer to the middle than near the edge - this gives you room to maneuver your saw inside the area to be removed), and hold the tool straight up and down. Strike the tool with a single firm blow from your hammer. Repeat for additional cutouts, if any.


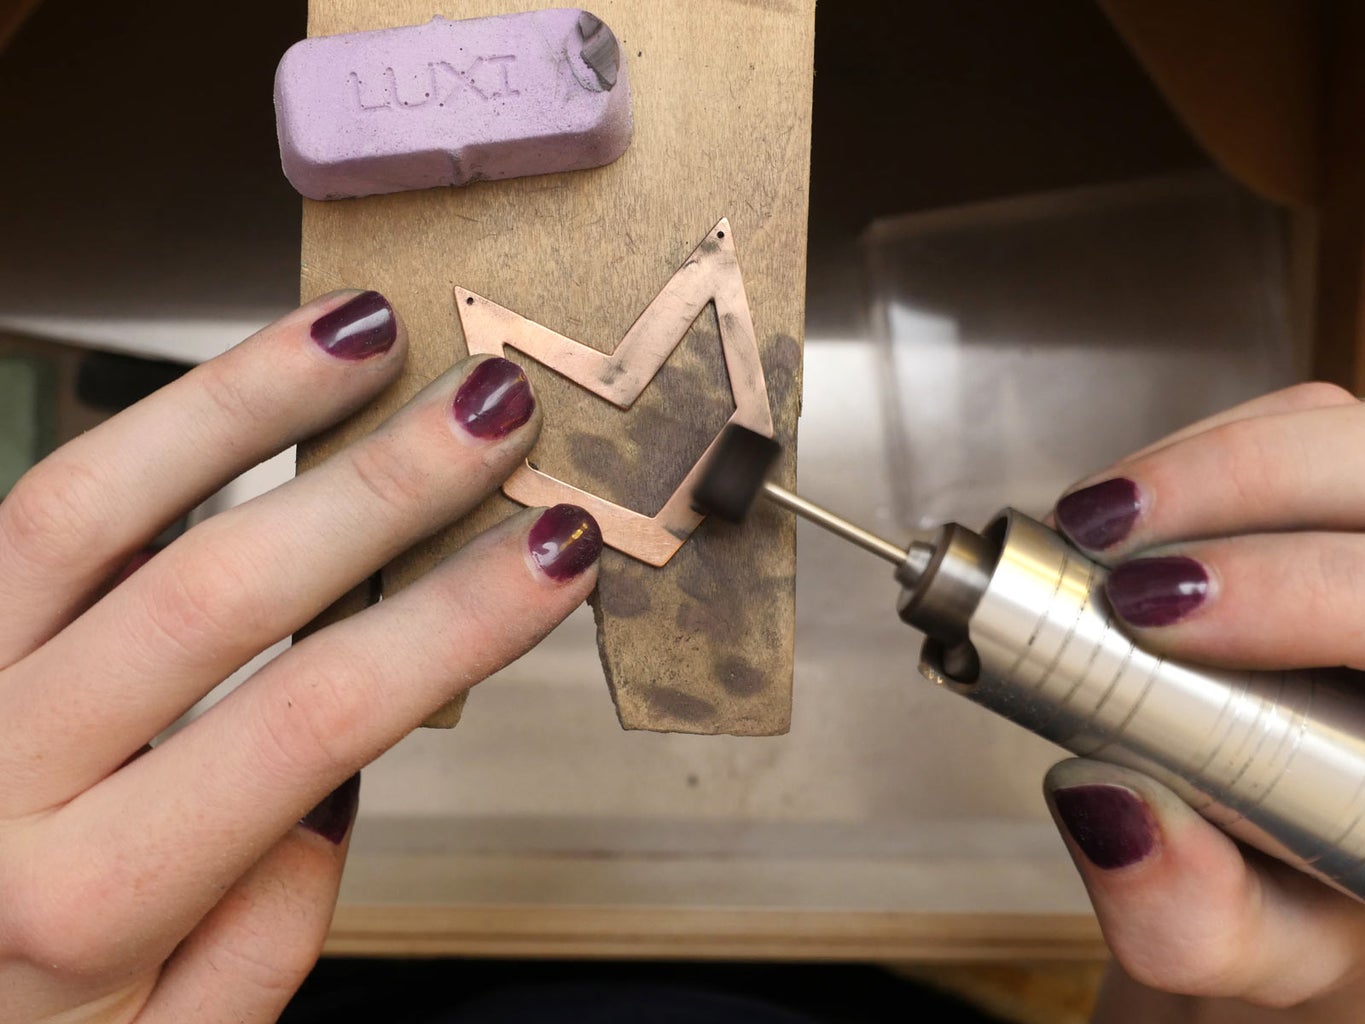
Set up your rotary tool or standard hand drill with a tiny (2mm or slightly smaller) drill bit. Draw your stick of bur lubricant along the drill bit, then place the drill bit against the divot and brace the metal before turning on the power. As the drill bit spins, apply gentle downward pressure until the bit pierces through, then remove and power down the tool.
Grab your saw frame and secure the blade near the handle, but not at the other end. Thread the saw blade through the hole you drilled in the metal before securing and tensioning the blade in the frame. Now you can begin cutting (don't forget the bur lubricant) from inside the area to be removed to cut out the void.

Step 4: Refining Edges With Needle Files

Once you've finished cutting out your shape, it's time to clean up the edges with a set of needle files. Most files are hardened steel with a tooth pattern cut into them, but when you’re shopping you might also see files covered in diamond grit. Reserve your files for use on soft metals only, as filing steel will quickly dull the teeth and reduce their effectiveness. These files cut on the push stroke, so you should only apply downward pressure on the file when pushing it away from you, and release the pressure for the pull stroke. Use the different areas of your bench pin to brace the metal for filing, and try to avoid positions that brace the metal against your hand.
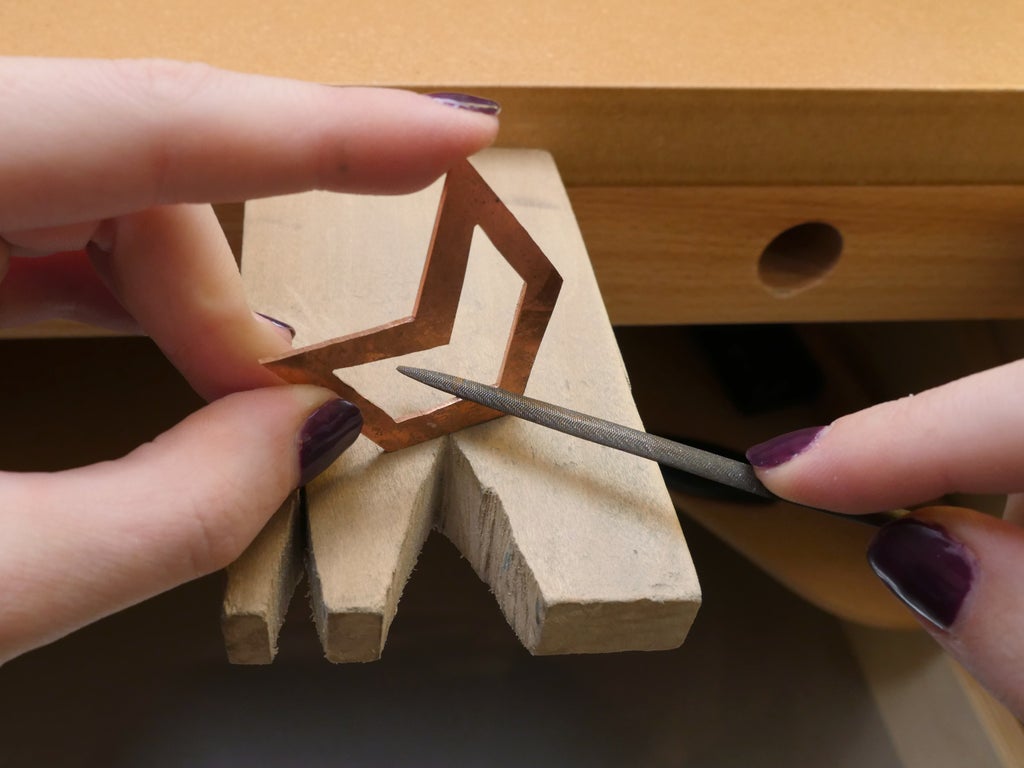
Files come in different shapes to allow you to get into tight spots or file curved shapes. For instance, to file the interior edges of the chevron that extend into a tight corner, use a shallow triangular flat file.

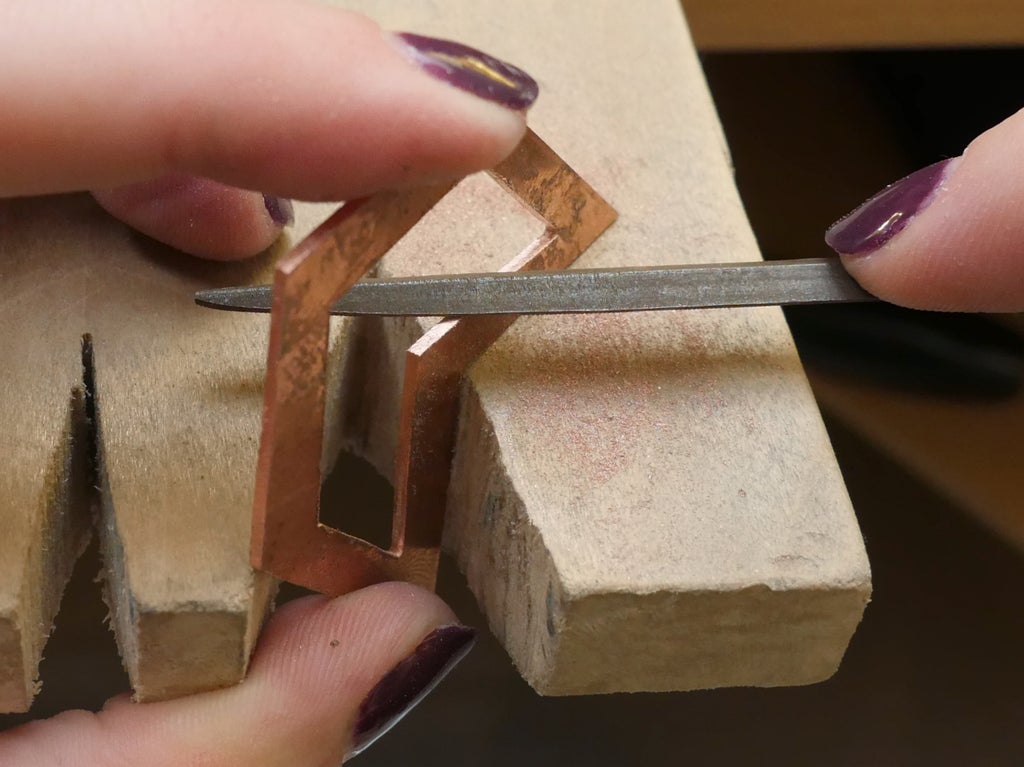
To perform uniform strokes across narrow edges, hold the file diagonally to the work and push it across the metal from tip to base as you glide the file along the length of the edge. Continue filing until all edges are flat, even, and perpendicular to the workpiece.
Step 5: Sanding

To refine the surface of your metal, you'll use sandpaper across a gradient of grits from (relatively) coarse to fine. Most hardware stores carry sheets of wet-dry sandpaper; pick up a sheet each of 400, 600, and 800 grit. You can tape sandpaper to a flat surface to create a mini sanding board, and get sanding boards that work like nail files. If you don't plan to polish your projects with a rotary tool, you can achieve a very respectable lustrous surface by finishing with some superfine sanding pads. Keep your dust mask on when sanding.
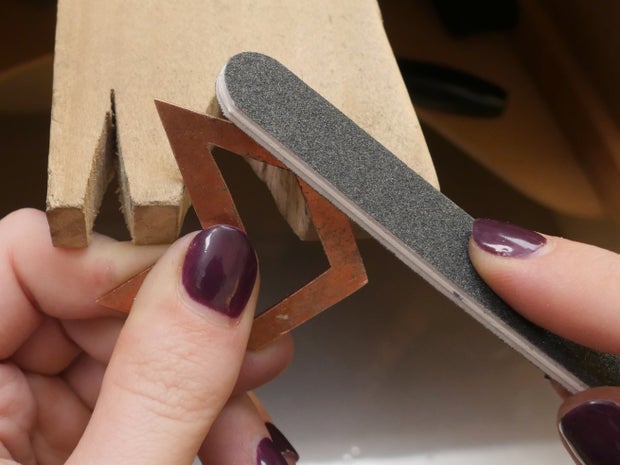
Sand the filed edges, starting with a coarse grit (200-400). Either rub the metal across the stationary sandpaper, or vice versa (or a combination thereof) until the surface is uniform. You may expose some areas that require touching up with a file. Don't ignore these spots, as sanding is a one-way process! If you rough up an area with a file, you'll have to start again with the coarsest sandpaper and work your way finer, so you might as well get that all out of the way now.

Now's also the time to decide what this workpiece will become, if you haven't already. To make a pendant, punch and drill two small holes near the upper points of the chevron. To create a keychain, create just one hole, but make it a bit larger. File away any burs left from drilling and resume the beginning of the sanding process.


Use the sandpaper to gently round the edges and sharp corners of your workpiece, then rub the piece on a flat sheet of sandpaper to sand each broad surface.

Repeat the sanding process over the whole workpiece with 600 grit sandpaper, then with 800 grit. Each time, evaluate the piece for scratches bigger than that grit can remove, and backtrack to a coarser grit if necessary to remove all scratches.

This sanding process will seem to take forever. Put on some music and get into it! Your fingers and workpiece will get dirty, so occasionally wipe the metal with a towel and wear gloves if you have a hand modeling audition tomorrow. Take a break if your fingers get sore, but don't cut corners on this step!
Step 6: Surface Finishing
It's up to you how to finish the surface of your sanded sheet metal. A thorough buffing with a 1000 grit sanding pad creates a brushed finish look that may be exactly what you're after. Wash the piece with soap and water using an old toothbrush, dry it off and apply a thin coat of wax if you want to keep the bright shiny color (or let it naturally oxidize).
But if you want to amp up the shine on your metal, a rotary tool with polishing buffs is a must-have. Professional jewelry shops use stationary bench polishers, which take up a lot of space for such a single-purpose tool. A Dremel or hanging flex shaft is more versatile for the jewelry beginner. These tools spin very fast and run the risk of launching a bit of material or broken tool into your eyes or someone's near you. Always wear safety glasses and a dust mask when using rotary tools, and tie long hair back.

Polishing buffs come in different materials, shapes, and hardnesses to rapidly move polishing compounds (very fine abrasive materials) against your metal. You can work your way to a shiny mirror finish!
Reserve a buff for each compound you use (do not mix and match or the finer compound will be compromised), and refer to the manufacturer's documentation to decipher which grit is which color.

Now that you've already learned how to sand the hard way, you can graduate to some rotary-assisted sanding using a slotted mandrel or abrasive-impregnated silicone bits. There are many other types of rotary tool accessories available for sanding and polishing (brushes, bristle discs, etc.), and you may discover a preference for certain types and shapes based on what you like making (e.g. flat broad shapes vs. more intricate designs with hard-to-reach places).
Polishing is just one type of surface finishing.
You could try hammering your polished metal with the round side of a chasing hammer to make it pitted, or research patinas that change the metal's appearance. If you want to clean up your bench pin to remove built up compounds and markings, just give it a good sanding!
Step 7: Attach Findings & Enjoy!

Use jump rings to attach a necklace chain or keyring, and show off your fresh creation! If you need a reminder about how to open and close jump rings, refer to the previous lesson about wire. Take a photo of your masterpiece and share it with us in the imadeit section below.
Class table of contents:


