

Introduction: Playing Canon D in 8-Bit Music


When classical music meets Mario, what do we get? Canon D in 8 Bit Music!

Step 1: Tools

Tools
* Arduino and Printer Cable
* Piezoelectric Buzzer
* Jumper wires
Step 2: Wiring the Arduino

This is the simple step. It is not surprising that the circuitry is simple, since all we are doing is inputting different voltages to simulate a variety of sounds.
Step 3: How It Works?

Using the built-in Arduino function, tone(), we can generate a square wave of a specified frequency (at 50% duty cycle) on a pin, where the duty cycle controls the volume. The duration can be specified, otherwise the wave continues until a call to noTone().
Only one tone can be generated at a time. If a tone is already playing on a different pin, the call to tone() will have no effect. To play a melody we can call notone() and loop aa new tone immediately after to emulate the sound.
The syntax is tone(pin, frequency, duration). Duration is optional -- it will play until notone() is called.
Step 4: Defining the Frequencies

Each piano key is a different frequency, which is why each key is a unique tone. We need to tell the Arduino which frequency is associated with which key, so that it is easier to type music (as letters) when we code the melody.
The frequencies are defined in a header file called pitches.h.
* Download the pitches.h header file
Step 5: Writing the Melodies

* Read the music sheet and note the notes that are played and how long each are played.
Canon D will take about 1000 lines to write. A fellow 'ible member @JeanC117 has helped me translate the main phrases of Canon D shown below to readable letters and numbers ( since I cannot read sheet music)
[(A6,8),(FS6,16),(G6,16),(A6,8),(FS6,16),(G6,16),(A6,16),(A5,16),(B5,16),(CS6,16),(D6,16), (ES6,16),(FS6,16),(G6,16)] [(FS6,8),(D6,16),(E6,16),(FS6,8),(FS5,16),(G5,16),(A5,16),(B5,16),(A5,16),(G5,16),(A5,16),(FS5,16),(G5,16),(A5,16)] [(G5,8),(B5,16),(A5,16),(G5,8),(FS5,16),(E5,16),(FS5,16),(E5,16),(D5,16),(E5,16),(FS5,16),(G5,16),(A5,16),(B5,16)] [(G5,8),(B5,16),(A5,16),(B5,8),(CS6,16),(D6,16),(A5,16),(B5,16),(CS6,16),(D6,16),(E6,16),(FS6,16),(G6,16),(A6,16)]
Legend: melody-duration tuples, Each list is one phrase (Python syntax)
Step 6: Parsing the Python List
The Arduino reads the melody separate from the time interval, so it is necessary to parse the list of tuples.
I've written and uploaded the Python code that reads the list of tuples and outputs it in the desired syntax for the Arduino code.
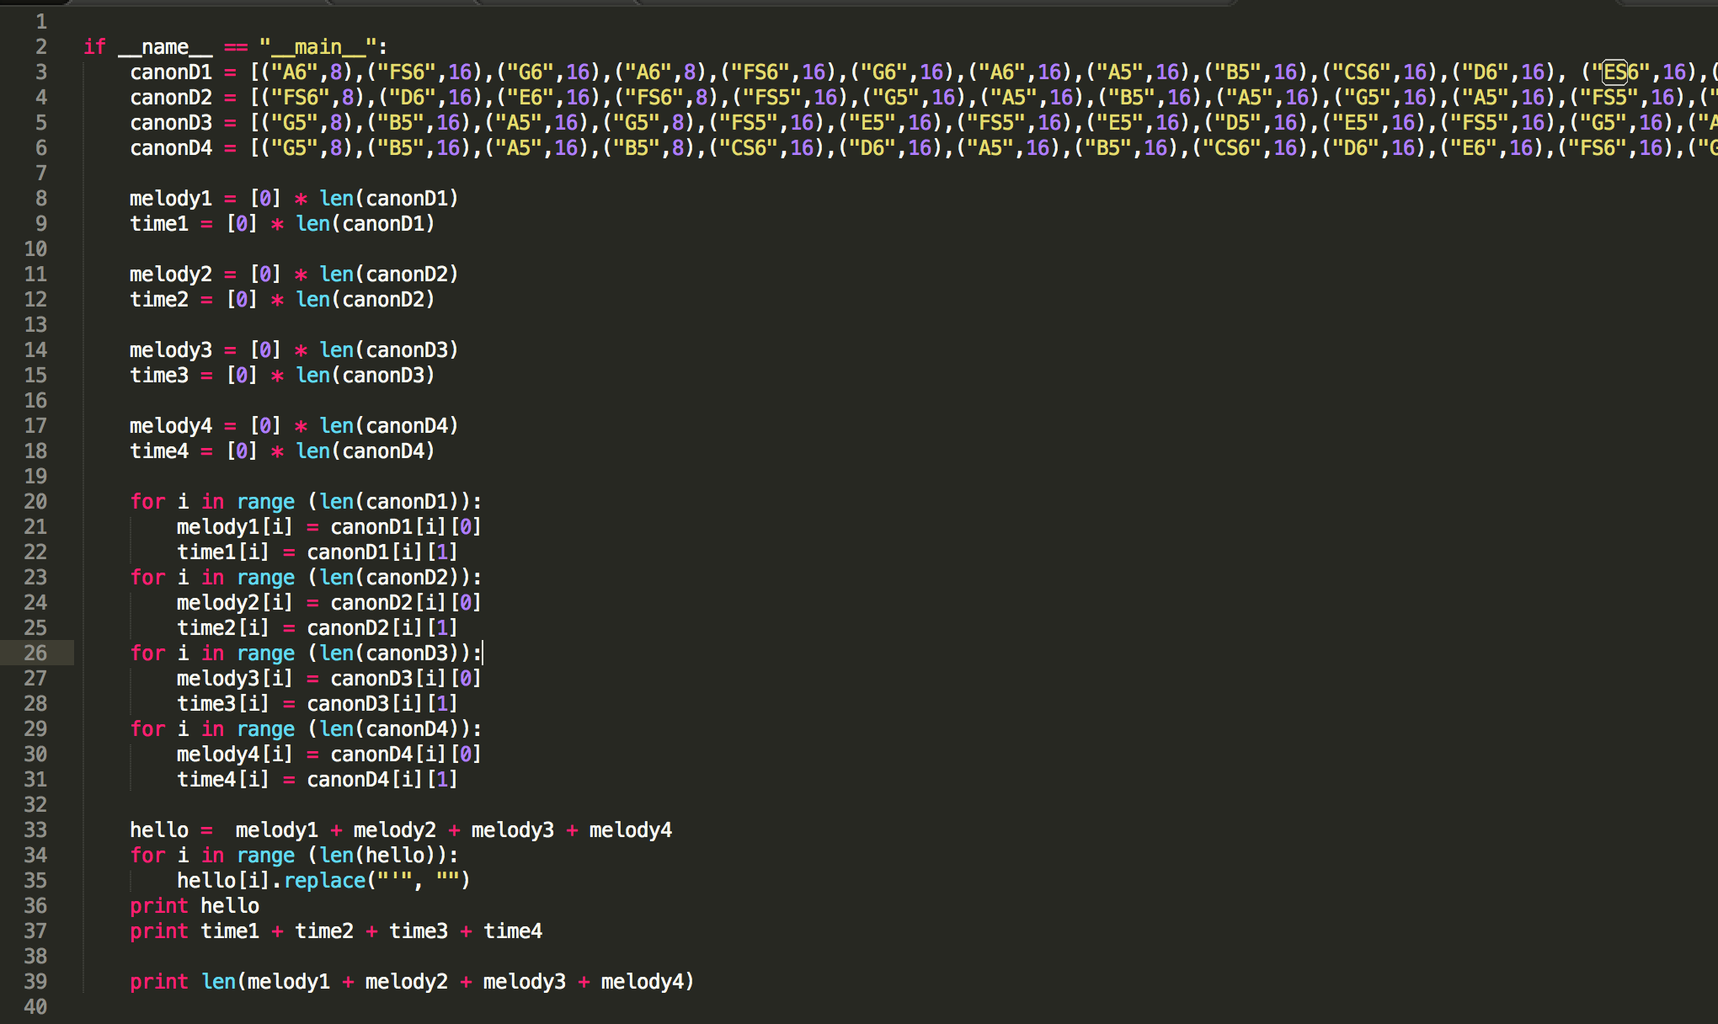
if __name__ == "__main__":
canonD1 = [("A6",8),("FS6",16),("G6",16),("A6",8),("FS6",16),("G6",16),("A6",16),("A5",16),("B5",16),("CS6",16),("D6",16), ("ES6",16),("FS6",16),("G6",16)] canonD2 = [("FS6",8),("D6",16),("E6",16),("FS6",8),("FS5",16),("G5",16),("A5",16),("B5",16),("A5",16),("G5",16),("A5",16),("FS5",16),("G5",16),("A5",16)] canonD3 = [("G5",8),("B5",16),("A5",16),("G5",8),("FS5",16),("E5",16),("FS5",16),("E5",16),("D5",16),("E5",16),("FS5",16),("G5",16),("A5",16),("B5",16)] canonD4 = [("G5",8),("B5",16),("A5",16),("B5",8),("CS6",16),("D6",16),("A5",16),("B5",16),("CS6",16),("D6",16),("E6",16),("FS6",16),("G6",16),("A6",16)]
melody1 = [0] * len(canonD1) time1 = [0] * len(canonD1)
melody2 = [0] * len(canonD2) time2 = [0] * len(canonD2)
melody3 = [0] * len(canonD3) time3 = [0] * len(canonD3)
melody4 = [0] * len(canonD4) time4 = [0] * len(canonD4)
for i in range (len(canonD1)): melody1[i] = canonD1[i][0] time1[i] = canonD1[i][1] for i in range (len(canonD2)): melody2[i] = canonD2[i][0] time2[i] = canonD2[i][1] for i in range (len(canonD3)): melody3[i] = canonD3[i][0] time3[i] = canonD3[i][1] for i in range (len(canonD4)): melody4[i] = canonD4[i][0] time4[i] = canonD4[i][1]
hello = melody1 + melody2 + melody3 + melody4 for i in range (len(hello)): hello[i].replace("'", "") print hello print time1 + time2 + time3 + time4
print len(melody1 + melody2 + melody3 + melody4)
Attachments
Step 7: Arduino Code

You can download my Arduino code from the file above.
Alternatively, you may write it yourself, I have steps detailing each function so that you may better understand as opposed to copy/pasting (or downloading).
Attachments
Step 8: Write the Pre-Setup Code

When you open the Arduino IDE, it will automatically generate these two functions:
- void setup ()
- void loop ()
Prior to void setup() we need to do the following:
- Include the pitches.h header file we constructed in Step 4 as a list (in C code syntax)
# include "pitches.h"
- Write the notes of the melody that we have read from the music sheet in Step 5
int melody[] = {A6, FS6, G6, A6, FS6, G6, A6, A5, B5, CS6, D6, E6, FS6, G6, FS6, D6, E6, FS6, FS5, G5, A5, B5, A5, G5, A5, FS5, G5, A5, G5, B5, A5, G5, FS5, E5, FS5, E5, D5, E5, FS5, G5, A5, B5, G5, B5, A5, B5, CS6, D6, A5, B5, CS6, D6, E6, FS6, G6, A6};
- Write the duration in between each of the notes ( in C code syntax)
int noteDurations[] = {8, 16, 16, 8, 16, 16, 16, 16, 16, 16, 16, 16, 16, 16, 8, 16, 16, 8, 16, 16, 16, 16, 16, 16, 16, 16, 16, 16, 8, 16, 16, 8, 16, 16, 16, 16, 16, 16, 16, 16, 16, 16, 8, 16, 16, 8, 16, 16, 16, 16, 16, 16, 16, 16, 16, 16};
Step 9: Writing the Setup Function

In the setup code we need to do the following
- The declaration of the buzzer pin as output, to the pin in which it is plugged in Step 3.
pinMode (8, OUTPUT)
- When playing the music once only, we would write the code for playing the song in this function. Otherwise, proceed to the next step to keep it on loop.
for (int i = 0; thisNote < 56; thisNote++) {
int noteDuration = 2500 / noteDurations[i];
tone(9, melody[i], noteDuration);
int pauseBetweenNotes = noteDuration * 1.30; delay(pauseBetweenNotes);
}
Step 10: Writing the Loop Function

* If it is preferred to play the music in repetition, then place following the Arduino code in the void loop() function and remove it from the void setup() function
Enjoy your digitized 8 bit classical music!

Participated in the
Makerspace Contest 2017


