

Introduction: Pokeball Speakers


3D printed Pokeball speakers with NeoPixels. What could be more awesome?
Parts needed:
-Speakers. I used an old PC speakers that has got a active "sub-woofer" witch power the speakers.
-3D printer or some place where you can print them. Total print cost for piece was about 2 dollars.
Plastic used in these is 1.75mm PLA with 0.2 layer resolution
-Adafruit 5V Trinket
-Adafruit NeoPixel 16 Led ring
-Some cable
-Paint if you don't have the right color plastic.
Check out how it is done.
Remember to vote for me in the DIY audio & music contest :)
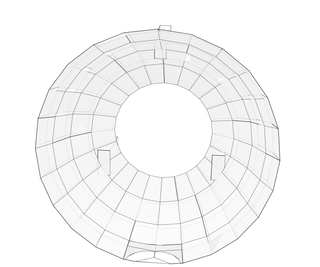
Step 1: Printing the Bottom


Print the bottom from the file.
I printed the case with Printrbot simple makers kit. Cura 15.02.1 is the program that i am using.
The inner mesh was printed just to keep the print in place. The inner mesh can be cut with knife.
Print took about 2 hours.
Attachments
Step 2: Print the Top Part


Make sure that the part is in the same scale as the bottom part is if you needed to scale it down or up.
The procedure with the top part is the same as the bottom part.
Cut the excess mesh from the print.
Attachments

Step 3: The Button


Print the button.
Cut a small notch to the lower part if needed. If you print the lower part couple of mils smaller you won't need to cut a notch as the top part will set over the edge. Choice is yours.
After the print is done. Hot glue the button to the upper part of the ball.
Attachments

Step 4: Speakers


I took the speakers from old PC speakers i had around. The bottom hole is made in the size of typical PC speaker. Luckily my speakers fitted just right.
Step 5: Insides


Solder wires to the NeoPixlel ring if you hadn't done it by now.
First insert the led to the bottom hole and put some hot glue around it to keep it in place.
After that fold the mounts from the speakers if needed. Use hot glue to secure the speaker on its place. The speaker goes on top of the led ring.
After that cut a small notch to the backside of the ball for the wires. See the last picture to get the idea.
Repeat the process with the second speaker.
Step 6: First Test With the Led's


To test the led's i first used a normal Arduino Uno.
The code used is slightly modified from Adafruit's test code.
But first get the NeoPixel library from here: https://github.com/adafruit/Adafruit_NeoPixel
Install the library and paste the following code to the Arduino
#include
#include#define PIN 1
// Parameter 1 = number of pixels in strip // Parameter 2 = Arduino pin number (most are valid) // Parameter 3 = pixel type flags, add together as needed: // NEO_KHZ800 800 KHz bitstream (most NeoPixel products w/WS2812 LEDs) // NEO_KHZ400 400 KHz (classic 'v1' (not v2) FLORA pixels, WS2811 drivers) // NEO_GRB Pixels are wired for GRB bitstream (most NeoPixel products) // NEO_RGB Pixels are wired for RGB bitstream (v1 FLORA pixels, not v2) Adafruit_NeoPixel strip = Adafruit_NeoPixel(16, PIN, NEO_GRB + NEO_KHZ800);
// IMPORTANT: To reduce NeoPixel burnout risk, add 1000 uF capacitor across // pixel power leads, add 300 - 500 Ohm resistor on first pixel's data input // and minimize distance between Arduino and first pixel. Avoid connecting // on a live circuit...if you must, connect GND first.
void setup() { // This is for Trinket 5V 16MHz, you can remove these three lines if you are not using a Trinket #if defined (__AVR_ATtiny85__) if (F_CPU == 16000000) clock_prescale_set(clock_div_1); #endif // End of trinket special code
strip.begin(); strip.show(); // Initialize all pixels to 'off' }
void loop() { // Some example procedures showing how to display to the pixels: colorWipe(strip.Color(255, 0, 0), 50); // Red colorWipe(strip.Color(0, 255, 0), 50); // Green colorWipe(strip.Color(0, 0, 255), 50); // Blue colorWipe(strip.Color(255,0,150), 50); // Send a theater pixel chase in... theaterChase(strip.Color(127, 127, 127), 50); // White theaterChase(strip.Color(127, 0, 0), 50); // Red theaterChase(strip.Color( 0, 0, 127), 50); // Blue
rainbow(20); rainbowCycle(20); theaterChaseRainbow(50); }
// Fill the dots one after the other with a color void colorWipe(uint32_t c, uint8_t wait) { for(uint16_t i=0; i
void rainbow(uint8_t wait) { uint16_t i, j;
for(j=0; j<256; j++) { for(i=0; i
// Slightly different, this makes the rainbow equally distributed throughout void rainbowCycle(uint8_t wait) { uint16_t i, j;
for(j=0; j<256*5; j++) { // 5 cycles of all colors on wheel for(i=0; i< strip.numPixels(); i++) { strip.setPixelColor(i, Wheel(((i * 256 / strip.numPixels()) + j) & 255)); } strip.show(); delay(wait); } }
//Theatre-style crawling lights. void theaterChase(uint32_t c, uint8_t wait) { for (int j=0; j<10; j++) { //do 10 cycles of chasing for (int q=0; q < 3; q++) { for (int i=0; i < strip.numPixels(); i=i+3) { strip.setPixelColor(i+q, c); //turn every third pixel on } strip.show(); delay(wait); for (int i=0; i < strip.numPixels(); i=i+3) { strip.setPixelColor(i+q, 0); //turn every third pixel off } } } }
//Theatre-style crawling lights with rainbow effect void theaterChaseRainbow(uint8_t wait) { for (int j=0; j < 256; j++) { // cycle all 256 colors in the wheel for (int q=0; q < 3; q++) { for (int i=0; i < strip.numPixels(); i=i+3) { strip.setPixelColor(i+q, Wheel( (i+j) % 255)); //turn every third pixel on } strip.show(); delay(wait); for (int i=0; i < strip.numPixels(); i=i+3) { strip.setPixelColor(i+q, 0); //turn every third pixel off } } } }
// Input a value 0 to 255 to get a color value. // The colours are a transition r - g - b - back to r. uint32_t Wheel(byte WheelPos) { WheelPos = 255 - WheelPos; if(WheelPos < 85) { return strip.Color(255 - WheelPos * 3, 0, WheelPos * 3); } else if(WheelPos < 170) { WheelPos -= 85; return strip.Color(0, WheelPos * 3, 255 - WheelPos * 3); } else { WheelPos -= 170; return strip.Color(WheelPos * 3, 255 - WheelPos * 3, 0); } }
Change the pin if needed. Pin 1 is used on trinket later.
Step 7: Painting


You will need red and black paint.
Paint the top red and the ring black. Simple as that. Use different colors if you want.
After the paint has dried. Put the top parts on the bottom parts and put some hot glue between them. The speakers are now done.
Now it's time to make the programming for the trinket and wiring.
Step 8: Trinket


Get the software and drivers from Adafruit's site.
Insert the trinket to the computer via USB, press reset on the trinket. You have now 10 seconds to start the uploading. Press upload on the customized Arduino program and wait for it to upload. You can find the program from Adafruit's site also.
Pins for the trinket and NeoPixel wiring is following.
Neopixel---------------Trinket
GND(blue)-------------GND
Power 5V(yellow)-----USB+
Data Input(green)------#1
Later the wire coloring is changed that the GND is black, Power is Red and Data is Green.
Use the same code as before. It will work with Trinket also.
Step 9: Cable for the NeoPixel


Cable used is typical 4 wire phone wire.
Screw the wires together, solder them and secure with tape in case of short circuit. Lastly add some shrink tube and heat it up. This will give a nice finish for the cable.
Repeat the process with the second speaker.
Step 10: Trinket Case


Print the file included. This is a simple case for the Trinket. This helps to install the Trinket safely behind the sub-woofer.
The Trinket will be powered from USB so keep in mind to make the Trinket's USB connector in easy to acces place. Also if you need to program the Trinket later it is easier this way. When uploading a new code to Trinket, simply start the code uploading in 10 seconds right after plucking the USB cable to the PC.
Use hot glue if needed.
Attachments

Step 11: Final Testing


Use hot glue to install the Trinket case to a place that suits you best.
The speakers work nicely and the sound quality is nice. And they look awesome.
Step 12: Beats by Pokémon


Enjoy the most awesome looking speakers ever!
The led's can be turned of just by removing the USB cable from the PC.
I mainly made these speakers for my soon 4 year old boy who loves Pokemon.
I hope you enjoyed reading this.
Remember to follow me to get the latest project's first!
Thanks for reading!

Participated in the
DIY Audio and Music Contest


