

Introduction: Polish Glass Bottle Edges After Cutting


After you have cut your bottle, it's important to sand off the sharp edges. In this Instructable I will show you how to do that. I will also show you how to polish the cut after sanding it.
This bottle has 3 cuts. If you want to do multiple cuts, I recommend doing a cut, sand and polish it, then do the next cut. I also recommend doing all your score lines before making any cuts.
If you would prefer to view this instructable in video form, you can watch it here: https://youtu.be/t2sT8SNHvUY
If you want to see how I made these cuts, check out my other instructable: Bottle-Cutting-With-a-Soldering-Iron
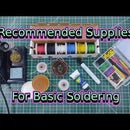
Supplies needed (grits can be approximate):
Step 1: Safety First!
Before we get started, there are some safety things to keep in mind. The sanding process makes glass dust. Because of this, eye protection and a dust mask are HIGHLY recommended.
Step 2: Sanding the Rim Flat


You can see in the picture this bottle that was just cut doesn't have a smooth or flat surface. The inner and outer edges are also sharp. I'm going to start with 80 grit wet/dry sand paper. The first thing to do is to get it wet, and make sure there is plenty of water on it during the sanding process. This will help keep most of the glass dust from getting into the air. Now that the sand paper is ready, start sanding the cut. I like to do a circular motion, and make sure you apply some downward pressure. Rotating the bottle every now and then will help the sanding be more uniform. Holding the bottle in one position the entire time will focus the pressure on one side of the bottle, potentially giving you a lopsided surface.
The markings that I put on the bottle are only there for the pictures, to help demonstrate how I move the bottle.
Since this first sanding is for flattening the cut surface, it will take a while, depending on how smooth the cut was. Check the surface every now and then, to see the progress. Wipe the surface off with a paper towel. It will be obvious what parts were sanded and what parts still need sanding. If it looks like it needs more sanding, keep at it a few more minutes. If it looks good to you, it's time to sand down the inner and outer edges. Be careful not to cut yourself while doing this part, and keep the sand paper wet.
Step 3: Prepare for Polishing


That's it for the first stage of sanding. The surface is flat, and the edges are no longer sharp. The other stages are for polishing, and will be quite a bit quicker. You can decide at which stage of polish you want to stop.
The first stage put a lot of grit from the sand paper and bottle on the table, so clean that up before starting the polishing stages.
Step 4: Start Polishing


Next I use 150 grit wet/dry sand paper. Each stage will follow the same steps: Sand the surface for a minute or two, then sand the edges. After that I like to wipe the surface dry and look at it, so see the progress. Since the polishing stages are not as aggressive as the sanding stage, it's not really necessary to clean the table between the polishing steps.
The next grit I use is 220 grit. Then 320 grit. And then 400 grit. This looks much better than what I started with. Some people like to stop here, but I like to do even finer polishing.
Step 5: Finer Polishing


For the fine polishing, I use 1000 grit sand paper, then 2000 grit sand paper. The 1000 grit gives a huge improvement over the 400 grit, and the 2000 grit gives a little better polish.
Step 6: And That's It!

The bottle I cut is now safe to drink from, and has a highly polished surface. If you would like to see the video version of this instructable, you can watch it here: https://youtu.be/t2sT8SNHvUY
If you want to see my instructables on cutting bottles, check them out here:


