

Introduction: Ponytail Extension


This is how I put together my personalized ponytail extension.
Step 1: Gather Supplies


1. Thread.
2. Sewing needle or a sewing maching with a leather foot with leather needles. (For durability.)
3. A bit of wax for lubricating the thread (if hand stiching).
4. Some Hypo-cement or equivalent.
5. Wax-paper.
6. Small clips.
7. Clear school glue.
8. Bias tape.
9. One hair extension clip.
10. Braid-in hair extensions.
Step 2: Cut Hair Extenstions

Cut the hair extensions to the desired length of the ponytail. I chose to make mine 61 cm (24 in).
Step 3: Bias Tape

1. Select 2.3 cm wide (1 in.) single fold bias tape.
2. Choose a colour that best matches the colour of the hair extensions.
3. Fold the tape in half and set the fold with an iron.
4. To estimate the length you will need to:
A. Put your hair up in a ponytail.
B. Take the end of the bias tape and hold it on the underside of the pony.
C. Wrap around the pony once and mark on the bias tape where that is.
D. To make the second mark, wrap the bias tape around the ponytail twice and mark.
5. Do not cut off at the second mark (yet), leave extra length to work with.
Note: This is an estimate for the start. In the end I needed a 20 cm (7.87 in.) long piece of bias tape, but I had to sew in hair a little past my first wrap mark for the hair to wrap around completely. Also, everyone has a different amount of hair and some may need more or less legnth of bias tape than what I needed.
Step 4: Preparing the Hair


1. From the main pile of hair take small segments that are about as thick as a gel pen.
2. Choose an end and trim it so that it is straight.
3. Apply the clear school glue to the ends going all the way around the bunch.
4. Take a piece of wax paper and fold it around the wet glue.
5. Secure the wax paper with a clip.
6. Hang to dry.
7. Make one segment of hair twice (2 cm or 0.79 in.) as thick as the others’. This piece will be used to wrap around and secure the ponytail when worn.
Notes: The total amount of hair used is about the same amount of hair you have when it is in a ponytail. I made a total of 24 segments from the main bunch of hair. 23 segments were used to make the ponytail. 1 segment was used as the part to wrap around the ponytail while wearing.
Step 5: Do a Dry Run


1. Peel off the wax-paper from the ends of the hair after the glue has dried.
2. Before sewing do a ‘dry run’ to see if more hair segments are needed.
3. Insert the segments of hair into the bias tape, overlapping each segment.
4. Secure each with clips.
5. Insert the segments until you reach the first line you marked on the bias tape.
6. Now take the ponytail extension and wrap it around your own ponytail.
7. Make certain the hair wraps all the way around once.
8. If it does not, continue adding segments of hair until it does.
Notes: I only needed 17 segments of hair to make one wrap around my ponytail. I had 6 left for the second layer.
Step 6: Start Sewing


1. Sew together the segments first. Do not sew them into the bias tape yet.
2. Use a back stitch, overlapping each segment as you go.
3. Sew along the end that is closest to where the glued ends and the unglued hair begins. Be certain that those stiches are hidden by the bias tape.
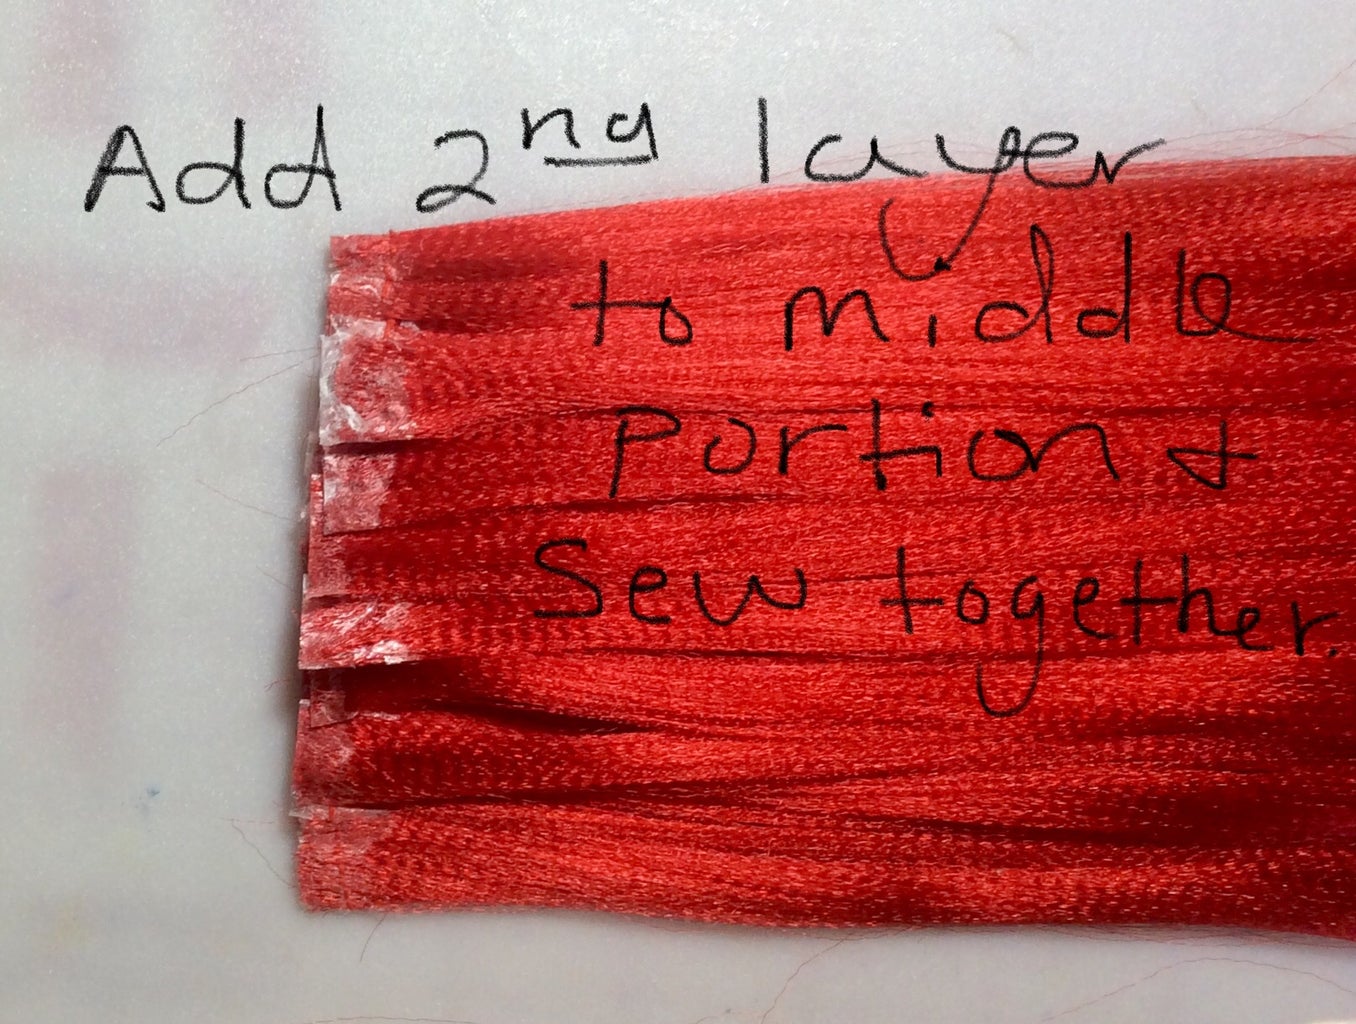
4. Sew together the first layer. Then sew on the second layer.
5. Sew the 2nd layer onto the 1st layer from the centre out.
6. Add segments evenly from centre right and centre left.
Notes: the second layer does not need to be the same length as the first layer. I only used 6 segments for mine. The purpose is to thicken up the ponytail and to help the piece not look segmented.
Overlapping the pieces as you sew is important. This makes it look fuller and more natural. So the hair hangs properly without any odd gaps.
Step 7: Sewing on the Bias Tape


1. Stitch closed the end of the bias tape that is going to hold the pony tail hair.
2. Insert the pre-sewn ponytail hair into the bias tape.
3. Use clips to keep the pieces together.
4. Remove clips as you sew.
5. Now you are going to sew A LOT.
6. I used back stitches and cross stitches.
7. Make 3 horizontal rows of small back stitches.
8. Then fill in the spaces with 2 rows of cross stitches.
9. Lastly, make small vertical rows of back stitches, sewing from end to end.
Notes: I hand stitched it all. I did not have the proper foots for my sewing machine (like a leather foot). If you use a sewing machine just sew over and over again. A zigzag stitch is probably good.
A lot of small stitches and stitches going in various directions is important for securing the hair. It keeps it from falling out and allows for gentle brushing.
Step 8: Sewing on the Wrap Around Segment


1. Now that you have the ponytail hair sewn in you can cut the bias tape to the final length.
2. Make certain when you wrap around the bias tape for the second time, that the end stops on the underside of your ponytail.
3. Cut off the excess bias tape.
4. Take the special 2 cm (0.79 in.) segment of hair and insert it into the end of the bias tape.
5. Fold over the bias tape with the inserted hair.
6. Clip it securely.
7. Begin sewing, using the same technique as before.
8. After the hair is sewn on, close up the edge of the bias tape between the segments of hair.
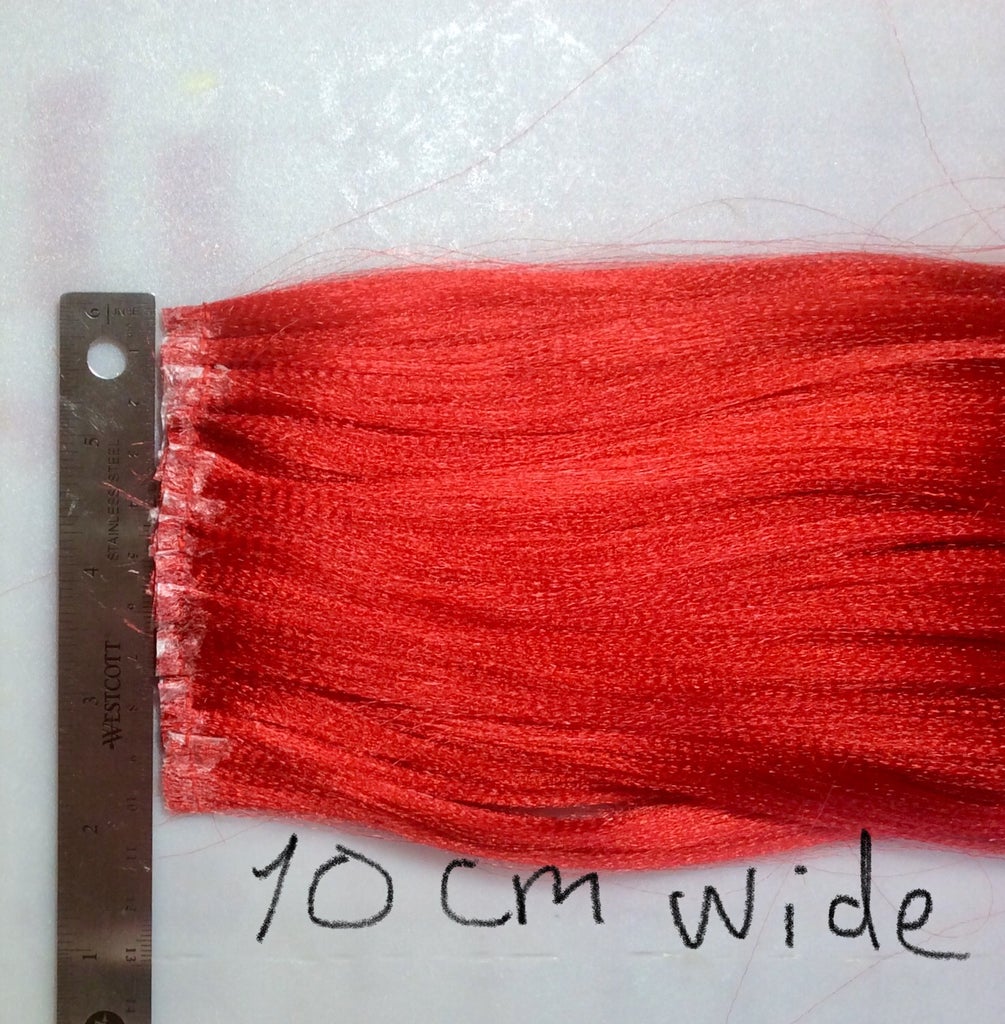
Notes: For my ponytail extenstion, I only needed 10 cm (3.93 in.) more of bias tape, make the total legnth of the bias tape 20 cm (7.87 in.). Yours may be a little shorter or longer. It depends on how thick or thin your hair is.
Step 9: Sew on Hair Extension Clip
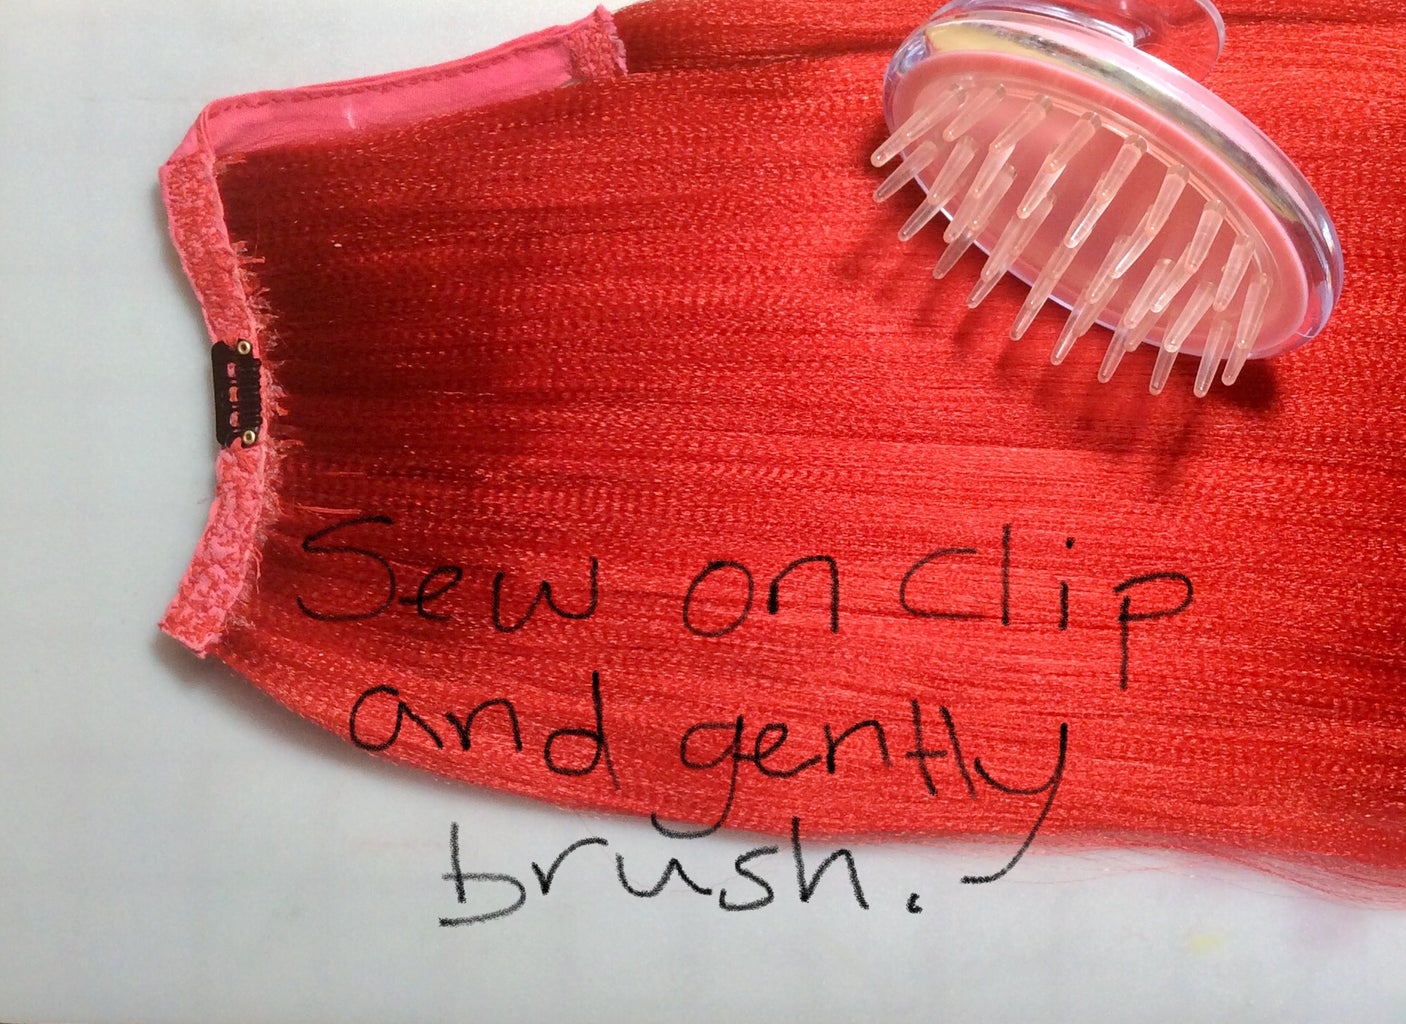

1. Centre the hair extension clip on the underside of the ponytail extension.
2. Stitch onto the bias tape.
3. Make certain it is sewn on securly.
4. Gently brush out hair.
5. Even out ends of the ponytail extension.
Step 10: Cutting Ends for Proper Wear


1. Hang up the ponytail extension with the outside (the side that will show when hair piece is worn) face towards you.
2. Begin trimming the left half first.
3. Trim at an angle. Shorter on the outer edge, moving gradually to the centre.
4. Leave the centre at the longest length.
5. When the left side is at the desired angle turn over the hair piece to trim the other side.
6. Hang the hair piece with the inside (the side with the extension clip) face toward you.
7. Start trimming the other half to match the angle and length of the the side that was just trimmed.
8. Wear the ponytail. It should hang even on the back and when flipped over the shoulder.
Notes: If you are right handed it is easier to trim the left side at an angle, that is why I have you split the trimming in half and then flip the piece over to trim the other half. If you are left handed, cut the right half first, then flip the piece over and cut the new right half.
Cut a little at a time, especially if you are a novice at hair cutting. Take your time and go slow. If needed, look up images of other ponytail extensions to get an idea of the angle of cutting.

Participated in the
First Time Author


