

Introduction: Porkupine: Serviette Holder Made From Cardboard and Body Filler


I wanted to enter a competition here in Johannesburg, South Africa where I stay. The competition was to design and make a prototype of a serviette holder. The inspiration was states as follows... "Dining and entertaining plays a significant role in people's lives. Whether it be formal ceremonial or celebratory occasions or impromptu, informal gatherings, table napkins and serviettes are always needed. Display an unusual and beautifully designed serviette holder and transform the ordinary into the extraordinary!"
The prototype was to simulate metal as the intended material for manufacture.
I wanted to enter, but with a humorous play on words at the centre of my design. The Porkupine would sit on a table, as roast pigs did in the past (sans the apple). The quills of the Porkupine would be made out of rolled up napkins/serviettes, similar to the quills you may have seen in the Porkupines cousin, the porcupine.
This instructable is an interesting set of steps showing how I got to the final form, as well as how I simulated the finish of cast alluminium, using corrugated cardboard, and automotive body filler.
It illustrates that corrugated cardboard can be used as an effective model-making and prototyping material.
Step 1: Maquette Made From Clay


I roughly sketched the form of the Porkupine until I got to a form which I liked. I then began modeling the form out of a modelmakers putty which is a similar consistency to plasticine, allowing me to mould the form of the pig.
I made several maquettes before setting my mind on this one.
You can see the size of this to be approximately 50mm long (2 inches). I photographed the model from the front and top, and scaled up the images on the computer. I then printed these out, and began laminating many layers of corrugated cardboard.
I used double-fluted cardboard which was approximately 8mm thick. I glued layer upon layer to create a solid 'block' of cardboard about 15cm thick (6 inches).
Step 2: Shaping the Cardboard


I cut the cardboard block using a band-saw and shaped it using a large orbital sander.
Fine shaping was done by hand with a bastard rasp, and sanding block.
I created tapered cardboard tubes using natural gum-tape (as one would use in packaging boxes) I purchased this at the local craft store.
I drilled holes through the shaped Porkupine body using a cordless drill with a 13mm bit. The holes wern't as accurate as I had hoped, but I guess that is a downfall of drilling at an angle through a block of corrugated cardboard. The holes seem to drift in varying directions, I accepted this and processed along without much frustration.
There is a piece of masking tape around the nose of the piggie. This was because the cardboard began de-laminating through being handled. I reglued with a bit of cold-glue and taped it together.
Step 3: Bodyfiller Screed


Once the underlying cardboard structure was completed and structurally sound, I proceeded to seal the cardboard with a sanding sealer similar to what is used to seal MDF board prior to painting. This was brushed on and allowed to soak in. It took about a day to dry...
Once dry, I proceeded to screed the entire form with body-filler. This was an automotive flexible polyester body-filler, from the automotive industry. You mix in a catalyst and then apply...
I had to apply several coats of body-filler, sanding and forming the Porkupine between each of them.
I bonded a piece of 2mm white ABS plastic to the belly, allowing for a smooth underside surface. This also covered up all the opposite ends of the internal cardboard tubes.
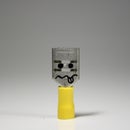
Step 4: Nose, Eyes, and Ears


Nose: I created the nose out of a template of brown card, and then cut it out of 2mm white ABS sheeting. This got glued to the body using contact adhesive. The edges were smoothed up with more body filler.
Eyes: I used the brown modeling putty (shown earlier) to cast the eyes out of white epoxy. This was done by depressing my finger into the putty, leaving 2 small dents, which I filled with epoxy.
Ears: The ears were made from the same body filler as used on the body. It was mixed and smeared into a rough mold made from a few bent pieces of plastic. I used some hilti pins as added strength when bonding the ears to the body. I used body filler as the bonding method to hold, and smooth up the join between the ear and the body.
I smoothed the edges with more body filler, and began using finer and finer sand paper... ending up with about a 800 grit paper. This fine grit was fine for the next step... painting.
Step 5: Painting


I painted the Porkupine with a grey primer, which filled some of the small imperfections in the body. This also allowed for a good quality surface for the final overcoat which was a standard metallic spraypaint.
I applied about 3 coats of primer, with sanding with 800 grit between coats.
Finally I applied the metallic spraypaint in 3 coats...
Step 6: Porkupine


The outcome is an interesting, fun, table centre-piece which arouses conversation and is a 3 Dimensional form of a simple word game. It took a long time to make, but I am happy with the outcome.
Please let me know if you like this design, or may be interested in buying one of these. I am able to create an accurate silicone mold and cast alluminium replicas (alluminium+resin mix) of the Porkupine. It is able to hold 18 paper serviettes, and is tame enough to keep in a drawer. It is Halal, Kosher and also a friend of the Vegan.
:)


