

Introduction: Portable 12 Volt 17 Watt Wind Generator With Automatic Furling


I've just designed and built a practical, portable 12 Volt 17 Watt wind generator that is ideal (and appropriate) for setting up in campgrounds, parks, Earth Day exhibitions, research stations, and third world homesteads.
On "light breeze" days (5mph = 2.2m/s) when most wind generators are becalmed, this light-and-nimble unit reliably generates power, at charging levels, fully taking advantage of the erratic, gusting winds that are so common in near-ground conditions.
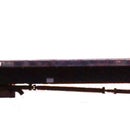
A 48VDC, 1,600 rpm brushed permanent magnet motor (#370-350-00 / PE24113G -from a medical centrifuge), with a standard keyed 5/16 inch diameter steel shaft, was used to serve as the generator. A shaft arbor, 3/8-24 right hand (Grainger Item# 3ZN05 / Dayton Item# 3ZN05) was fitted on the shaft, to use as a 12 Volt generator, @ 550 rpm, when turned clockwise. The motor, weighing in at just under 3 pounds, has permanently lubricated bearings, but is not weatherproof.
Note: If you plan to use a counter-clockwise set of blades, the timing of the "generator" brushes (2 carbon brushes) and internal commutator is such that the same amount of power (Amps and Volts) is also generated when turned counter-clockwise, but be aware that the shaft arbor manufacturer's suggestion as to "right-hand" and left-hand" thread pertains to motors only, and not wind generators, where the just the opposite thread is required.
Note that the Grainger Shaft Arbor requires a thin, soft metal shim inserted against the flat face of the standard keyed generator shaft, for the allen set screw (which has a knurled cup point) to bite into and firmly hold the arbor in place. I used 2 layers, fashioned from an aluminum beer can. Or, use a replacement allen set screw with a soft brass core. Also, two, 1-1/4" thin neoprene washers are needed to pad (and grip) the 1-1/4" steel washers that come with the shaft arbor. The original shaft arbor nut was also replaced, with a nut with a thicker profile, with a nylon locking core.
This portable wind generator is ideally suited for one 12 Volt, 21 Amp Hour sealed lead acid battery.
Granted, that's not much power, when compared to typical permanent, stationary wind generators. But this lean-and-mean device was designed to fill in the void, to reliably provide 12VDC power to remote, inaccessible locations.
Step 1: Stock High-Speed Blades for the Wind Generator:

After running the "generator" through a series of bench tests, it became obvious that my simple homemade PVC blades (300 max. rpm) would require a gear-up to properly turn the generator, an inefficient scheme that I was not wild about. And I was also reluctant to commit myself to a number of weekends designing, developing and refineing a set of small, lightweight blades that would achieve the necessary direct-drive speeds (550+ rpm), so I purchased a matched set of three Air-X Airfoil blades.
22-3/16 inches long, and designed for a clockwise rotation, when viewed from the front (shaft end), each with two .25" holes spaced at 23mm (25/32") on center. Having only about 1/4 the torque of the much larger Air-X generator, the 17 watt generator spins very easily, in the slightest of breezes.
The blades were mounted on a 5-3/4" diameter, 3/16" thick, ABS faceplate (blade hub), and carefully drilled out to handle either a 3-blade arrangement (as well as a 2-blade arrangement option). The blades were mounted to the backside of the faceplate (hub), to position the mass of the blades as close as possible to the shaft bearings. After bolting the three blades to the ABS faceplate, the tip-to-tip distances of the blades were measured and the blades adjusted with light hand pressure until all three of the tip-to-tip distances were equal, then the blade bolts snugged down.
2 blades are more portable, being easier to stow, protect from damage, and transport, but tend to teeter on the generator shaft, in actual practice. But, after a series of tests, I decided on the 3-blade arrangement, as it provided better performance in low wind conditions (actually typical for many locations).
I fashioned a discarded (actually I'm a hopeless pack rat) thick-walled plastic easter egg ornament into an aerodynamic parabolic plastic nose for the hub, and outline-cut the hub to 4-7/8" diameter, flush with the parabolic nose. The arrangement allows for a smooth flow of air through the blades and greatly enhances the performance of the generator, in low wind speeds.
The Air-X blades, in a portable environment, are much more exposed to rough handling and damage, than they would experience in a permanent installation. A triangle shaped box will soon be built, to carry the blades, hub, shaft arbor and nose, together as one unit, in order to protect the sharp, thin blades from dings and damage, and ease installation onto the generator shaft, in the field.
Step 2: Simple Furling Device for the Wind Generator:


After a series of tests with the Air-X Airfoil blades, I then mounted the generator to a National brand spring hinge (Model# N190-736 V122), to serve as a furling device. With the weight of the generator too heavy to act as a vertical-furling device, the lightweight spring hinge worked quite well as a side-furling device.
The generator was mounted on a block of varnished wood, with the axis of the generator offset 1-5/8" from the axis (or pivot-point) of the hinge. The 1-5/8" offset provides the necessary leverage for the furling to properly engage when the wind speed reaches 9-10 mph (= 4.0 - 4.5 m/s). A wind speed of 9-10 mph creates a pressure of about 2 pounds on the spinning blades, initiating the furling process, and keeping the DC voltage output, from the generator, at a manageable level.
A 1-1/2" diameter hard nylon wheel was also mounted (with a large, long woodscrew, as the axle) to support the 5" swing of the furling generator. A rubber bumper was also added to the rear end of the generator to provide a soft-stop @ 90 degrees to the wind.
Some sort of furling device is required, when using Air-X blades, as they are quite capable of speeds of over 2,000 rpm, and, at that rate, require a generator with a much more thicker shaft, and also require a OEM diecast Air-X hub. My simple ABS hub (and tiny 5/16 inch diameter generator shaft) is only suitable for speeds up to about 750 rpm. Also, automatic furling eliminates the higher generator rpm's that cause premature wear on the relative small generator bearings, not to mention the possibility of burning out the electronic charge controller, which is usually rated with an upper voltage limit, as well as the strain on the lightweight portable mast and rigging.
Here are the results of the generator, with three Air-X blades, and furling device (but before the parabolic nose was added) under actual wind conditions (before the automatic furling kicks in):
3.0 mph (1.34 m/s) wind speed, generator spins @ 186 rpm, producing 5 VDC, 0.15 Amps, 0.80 Watts.
3.8 mph (1.70 m/s) wind speed, generator spins @ 269 rpm, producing 8 VDC, 0.31 Amps, 2.50 Watts.
4.4 mph (1.97 m/s) wind speed, generator spins @ 325 rpm, producing 10 VDC, 0.42 Amps, 4.20 Watts.
5.7 mph (2.55 m/s) wind speed, generator spins @ 533 rpm, producing 15 VDC, 0.83 Amps, 12.5 Watts.
6.0 mph (2.68 m/s) wind speed, generator spins @ 553 rpm, producing 16 VDC, 0.87 Amps, 13.9 Watts.
6.8 mph (3.04 m/s) wind speed, generator spins @ 573 rpm, producing 17 VDC, 0.90 Amps, 15.3 Watts.
9.0 mph (4.02 m/s) wind speed, generator spins @ 634 rpm, producing 20 VDC, 1.02 Amps, 20.4 Watts.
The wind generator maxes out at 24VDC, with the furling kicking in -no matter how fast the wind blows, although sudden gusts will sometimes generate short bursts of up to 34VDC, before the tail properly orients the wind generator and enables the automatic furling to take effect. The electronic charge controller is rated up to 25VDC (but takes the occasional 34VDC bursts in stride) and process it into a safe 14VDC - 16VDC for the sealed lead acid battery pack.
Attachments

Step 3: Shortening the Length of the Blades for a Safer, More Portable Device:

Even in mild wind conditions, the Air-X blades spin quite fast -so fast the wicked "hiss" they generate actually makes my skin crawl. The thin, sharp, dense blades could easily kill anyone who gets in their way. You would NOT want to use these blades on a yard ornament. I painted the blade tips fluorescent orange and used fluorescent orange guy-lines to brace and support the mast. The generator blades are now well out of harm's way, with adequate, visible rigging in between.
In an effort to make the wind generator safer, more manageable -and portable, I carefully examined, and then sawed 4 inches off the ends of the blades (to a new over-all length of 18-3/16 inches long) and, after adding the parabolic nose, have yet to detect a change in the performance characteristics of the highly engineerd blades, except in the furling. The generator actually needs to be re-mounted on a thicker block of varnished wood, with the axis of the generator offset to a new position of about 2-5/8" from the axis/pivot of the hinge (but this has not been tested yet). A wind speed of 9-10 mph will now put a pressure of about 1.37 pounds on the spinning blades, initiating the furling process, and keeping the DC voltage at a manageable level.
Later... in an effort to make the wind generator even more safer, even more manageable -and even more portable, I sawed off another 5-1/16 inches off the ends of the blades (to a new over-all length of 12-1/2 inches long). And the generator still flywheels in 5 mph (2.24 m/s) winds, generates a charging current at 7 mph (3.13 m/s). But, now, the unit doesn't furl until 12 mph (5.36 m/s) winds, producing up to 40 Volts. As the spring in the spring hinge is not designed to be tampered with, to a weaker tension, the generator actually needs to be re-mounted on a thicker block of varnished wood, with the axis of the generator offset to a new position of about 3-3/4" from the axis/pivot of the hinge (but this has not been tested yet). A wind speed of 9-10 mph (4.02 - 4.47 m/s) will now put a pressure of about .67 pounds on the spinning blades, initiating the furling process. Also, with the shortened blades, a 24 Volt (instead of a 12 Volt) system may be desirable, and appropriate, for some applications.
But instead of fashioning new wooden generator mounting blocks, a quicker (if not elegant) way to initiate furling, to a lower wind speed, is simply to attach and stretch a simple rubber band, from the right-rear of the generator, to add .5 - 1.5 pounds of tension, coax the blades off their 90 degree (perpendicular) to the wind orientation, to advance the furling process, keeping the DC voltage to a manageable level. After all, once the blades tilt past 90 degrees, all it only takes about 1 pound of wind pressure to force (and hold) the blades into a 0 degree (edge-on) position, fully furled, which is the same regardless of the blade lengths. I enjoy designing and building aesthetic things, but there is no denying that the world is really held together with scotch tape and bailing wire.
But, ultimately, I decided that full battery charging voltage, in low wind speeds, was most important and ordered a new set of blades (over-all length of 22-3/16 inches). And a triangular-shaped case is being built to house the blades, hub, and shaft arbor -as one unit.
The spinning blades of a wind generator produce about as much pressure as a solid disk, of the same diameter. That explains why reducing the length of the blades will always require some sort of loosening of the spring tension (or leveraging) of the side-furling device: To change that simplified frontal "circle" into a more controllable ellipse, as viewed from the front, whenever the wind threshold is reached.
Some quick math indicates that the improvised generator, with full-length blades, without furling, could possibly generate 70VDC, 100 watts, @ 32mph (14.31 m/s) and spinning at 2,150rpm, which the Air-X blades, on a special Air-X hub, are fully capable of. But such voltage is beyond the ability to harness into any practical, portable capacity -not to mention designing a truly portable tower that could stand up to such a wind, with a generator that does not furl.
To complicate matters, many wind generators are marketed, posting their maximum watt rating -in almost gale-force winds, and novice owners mistakenly purchase high-current 12 Volt appliances, with the expectation their wind generator will always be able to power them. A good rule of thumb is 15% of advertised wattage equals the average wattage you'll probably get, in actual field conditions. Reputable dealers may advertise the maximum wattage in their headlines, to, understandably, catch your attention, but will also post a chart of actual watts, for given wind conditions.
Step 4: Mast and Rigging for the Portable Wind Generator:


Designed to fully take advantage of gusting wind conditions, the wind generator has an unusually large tail fin, as well as a ball bearing fitting on top of the mast. This enables the unorthodox device to quickly seek out and turn into the next wind gust, with the flywheeling blades always ready to harvest the often erratic and meager winds. The large tail fin also stabilizes the device during furling, holding the wooden body straight-and-true, into the wind.
A lightweight, but strong, 24" long stainless steel mast-pivot tube was cannibalized from an extendable shower curtin rod, from a local hardware store. The tube is a sturdy thin-wall construction, internally butted with plastic sleeves on the ends, providing a low-friction pivot that slips perfectly over the 1" diameter fiberglass mast.
The generator, Aix-X blades, wooden mount, tail fin, stainless steel mast-pivot tube, and power cord all weigh in at 9-1/2 pounds, total, and mounts lightly on top of an extendable 10 foot tall fiberglass mast pole (actually a modified tree pruning pole), in perfect balance. 4 guy-lines and hardware mount complete the rig.
I have recently replaced the original 10 foot tall mast, with a 15 foot tall extendable fiberglass mast (also a tree pruning pole), providing much better wind exposure, but the rigging needed to be refined to handle the increased stresses on the mast:
- Four additional guy lines were attached to the mid-section of the mast and tied to the four original ground stakes.
- A ball&socket plastic water shut-off valve was modified into an articulated ball&socket base for the mast.
The setup of the portable generator and mast is now greatly simplified by the ball&socket base:
- A plastic stake is fully driven into the ground, for the mast. The stake is then carefully pulled out and the special, custom made ball-topped mast stake is pressed in its place.
- The looped end of a white nylon rope, with a red mark @ 13 feet, is slipped around the round shaft of the ball-topped mast stake, and the four anchor stakes are driven in, exactly 13 feet from the ball-topped mast stake.
- The non-looped end of the 13 foot white nylon rope is drawn taught and tied to the ground stake that is downwind (leeward) of the mast. This holds the ball-topped mast stake firmly in place for the set-up and take-down side stresses that will follow.
- The 15 foot mast is fully extended, with its internal wire connected to the wiring of the wind generator. The wind generator is then slipped onto the top of the mast.
- The socket base of the mast is snugged onto the ball of the ball-topped mast stake.
- The upper rigging (4 guy lines) is attached to the mast, and 3 of the guy lines are attached to the ground stakes EXCEPT the 4th guy line that is upwind (windward) is NOT attached to its ground stake.
- Firmly grasping the 4th guy line, standing above the upper mast anchor, gracefully pull up the wind generator and mast, while walking back into the wind, and attach the 4th guy line to its ground stake.
- The entire rig will now be in its vertical, perpendicular, position and requiring only minor adjustments.
- Attach the lower 4 guy lines to both the lower mast fixture and ground stakes. Carefully tension all 8 guy lines until the slender, flexible mast is straight and true.
- Take-down of the wind generator / mast is simply the reverse of the above.
The generator, from shaft arbor tip to tail, measures 45 inches. The power cord is routed through the ring-shaped ball bearing fitting, and inside the hollow, fiberglass mast. A standard RCA audio jack, used as an electrical connector, slips easily through the 5/8" diameter hole in the ball bearing fitting of the mast and down through the hollow mast. A slip ring (rotating electrical connection) is not needed, as a portable wind generator only pans a total of about 270 degrees, on a typical day.
The rigging attaches to a square piece 5" x 5" plywood, 11/16" thick, and glue mounted (PVC glue bonds well on both surfaces) to a PVC pipe which slips over the 1" diameter fiberglass mast. A thumbscrew tightened ring was fitted over the radial-cut end. 4 angled, thin plywood braces will later be added to the underside of the 5" x 5" plywood, for reinforcement.
The 4 guy-lines are firmly anchored into the ground with 17" long, heavy, steel "cork-screw" stakes.
The entire rig is easily set up and taken down by one person.
A side note:
I was recently invited by a local ham radio club to set up my portable wind generator, for their international ham radio day. I was quite impressed with their portable 24 foot antenna masts, made from interlocking U.S. military surplus antenna mast poles. These sturdy (2 lbs each), inexpensive, 4 foot long composite (resin impregnated glass fiber) mast sections can be purchased on ebay. The mast sections have an outside diameter of 1-13/16", an 1/8" (.125") wall thickness, with a 3.5" long male/female coupling end.
Also, standard military surplus composite 4-point guy line attachment rings can be purchased, which slip on easily between any of the 4 foot section joints. The guy ring is 5-11/16" diameter, drilled with four 3/8" guy line holes, with a 1.531" diameter center hole.
These pole sections not only allow for taller and stronger portable wind generator masts, it also makes the reality of truly portable 500 watt (500 watts rated = 75 watts typical) wind generators not only possible, but much simpler and affordable.
Step 5: Physical Limits of the Portable Wind Generator:


I've test run this generator in winds up to 35mph (15.65 m/s), a "moderate gale", but don't recommend it. After all, the simple device is made of wood, and held together with glue and wood screws.
After about 5 hours of use in high winds, in an isolated area, I noticed a slight drop in voltage, and cautiously took down the dangerously spinning device, to inspect it, and noticed that the allen set screw, as well as washers and nut on the generator shaft arbor, had begun to work themselves loose! To correct the problem, I added aluminum shims to the generator shaft, neoprene washers, and a lock nut (detailed above). The spring hinge, fitted with special oversized wood screws, remained tight and required no adjustment.
This wind generator was designed for, and is best suited, for "light breezes" (5 mph = 2.24 m/s) to "strong breezes" (25 mph = 11.18 m/s), although a 21 Amp, 12 Volt battery was quickly charged in the 35mph windstorm test. And it was satisfying to observe the blades and generator desperately furling back-and-forth, while the entire unit, and the fiberglass mast, strained against the guy-lines, but held, in the insanely violent 35 mph (15.65 m/s) winds.
Also, violent, gusting winds will put a strain on the telescoping lock-nut of the 10 foot mast, causing the upper section to slowly work its way down an inch or two, giving the illusion that the guy-lines are becoming slack. The same applies to the lock-nut to the guy-line mount, on the mast.
Being portable, this wind generator will, more than likely, be used in close proximity to people, so safety is paramount. Keep the device under a watchful eye: If the winds really pick up, take it down. And never leave any portable wind generator unattended. Use the same care and precautions as one would use with a portable gas generator.
The 3-blade (and 2-blade) arrangement self-starts @ 11 mph (4.92 m/s) constant wind, and @ 13 mph (5.81 m/s) gusting wind, with the flywheel action of the thin, but dense, 3-blade arrangement sustains spinning of the blades down to 5 mph (2.24 m/s) wind speeds.
I have found that, on days of 5-10mph winds (2.24 - 4.47 m/s), "light breeze" to "gentle breeze", an extendable hiking staff, with a rubber foot, is quite useful to push-start the blades, intitate the battery charging process. Two or three of these "jump-starts" is all that is usually needed, over the period of a "light-to-gentle breeze" day, to keep those blades spinning and charge a 21-42 Amp battery pack.
Another way to "jump-start" the blades, if mounted on an unusually tall mast, is to simply run the battery pack power through the "generator" for a second or two, to get things moving. A 24 inch long string has been attached to the lower-rear of the tail fin, to serve as a simple telltale: 90 degrees = no wind; 45 degrees = sustainable blade speeds; 30 degrees to 0 degrees (parallel to the ground) = battery charging speeds.
As mentioned earlier, the generator is not yet weatherproof, even though all wood surfaces have already been given a good marine varnish. Future plans call for a simple, aerodynamic cowling, over the generator only, made from aluminum sheet metal and aluminum pop rivets.
Stay posted for more information and updates.
Runner Up in the
Earthjustice United States of Efficiency Contest


