

Introduction: Post Office Box Piggy Bank/Safe.


I saw one of these a few months back and thought how cool it would be to make one for each of my kids. I started with the idea of making them all the same. Once I completed the first one though, I thought it would be more memorable if I made each kid their own unique box. One that I made with them in mind specifically. You don't need to be a skilled woodworker to make these either. The ones I made do have some "advanced" techniques in them but honestly, it's just a box that's been glued together.
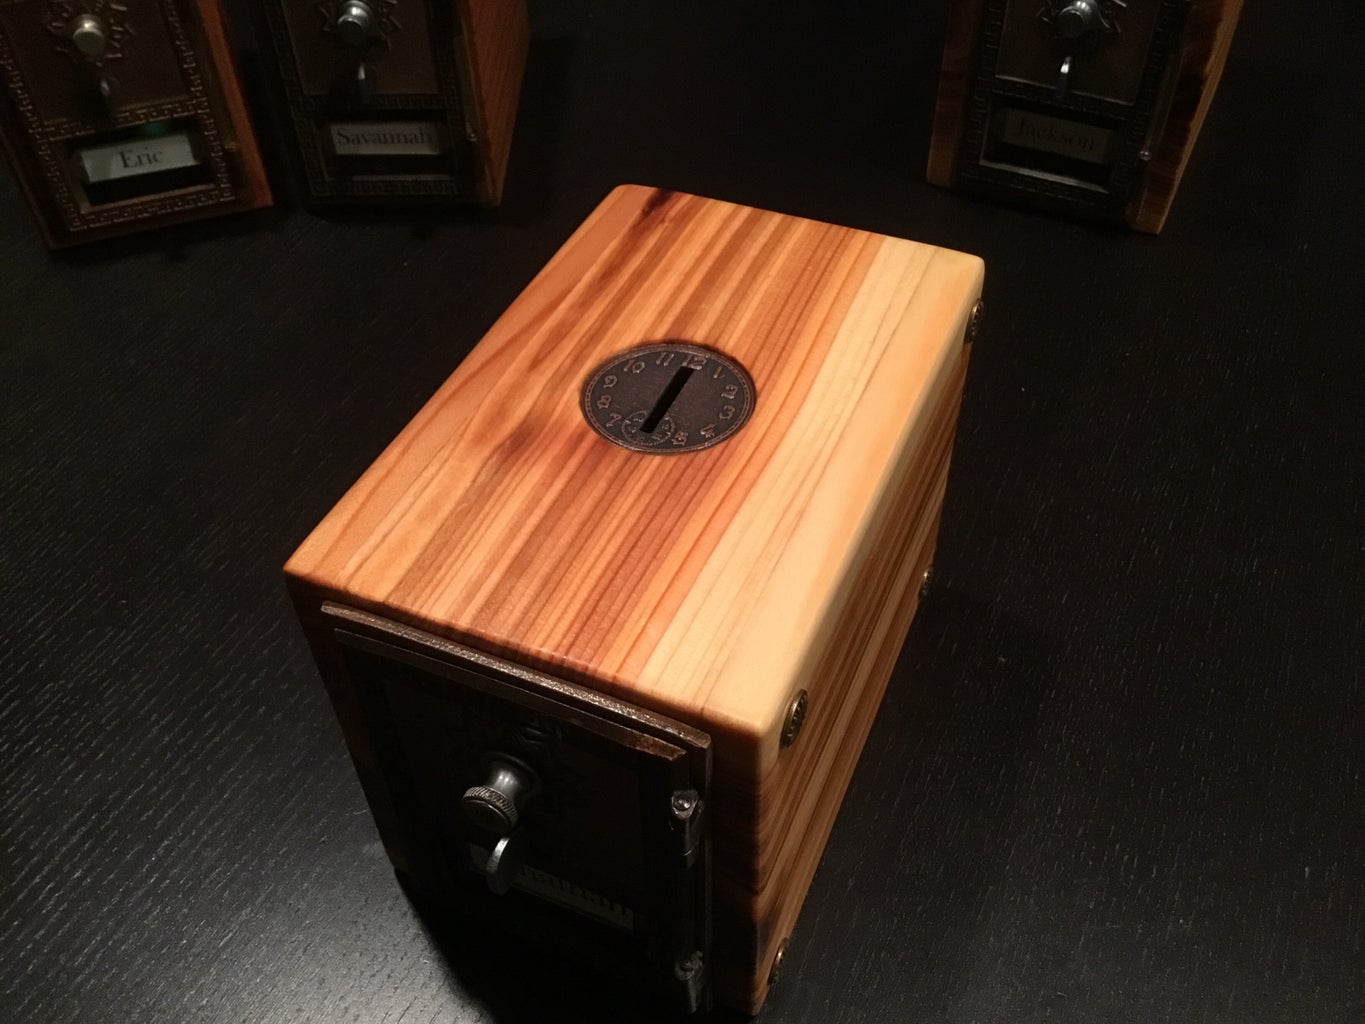
Step 1: Box#1


Box#1.
The one pictured here was the first box. I modeled the others after this one. This box was glued together using biscuits. I used red oak. The hardwood made lining it up for gluing difficult. The biscuits helped a lot.
I also used a Rockler router spline jig to inlay to walnut box joints along the side (see photos). This jig was really easy to use and I probably should have done more in the other boxes. Unfortunately I forgot to take picture of the process. As I got creative on these, the clock started ticking for Christmas. I was under the gun to finish these. I literally finished them the night before.
For the coin slot I used IPE wood. Using a hole saw I cut a round blank from the wood. I then used a forstner bit to drill out a hole for the blank. Then using a smaller forstner bit (one the size of a US quarter) I drill through the box. I cut the IPE blank almost flush. I then used a dremel tool to finish up the coin slot. I wanted to use a "store bought" coin slot... Go look for one. Seriously, the cheapest I found was $8.00. Pfft...not paying that for a piece if stamped metal.
Step 2: Box#2


Brown heart...what can I say. If anyone else here that has used it before, please give me some tips. I bought it because I thought it would look very rich and "old soul", like the kid I was making this box for. It's a difficult wood to work with. It clogs everything. I blasted through all my sandpaper in one day. The coin slot was made the same as the first one but I inlayed red oak. The brown heart was true thick. That is, a true inch thick. I didn't want to ruin my bandsaw blade cutting it down so I used the router table to cut 1/2 inch slots along the top and bottom. This helped to reduce the overall profile. Still, I think this one is my favorite. So classic. Once finished with boiled linseed oil, the grain totally popped. Still, the old man at woodcraft laughed when I bought the wood. He took the boards and said "Brown heart...hmm. Good luck"
Step 3: Box#3


For my girl.
I had to make hers standout. With 4 brothers she often gets lost in all the testosterone. I had just finished a cutting board for my mother-in-law and had some Purple Heart wood left over. For those that don't know, Purple Heart is a hard wood. It's great for cutting boards and the like. In case you're wondering though. Yes, it's naturally purple. I didn't color this wood at all. In fact, the purple changes as you sand it. It's one of the most beautiful woods I've ever seen or worked with. It's also, the most solid and dense. Be patient and cut slow.
This wood was also true cut. A true 1/2 inch. I didn't want to have the same profile issues as I did with the brown heart so I made a jig and cut it down on the bandsaw. I was going to cut down another board for the sides and make the whole box in Purple Heart when I had a bit of inspiration.
I had a bunch of scrap leftover from the cutting board. I thought, wouldn't it be cool if I made the back of the box like a miniature cutting board. I found some matching scraps of red oak, cut it and the Purple Heart into strips. Glued them overnight and ran them through the planer. Came out great. So, to match the red oak in the back panel, I made the sides out of red oak.
Her bank came out great but still not "girly" enough. I wandered around the craft store looking for fancy stuff to screw on her bank when I found the wooden flower disc. I was going to make that the coin slot but came up with the idea of using some brass plating to cut a disc out of, countersink it and make the flower swing out and cover the coin slot. That way the flower stays intact and really finishes then top out nicely.
The corner pieces I added at the end. Thought that finished it up nicely. I didn't put them on the bottom because they would scratch anything the box was placed on. I lined the bottom of all the boxes in felt to soften the noise of the coins going in. All the boys were green. Hers, pink. She liked that.
Step 4: Box#4


I used cedar for the last two. Partly because I was tired of working with hardwood and had only a couple of days left. Besides, the cedar is lighter and would be easier for the younger two pick up and carry around. Unlike the brown heart which I have a hard time picking up.
I had a bunch of that "fancy" stuff left over from my daughters bank. I decided to incorporate it into the final two boxes. Like the other boxes, it's just a glued together wood box. The difference in this one is the back. It's a checkerboard pattern. I had leftover scrap checkerboard from a failed attempt to make my dads urn a checkerboard pattern. I used my 12" planer to take it down to about 1/4 inch. This was not my best idea as I destroyed almost all of it and almost my planer with it. Nevertheless, I got a workable slab and it looks cool.
For the coin slot, I used one of the false clock faces I found at the craft store. I counter sunk it and filed the coin slot into it. I told him it stood for "time to save" he seemed to really like it. He was the only kid to carry his around all day. He seemed to like his the most.
Step 5: Box#5


The final box was built along the same dimensions as the 4th. Same wood, same cut. For this one though, I did the same trick as I did on my daughters. I made a miniature cutting board out of scrap for the back panel.
To make his unique, I used some more of the "fancy stuff" and fabricated a coin slot. I used one the metal label plates I bought and glued a very thin piece of brown heart. Once dry, I sanded it flush. I drilled a straight slot on the top. Once I had the size I needed, I drilled a hole through the glued wood and lined them up. Once lined up, I secured the plate down and used a micro file to make the slot. This took sometime. I still need to go back and clean it up. I ran out of time though. Like I said, I finished these the night before.
I also made each kid a special card with a picture of their bank, instructions on how to open it and a note from dad...they seemed to love that.
I bought these PO Box doors on eBay. I have recently been asked to make more for friends and family. I think I'm actually going to do this...make a bunch of these and sell them. I think I could do pretty good with it.
Enjoy, advice is welcomed too.

Participated in the
Homemade Gifts Contest 2015


