

Introduction: Program a Simple Tune on an Arduino Uno


This instructable will show you a super-simple way of programming your Arduino Uno to play a simple midi-tune (in this case “You Are My Sunshine”). I used a few items in my Arduino Starter Kit, a Chromebook and the free cloud-based Arduino IDE, Codebender.
I just recently caught the Arduino bug and was only a few projects into my Arduino Starter Kit Project Book when my 2 year old niece’s favorite toy suddenly stopped working. Well, anyone with a 2 year old knows, broken toys can wreak havoc on a household. The toy in question was a colorful little smiling plastic sun that beeped out the melody to “You Are My Sunshine”, her favorite song! My sister scoured the nearby stores and searched endlessly online for a new one, but to no avail. So, with a few hours before my weekly visit with the fam I decided I would try putting my new Arduino knowledge to the test. I skipped ahead through my project book, did a little online research and in no time had my Arduino ready to play “You Are My Sunshine” at the push of a button. The visit was a success and my niece smiled and danced as we sang along.
So...what do you need?
(Being a relative newbie, I used the basics right out of the starter kit-if you are more experienced and just want the code it can be found here: https://codebender.cc/sketch:115114)
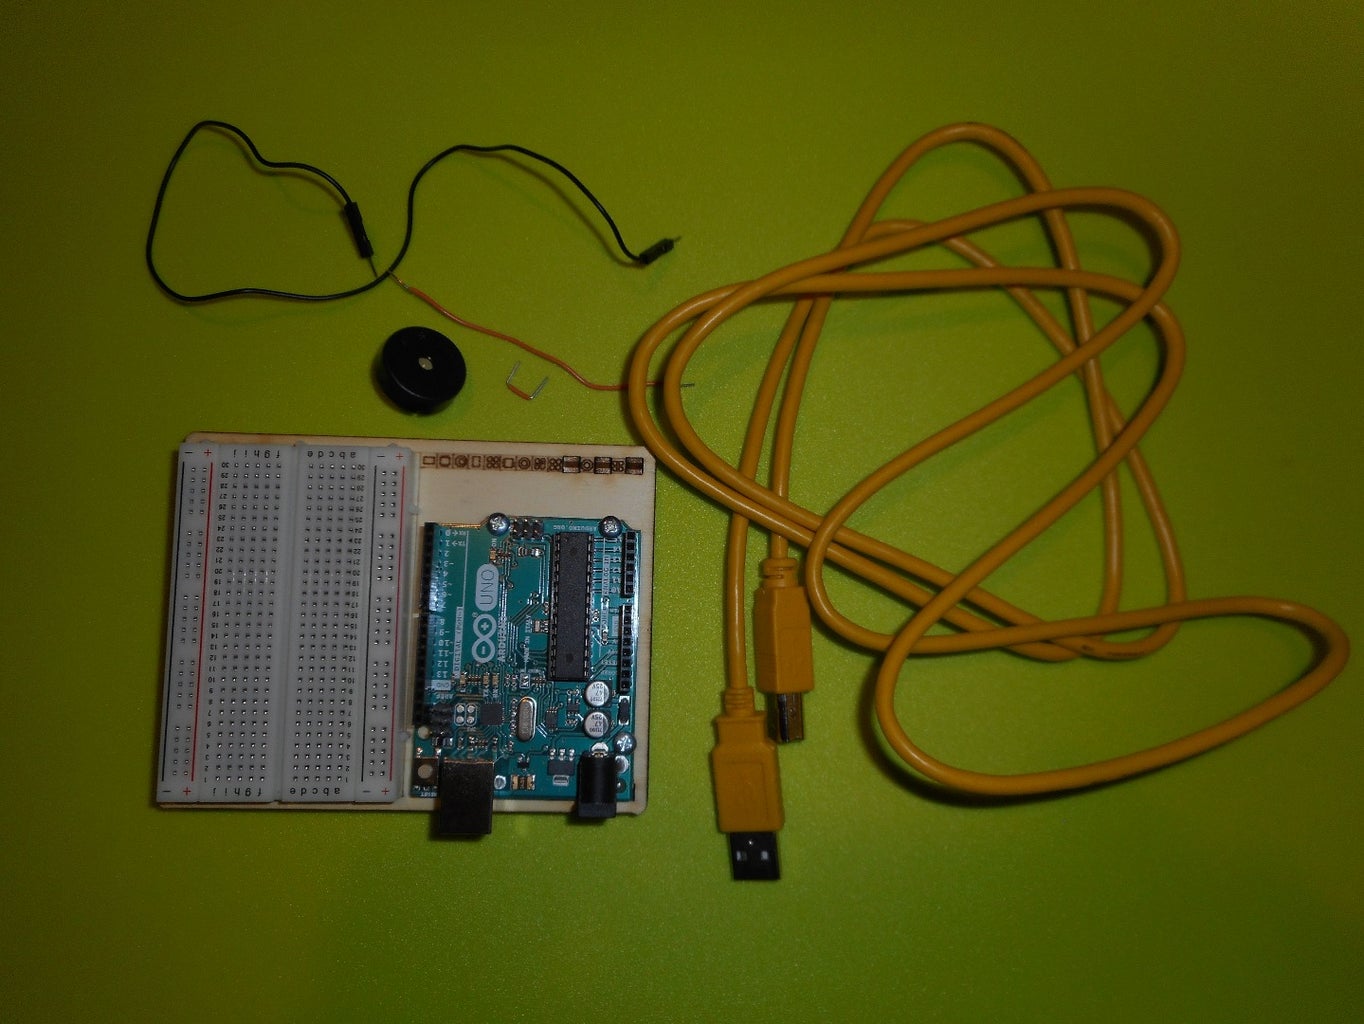
- 1 Arduino Uno Project Board
- 1 piezo capsule
- 3 jumper wires (1 long black one, 1 really short one and 1 medium one- these 2 can be any color)
- 1 USB cable
- 1 USB-AC adapter (optional)
- A Computer (or Chromebook)
- An Arduino IDE (I used Codebender, get it here for free: Codebender)
Note: A piezo reads and plays music in terms of Hertz (Hz) so if you would like to try writing your own favorite diddy in code it’s helpful to have a chart of Music Frequencies. I found a good one here: (Physics of Music Notes). I rounded the Hz up or down to the nearest whole number for the code and it seemed to produce a good quality tone. In addition, it’s helpful to have the midi-sheet music of the song, I found mine here: (You Are My Sunshine).*
*Copyright info: 1940 and 1977 by Peer International Corporation, Creative Commons Attribute 3.0, You are free to: Share — copy and redistribute the material in any medium or format, Adapt — remix, transform, and build upon the material for any purpose, even commercially.
Step 1: Build Your Circuit


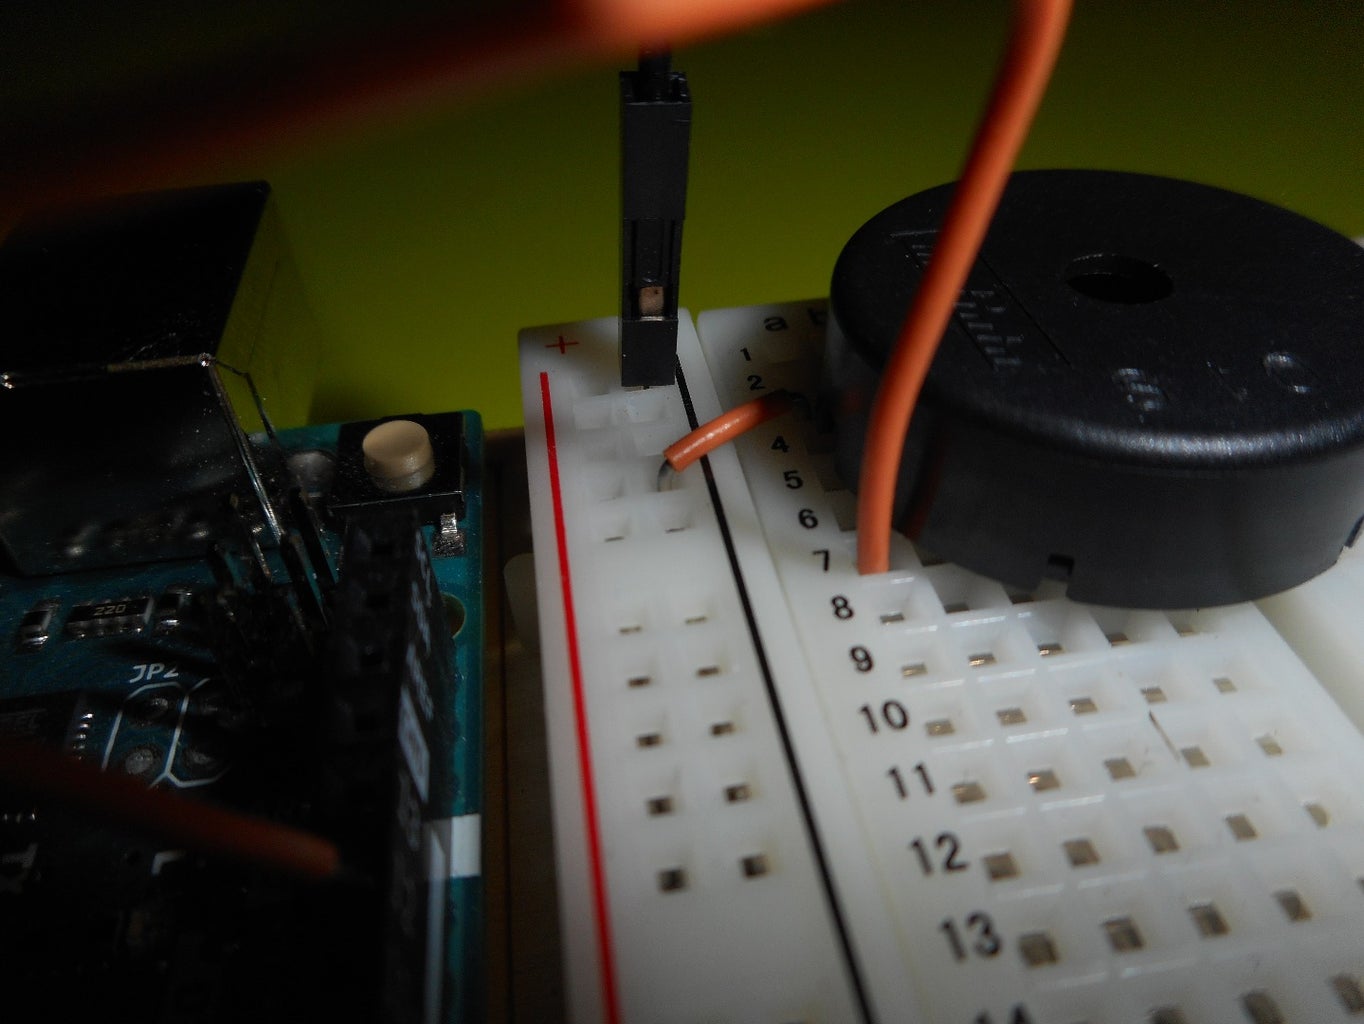
- Ground your Arduino Uno by placing one end of the black jumper wire in the GND pin on the Arduino and the other end in the ground (-) bus line on the breadboard.
- Place the piezo capsule on your breadboard. (I put the pins in E 3 and 7)
- Attach one end of the piezo (E3) to ground using a small jumper wire.
- Attach the other end of the piezo (E7) to pin 12 on your Arduino with the medium wire.
Step 2: Write Your Sketch (Code)
I searched for a pre-existing sketch of this particular song, but I couldn’t find one. Then I thought maybe I could edit an existing sketch of a different tune, but all of the ones I found were quite complex-many with over a hundred lines of code (not to mention a much more complex circuit!) With limited time and experience, I wanted to write as simple and short a code as possible, so I opted to put all of the notes in succession on one line of code. The only problem with that was each tone would be played with the same value (duration) and you couldn’t include rests (pauses). To combat this issue I used 4/4 time and assigned a single beat, or quarter note, to each tone. So if a particular note in the song was to be held out for 3 beats (or a dotted half note) I simply entered that note 3 times. For instance if middle C (262) needed to be held out for 2 beats, I entered it twice. The piezo doesn’t separate identical notes in succession so this made a half-note!) To account for rests I extended the length of the previous note to fill the space. I actually first entered rests as a 0, assuming 0 Hz would equal no sound-but it instead made a horrible buzzing noise! Okay, so here’s the code!
1 int speakerPin = 12;
2
3 int numTones = 62;
4 int tones[ ] = {587, 784, 880, 988, 988, 988, 988, 988, 988, 988, 932, 988, 784, 784, 784, 784, 784, 784, 784, 880, 988, 1047, 1047, 1319, 1319, 1319, 1319, 1175, 1047, 988, 988, 988, 784, 880, 988, 1047, 1047, 1319, 1319, 1319, 1319, 1175, 1047, 988, 988, 784, 784, 784, 784, 880, 988, 988, 988, 1047, 880, 880, 880, 988, 784, 784, 784, 784};
5 // You are my sunshine
6
7 void setup()
8 {
9 for (int i = 0; i < numTones; i++)
10 {
11 tone(speakerPin, tones[i]);
12 delay(290);
13 }
14 noTone(speakerPin);
15 }
16
17 void loop()
18 {
19 }
You can copy and paste, print it and enter the code yourself, grab it from Codebender or try it out right here on this instructable, see below! Want a different song? Just replace the numerical code on line 4 with your own, edit the total number of tones on line 3 and adjust the tempo with the delay value on line 12.
You Are My Sunshine
Step 3: Upload Your Sketch to Your Arduino
Connect your Arduino to your computer via USB and upload the sketch to your Arduino! The code is written to play the tune once and stop-to hear it again just push the reset button. Congratulations! Now you can take your musical creation anywhere and share it with anyone! If you don’t have a portable device to supply power on the fly, just take along your USB/AC adapter and plug and play! Enjoy!
Thanks for checking out my first instructable!
Attachments


Participated in the
Coded Creations


