

Introduction: Projector, 100W LED, Watercooling, Fan + Misc Rework


First off, all the usual information, to keep it short, if you don't have the faintest clue about what you're dealing with (high voltage and the likes), stop and read up. If you still uncertain ask for help, if the trend continues and you're still baffled about how to proceed, repeat stop and read up or ask for sources of information.
I don't want to bother with theory, if you need it read about it from a pro, so i'll stick to common terms so you will have something to go by that's all.
As always your mileage may vary and i can't be held accountable for anything you might do!
This is at the moment foremost just a semi-complete sketch of my mods, more will come, and better details when i get the time. But the part with the bulb by-pass have bugged some users for a while, so i thought i wanted to share that as soon as i could.
Step 1: What I Wanted From a Reworked Projector
I got a deal on a Epson EMP-TW700, a ceiling mount, and a 10M HDMI cable that i couldn't refuse.
If you got a TW700 or TW1000, and properly some other models, just buy a new bulb, their like 40 bucks.
If you like me like a challenge as i saw others having trouble getting their projectors to boot into normal operations by fooling the logic ballast pins i saw an easy challenge i wanted a whack at and a good excuse to buy a 100W LED.
I mainly wanted:
1. (Done) a near silent in full blast projector
For this i got a used H100i watercooler, this doesn't get close to warm though so go for something smaller like a H55 or something like it.
2. (Dunno if done, don't hope so) I wanted it to be close to normal lumens output (hahaha).
3. (TBD) WAF approved. By either coming close to the original form factor or doing some silly stuff in ply.
What i would have done, if i had to source everything for the project from scratch:
1. Use a stepup/stepdown converter. Saves space.
2. Strongly consider if i need keystone adjustment, seeing that there are other solutions, e.g. using an iPad 3 screen (100 bucks) getting over 1080p res, some fresnels etc. and ending up with a much brighter picture. But thats a completly different 'ible.
3. Have a good look at the projectors available, high res, and a newer projector is perhaps not what suits your level of expertise or need.
Step 2: Normal Boot


Warning high voltage (presumably)
Crucial for all in this project, was determining if the projector was any good.
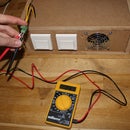
For this you'll need a:
Basic understanding of electronics
Voltmeter
Small wire
Timing
0. Check for any failsafe switches that might need to be engaged, coverswitches etc. short or open these so they don't throw "ghost"errors at you. :)
1. Boot the projector, if you have a bulb and some life in it, so you can go to normal operation or see a youtube vid, with the projector in normal operation mode, awesome, take note of the sounds it makes.
2. Remove the lamp, so you have a controlled failure, take note of the sounds and when it detects the failure.
3. Strip the projector down.
4. Find your lamp PSU/ballast.
5. Locate the optocouplers, there should be three in total. The one facing the opposite direction is the one we need to get familiar with. Locate that units PID, and google it. Read the schematic and find the logic pin that goes high when the optocoupler is enabled on the PSU. (see pic, it's pin 4 in that case, in my case it was pin 3). Probed i got a reading around 3.3V
6. Ground it, for some it ends here! For me it didn't, for a lot of newer projectors it can't be grounded during the boot. Then it needs a fixed amount of time before grounding. I could simply hear it. When i grounded it statically from unplugged to boot, it just stalled, not auto-iris no motion, the fans didn't even spin to critical levels to cool the projector, so easy mode, the logic supply was grounded and the MCU didn't have enough power to boot.
7. Take notes and compare to your controlled failure while you ground the logic to the motherboard GND, if you don't know the normal operation mode, then you're just like me, i didn't know, i was just hoping it was only the bulb :)
I learned that not all grounding points worked, and that i took aprx. 9 secs for the projector to be in warm up phase, if i grounded later it would sometimes not pass.
I bought a ATTINY85, got it working -.- took a while...
Wrote some basic code, it's deleted... I'm sorry, but something along the lines of:
// the setup function runs once when you press reset or power the board
void setup() {
pinMode(0, OUTPUT); //Initialize the pin on the ATTINY85
digitalWrite(13, HIGH) //Optocoupler pin
delay(9000); // Wait for as long as it takes to get clear of the boot commands
digitalWrite(13, LOW); // Fake PSU normal operation }
// the loop function runs over and over again forever
void loop() {
}
I connected the MCU by supplying it from the projectors logic power supply 3.3V i then gave it GND on the GND-pin i found that worked, and connected the lamp connector on the motherboard. This means i keep it HIGH from the same source, and i then ground it through the ATTINY, by having it go LOW.
8. Light a flashlight through it and check for some bluescreen or what not.
Then you should be done and the projector in a normal operating state during next boot.
Step 3: Silence
I guess most wants to keep it stock so this is just FYI
Figuring i wouldn't have to deal with 170W of pure halogen random heat dispersion, i wanted to have it more silent.
That means quieting down the stock fans or replacing them. I found that i can disconnect them all and faking a PWM signal from the MCU and splitting that signal to all the tacho pins on the motherboard. Removal of one fan kicked my projector into failure mode instantly.
I had to draw power from the lines though otherwise i would enter fault mode again.
I used the Pulse-in sketch for arduino to get a PWM signal from one tacho pin from a fan on the projector and multiplied it to all the pins.
You then have the option of keeping whatever fans you like, use your brain though, some of mine cooled directly onto the 3LCD system, i kept that.
I then soldered in a variable fan controller to the 9V supply i had to use, so i can run 120mm fans to the water cooling and general cooling of the projector or just limiting the stock fans. Another trick is just putting in a resistor inline with the fan to create a voltage divider.
Step 4: LED Lamp


This, well this is really depending on way you focus your LED, and reflector aswell i suppose.
I'm really no expert here, and as other before me have experience the LEDs are hard to direct through the projector.
I have output, but not nearly to a level of satisfaction this is mostly because the LED has to be narrow and condensed to a size almost exactly the same as the LED, when it meets the first stock lens, i guess it's a fresnel lens, but i could be wrong.
What i've used:
A 100W LED off eBay + 100W driver etc. 6500k light
A 70 degree beam angle collimator
H100i watercooling, don't do it :) It's PITA to test with, so have an aluminium block for testing.
Empty soda can
What i've tried:
1. (Tried) Use the lens i got the the 100W LED, a lot of light spill, but proof of concept none the less. (Could only be better :)
2. (Tried) Bolt straight onto the Fresnel, no room between LED and fresnel. (Bright light picture, but no chicken dinner)
3. (Tried) Used my brain and created a small reflector from a used flashlight and a can i polished and in part removed the inner epoxy liner. (Even better picture, and the picture attached) This is a viable option, i can watch a movie like this, but if it only needs a mirror and some other stuff then i can wait a little longer by putting that effort into the finished product. Think of the WAF for your money spending. As the saying goes, a good soldier is a lazy soldier, do it right the first time every time. I'm lazy.
4. (Untried) I'll fab a reflector from a mirror, have some from IKEA, so i'll try a few solutions, one where i widen the beam and narrow it in the reflector as i've done already, and one where i just tunnel it directly onto the presumed fresnel lens.
5. (Untried) I've ordered a 2nd LED Collimator lens that shouldn't just collimate to 70-90 degrees but to 60 degrees. (I don't have high hopes... i think in hindsight that it's just more of the same crap.)
The pictures are mostly for ideas for your own build.
Step 5: My 2 Cents

Look for projectors with big fresnel light ports, so you can have a wider beam acceptance from the LED to the projector. My projector have a narrow light acceptance, and it's hard to test what works and doesn't work.
I wanted something that would do close to 720p, so i bought from just looking at that, but take into account that newer projectors have better beam control as well, at least from my findings. So the lamp your replacing is pretty directional, that leaves little room for further mods if you'd like the stock appearance.
Is this a plausible solution to projection? I believe it is, the chinese supplies just haven't created a kit solution for beam control yet, and i know nothing of the sort when it comes to optics.
If you have any questions or some knowledge i should know about please share.
English is not my mothertongue so please help improving this 'ible and me, by correcting me as you see fit.

Participated in the
Make it Glow!

Participated in the
Formlabs Contest

Participated in the
MAKE ENERGY: A US-Mexico Innovation Challenge


