

Introduction: Put an IPod Nike+ Sensor in Any Running Shoe in One Minute for 5 Cents


Using the Nike+ system is truly awesome, but my feet don't like Nike shoes so I needed to figure out a way to put the sensor into my regular running shoes. I found some shoe pouches on Amazon, but didn't want to pay $10 for a tiny piece of neoprene that I could get myself.
Before I ran to the store to get some fabric to sew together for a DIY pouch, I decided to do a super-simple hack that has ended up being my long-term solution. This has lasted me over 250 miles so far without a problem.
All you need beyond the Nike+ kit is a knife and a safety pin. I don't really know how much a safety pin costs, but I'd guess 5 cents.
If you're not familiar with the Nike+ system, you can check it out here:
http://www.apple.com/ipod/nike/
Step 1: Get the Stuff

A nice short list.
- Running shoe
- Nike+ kit
- Knife
- Safety pin
Step 2: Cut Your Tongue

Take the knife and cut a slit in the tip of the tongue on your running shoe. This only needs to be just as wide as your Nike+ sensor.
Step 3: Slide the Sensor In
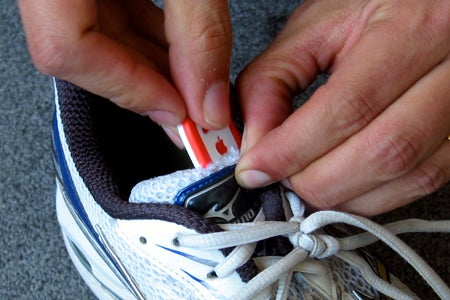
The sensor goes into the tongue.
There you have it.
Step 4: Pin It Up

Take the safety pin and secure the sensor inside the tongue. You can be more serious and sew it inside, but I like to swap out different shoes for my runs so I use the pin.
Cool, that's it! If the sensor is able to slide all the way down the inside of the tongue you want to be careful to push the sensor up to the top as you lace up, but aside from that you're ready to go.
I've been using this technique for over 6 months and more than 250 miles so far and it's been pretty accurate. After calibrating the sensor at a track my records have been off by no more than 1-2% on my runs. Your results may vary.


