

Introduction: Quick and Easy Temperature Sensor


I received a call in the morning from our local zoo here in Wahpeton ND. The furnace is potentially on the fritz in one of the winter animal shelters and they need a sensor to alert them if it gets too cold. So I spring into action (picture me doing a mario jump) and set about making a temp sensor that will send alerts. I only had until the end of business to create and finish this. So "one day build" time.
I am going to assume in this "ible" that you know what cayenne is. If you do not know what cayenne is or are not familiar with how to set it up then check out my Arduino Component Restarter which goes in depth into how to set up and operate cayenne for an arduino. the process is very similar for a Raspberry Pi.
Step 1: Parts

These are the parts that I used to make this temp sensor
Parts
- Raspberry Pi 3
- Outdoor Waterproof Project box
- DS18B20 Temperature sensor
- Lexar Class 10 16GB Micro SD Card
- 4.7k Resistor x 1
- Pi Micro USB Charger
- Micro USB Extention
- PCB L style Mounting Feet (these things are awesome)
Software
Step 2: Why Did You Choose Those Parts? When ________ Is Better?????

Ok so why am I using a waterproof sensor inside? Why is my project box waterproof? why am I using a raspberry Pi 3 when a cheaper pi zero would work?
Well let me explain. I keep a lot of parts on hand, a wide array of microprocessors and misc materials to be able to make all of the things I need to. I could have used a pi zero, but they are a lot slower and I needed to get this loaded and ready in one business day. Also I only have like 6 pi zeros, and you can only order one at a time, soooo I horde them ;). As for all of the waterproofing, it is a zoo, and a food prep area at that, so it needs to be able to be cleaned and handle a splash or two.
In reality just use the parts at your disposal, that will complete the project in the given time, within the given budget, to complete the given project.
Step 3: Software


The first step to any pi related project is "install the OS", in this case I used NOOBS 2.0, and ran the installer. Next I connected the pi to cayenne using my phone. This is the easiest way to do it. Just open cayenne on your phone and click on the " + " and click "pi". Make sure that both the phone and the pi are on the same network, or it will not work.
Thats it, it is that easy to install cayenne on a device. Once installed you can access the device from anywhere in the world. Now to install the sensor and set up the triggers.
Step 4: Sensor Setup


So the sensors have three wires. Red Black and Yellow, your might be different, but in my case the black is ground, the red is voltage and the yellow is data. You will need to put a 4.7k resistor between the data and the voltage wires before it goes to the Pi as seen in the photo above.
The Ground (black in my case) goes to any gound, I used pin 6. The Data (Yellow in my case) goes to GPIO 4 or pin 7. The Voltage (the red one on mine) goes to any 5v source I used pin 4.
Once everything is connected the software will automatically detect the sensor and add it to your dashboard on cayenne (see I told you it was easy).
Step 5: Setting Up Rules or Triggers

Setting up the Triggers in Cayenne is very easy as well, you just click on the device, then click on triggers, then add new, then specify the sensor and what will set off the trigger. Then click on what you want to happen when the rule is triggered. I set this one up to notify the head of maintenance and the head zookeeper if the temp went below 60 degrees.
Step 6: Assemble
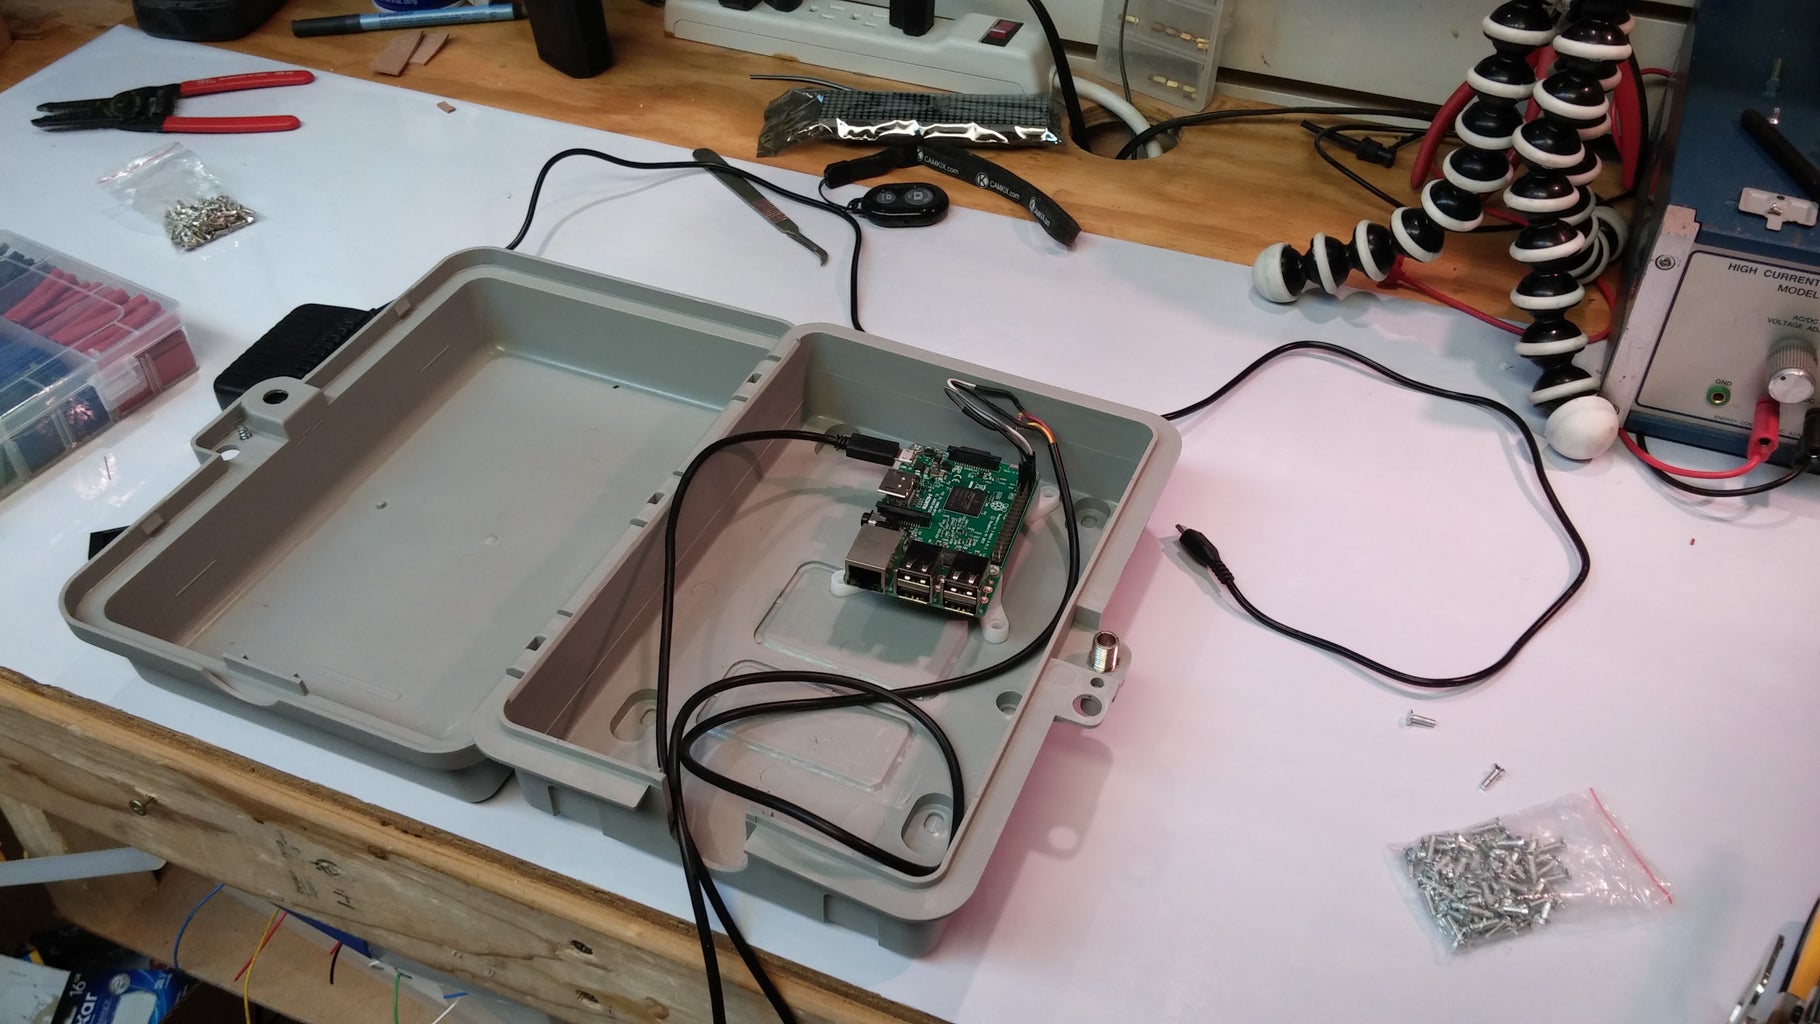


Once the sensor and the software are all set up, all that is left is putting it into a case. I used the pcb feet listed in the parts step and it worked great. I also connected a micro usb extension so that I did not have to open the case in order to plug the pi in.
Now that it is all set up I can move this sensor anywhere in the world as long as it can access the internet through wired or wireless internet, I can monitor the temperature.
I hope you learned something. Have a great day.

Participated in the
Epilog Contest 8

Participated in the
Green Electronics Contest 2016


